• Hey, guest user. Hope you're enjoying NeoGAF! Have you considered registering for an account? Come join us and add your take to the daily discourse.

The NeoGAF Screenshotter's Compendium Thread

I've created a new Cheat Engine table for Bioshock Infinite.

https://dl.dropboxusercontent.com/u/9739867/BioShockInfinite.CT

This includes:

PlayersOnly (timestop)
Fly Mode + real no-clip (collision disabled)
Configurable Slow Motion
HUD Toggle

It also includes my old no-clip (coordinate hack), as well as a ton of stuff you can use for cheating.

Everything EXCEPT for my old no-clip will require you to assign hotkeys. I have no idea what hotkey preferences people have, nor do I recall what keys the game actually uses.

I plan to use this table for a Cheat Engine Tutorial. But I plan to break that tutorial up into 2 segments.

1. Using tables others have created
2. Creating your own table and learning how to find useful things for screenshotting

It's such a complicated thing to explain though, and I suck at explaining things. So it might take some time...

This sounds great. Cheat engine definitely seems like the most powerful tool a screenshotter could have, even if a bit unwieldy.
 

Stein3x

Member
This sounds great. Cheat engine definitely seems like the most powerful tool a screenshotter could have, even if a bit unwieldy.

Yeah, Cheat Engine is very powerful.Trainers and many other stuff is done with CE and in the hands of a screenshotter who knows what he's doing can be very very helpful, but it is so time confusing trying to find the right values.
 

One3rd

Member
Yeah, Cheat Engine is very powerful.Trainers and many other stuff is done with CE and in the hands of a screenshotter who knows what he's doing can be very very helpful, but it is so time confusing trying to find the right values.

I've never used it but intrigued to check it out. Does it pose a problem for multiplayer gaming if this is installed on your PC? Or would it only be a problem if actively being used?
I'd specifically want to use this for SP games for removing HUD, changing FOV, camera position and such.
 
I'd specifically want to use this for SP games for removing HUD, changing FOV, camera position and such.

Having it installed doesn't mean anything. Cheat Engine is just a program that you have to actively attach to a running game executable. So long as you don't do that to a game you're playing in multiplayer, you're fine. Not to mention the fact that I don't think CE is powerful enough to get around a lot of Multiplayer netcoding. I tried it in Battlefield 3 on an unranked, punkbuster disabled server.... and I couldn't even get my coordinates. I did, however, hack away at single player. That is, before VeniceFX was released which gives you everything you could want in Battlefield 3.

I'd specifically want to use this for SP games for removing HUD, changing FOV, camera position and such.
I've never managed to figure out a way to change FoV, but someone working on a table for borderlands 1 did manage to figure it out. Since most UE3 games still have the commands in the code, I'm sure FoV is possible. The fact that Flymode, PlayersOnly, and ShowHud are working in Bioshock Infinite makes me think I could find even more UE3 commands if I looked hard enough.

As for non-UE3 games, I have no clue how you'd find the HUD switch. Lingon has a HUD toggle in his trainer, but he doesn't use Cheat Engine to create his trainers.

Sadly, the folks out there that are far more talented at Cheat Engine than I am are more concerned with creating cheats than they are creating tools for screenshotters. I'm not the best reverse engineer, nor do I know a lick of assembly. So coding scripts is way out of my league.

On another note, I will be attempting to create a no-clip \ flying table for Metro Last Light. Not sure how worthwhile that will be. I'm not convinced those are great games for screenshots, and Metro 2033 had some goofy coding preventing me from easily flying around so we'll see....
 

antitrop

Member
Ah, the king of stretched low-resolution textures itself, Resident Evil 6. By all accounts a less impressive game visually than the one that came before it, Capcom really outdid themselves by setting a low bar for quality to make other video games look amazing by comparison. How nice of them for other developers, right?

Anyway, at least it's very easy to take screenshots of. Harder to get ones that aren't ruined by some 64x64 texture that would have looked poor in 2007 and is stretched over an entire wall.

-- First you will need wilsonso's Resident Evil 6 +49 Trainer. Confirmed to work with the April 29, 2013 1.0.5 patch on Steam as of the time of this posting.
http://z6.invisionfree.com/Resident_Evil_4_PC/index.php?showtopic=24364
Mirror: http://www.mediafire.com/download.php?6a445fvn8kcrc6w

-- Once in the game, Alt+Tab out to the trainer, select the 'Camera' tab, then the 'Load Frozen Values' button. Load the 'RE6 First Person Camera.ini' file that comes with the trainer.

-- Almost all traditional UI elements can be removed easily from the in-game options menu.

-- I recommend setting "Laser Dot" for the aiming method, as when the camera floats too low or too high below/above the character model it will drift into view. You can get awkward angle shots by going into the aiming method and then easily removing the red dot with Photoshop. Takes no more than a few clicks with the Clone Stamp tool. It's not often necessary to do this, but it is a convenient last resort if you can't get the angle you want without the player model in the way.

-- As of right now I am not aware of a way to get a free floating camera.

*** UPDATE - 6/7/13 - Capcom/QLOC has updated the game to 1.0.6, specifically patching in measures for "anti-cheat". The author of the trainer has stated he will not support his cheat for newer patches, but has provided the EXE of the 1.0.5 version that works with the trainer. It is available for download at the link above.

jbsxPmO8gG0NHb.png


jnE96Cocc4H9u.png
 

Alo81

Low Poly Gynecologist
Ah, the king of stretched low-resolution textures itself, Resident Evil 6. By all accounts a less impressive game visually than the one that came before it, Capcom really outdid themselves by setting a low bar for quality to make other video games look amazing by comparison. How nice of them for other developers, right?

Anyway, at least it's very easy to take screenshots of. Harder to get ones that aren't ruined by some 64x64 texture that would have looked poor in 2007 and stretched over an entire wall.

-- First you will need wilsonso's Resident Evil 6 +49 Trainer. Confirmed to work with the April 29, 2013 1.0.5 patch on Steam as of the time of this posting.
http://z6.invisionfree.com/Resident_Evil_4_PC/index.php?showtopic=24364

-- Once in the game, Alt+Tab out to the trainer, select the 'Camera' tab, then the 'Load Frozen Values' button. Load the 'RE6 First Person Camera.ini' file that comes with the trainer.

-- Almost all traditional UI elements can be removed easily from the in-game options menu.

-- I recommend setting "Laser Dot" for the aiming method, as when the camera floats too low or too high below/above the character model it will drift into view. You can get awkward angle shots by going into the aiming method and then easily removing the red dot with Photoshop. Takes no more than a few clicks with the Clone Stamp tool. It's not often necessary to do this, but it is a convenient last resort if you can't get the angle you want without the player model in the way.

-- As of right now I am not aware of a way to get a free floating camera.

jbsxPmO8gG0NHb.png


jnE96Cocc4H9u.png

Just a recommendation but for the sake of this thread, you should probably download that trainer and host an alternative on another site so if it's ever removed from that site people here still have access to it.
 

antitrop

Member
Just a recommendation but for the sake of this thread, you should probably download that trainer and host an alternative on another site so if it's ever removed from that site people here still have access to it.

Any suggestions? I literally don't even know what kind of a site you would use for something like that, I have an account on Mega, but I don't know if that's even useful for this.
 
Any suggestions? I literally don't even know what kind of a site you would use for something like that, I have an account on Mega, but I don't know if that's even useful for this.

Do you have a dropbox? If not, I could upload it. In fact, I could probably create a dropbox just for such things in the future.
 

Alo81

Low Poly Gynecologist
Any suggestions? I literally don't even know what kind of a site you would use for something like that, I have an account on Mega, but I don't know if that's even useful for this.

I think Dropbox would be the safest option, but if you don't want to create one you could just host the file on Mediafire but I'm not sure how permanent a solution that is.

Also @MrRoderick, I think a DropBox dedicated to hosting all of these types of things would be a really great idea.
 
I think Dropbox would be the safest option, but if you don't want to create one you could just host the file on Mediafire but I'm not sure how permanent a solution that is.

Also @MrRoderick, I think a DropBox dedicated to hosting all of these types of things would be a really great idea.

So I set one up but I have to figure how to link it to something. My computer is already linked. Perhaps its something that could be pertinent when I split up my windows accounts into Gaming and Productivity accounts. Do different accounts allow different linking?
 

Alo81

Low Poly Gynecologist
So I set one up but I have to figure how to link it to something. My computer is already linked. Perhaps its something that could be pertinent when I split up my windows accounts into Gaming and Productivity accounts. Do different accounts allow different linking?

Hmm, I'm not sure but to be clear, it's not required. You can upload things through the website as well.
 
Hmm, I'm not sure but to be clear, it's not required. You can upload things through the website as well.

Ahh you are correct. I just needed to sign back out and back in. Well sometime soon I'll try to start accumulating the various things that should be stored in there. It'll be nice to have a repository for everything.

Also, folks:

I was thinking that we should have entries for new games, even if there aren't any necessarily new ways to go about things. For instance, the tricks in Last Light (except for Neo's cheat engine), are standard fare, but I still think we should try to keep a list of new things going onward, in hopes that people looking for info will know where they stand with a game. If no one's posted things up, I'll take care of it. Soon I'll be able to be a bit more attentive to this stuff, and add some more content myself. But in any case, you know what I mean. :)
 
Unfortunately my table for this game no longer works (due to patches). In the future, I'll try to distinguish which tables are temporary (will be broken by updates) and which ones will continue to work after patches (aob scanned tables).
 

Alo81

Low Poly Gynecologist
I decided to do a little test to see how much quality loss there really is when saving as a maximum quality (12 quality in photoshop) JPEG compared to a lossless PNG.

Here are the results.

These images were taken in the game Lumiare.

PNG said:
Max Quality JPEG said:

Now that's just the images side by side.

Next, I layered the JPEG image on top of the PNG and set photoshop to show the difference between the two images.

Difference said:

The closer to black the image is, the closer to being identical the images are.

So, there isn't a difference? Not quite. Here is a 100x100px section of the above image blown up 8x.

Blown Up Difference said:

Looking at that image, it's clear that yes - there IS a difference. But, to the naked eye, pretty much completely unnoticeable and only really recognizable when blown up to 8x its normal size.

But, that's a fairly dark image, lets try the same with a bright one.

For the next examples, I used Rayman Origins.

PNG said:
Max Quality JPEG said:

Again, let's see how the differences fair when the JPEG is layered over the PNG and set to show difference.

Difference said:

Again, the closer to black the image is the closer they are to being identical.

There's basically no visual difference. But lets once again blow up a 100x100px section 8x.

Blown Up Difference said:

When blown up again there is a difference, but again, not noticeable to the naked eye. Bright images DO have more data loss than dark images it appears, but even so it's a minuscule difference.

All the information is in front of you now, but not the why. So why should you save as JPEGs? Well, when comparing the Lumiare images from above, the file size of the JPEG image was 40% smaller, and when comparing the Rayman Origins images, the JPEG is half the file size of the PNG image. If, just for example, everyone in the PC screenshot threads were to use lossless JPEG files, it could likely cut page load times by 1/2 with near identical image quality.

We've got the examples, we've got the why, now the how.

The settings will be for the smallest achievable file size while maintaining the best possible quality.

Photoshop

  1. Select File > Save As
  2. Under Format, select JPEG and hit Save
  3. Set Quality to 12
  4. Under Format Options, tick Progressive
  5. Under Scans, set the number to 5
  6. Select Okay and you're done

FastStone Image Viewer

  1. Use Ctrl+click to select the images you want to convert
  2. Select Tools>Batch Convert Selected Images, or press F3
  3. Under Output Format, select JPEG
  4. Select Settings next to Output and use these settings, except setting quality to 98%
    l8jtvcl_by_aloooo81-d8uwbp6.png
  5. Select your output folder
  6. Optional: You can use the advanced options dialog to resize all of your images. (I recommend Lanczos2 for downsampling but it notoriously causes banding)
  7. Click Convert

(If anyone has other programs they use that they'd like me to list instructions for getting high quality JPEGs, let me know.)
 
Hud Hide, Free Camera, Timestop, FOV

You'll need this EXE. Launch that, tick the version of the game you're running, then launch the game. You'll know it's working if you press escape while in a map and you see the developer menu option.

Dev Menu Loader

Controls:

F9 - Pauses the game
F10 - Toggle HUD
Pause key - toggles on/off FreeCam
NumLock - slow motion (very useful for free camera)
Numeric / - accelerates game time
Numpad * - brings up Developer Menu
ScrollLock key - toggles 1st/3rd person views (you're just a pair of arms in this game)
Y key - respawns you at map entry point
+ and - keys (number row) - modify FOV
 

Stein3x

Member
All graphical tweaks seem to reset once you change levels so you have to re-enter them every time


How to open the console

When ingame hold down "Ctrl + Alt" and press the tilde key (~) to be able to input commands (cvars) in the game.You can press the "tab" for a complete list of the commands (most of them are trash)


No Clip , Hide HUD

When in-game open the console and type :

- cmd(noclip) (noclip)

- cl_toggleshowhud (toggle HUD on/off)


Graphical Tweaks

- xr_ssao 0/1 (Enable/disable ssao) This command doesn't work properly for me if set to 1, there are black textures everywhere (but may work for others).

- xr_ssaogain (This controls the amount of darkening) Again it doesn't work for me

- xr_shadowmapmode 2 (This enables shadows on objects which are missing by default but it introduced flickering artifacts on some objects.To disable enter "1")

- xr_smm_lightfieldblock 0.5 (It controls how strong the shadow blacks are)

- xr_selfshadow 1 (It enables character shadows which is missing by default. To properly work you have to set first the "xr_lod -1")

- xr_dfrtargetratio 1 (This is quite useful as it tones down the bloom in highlights, to revert enter "0")

- xr_lod -1 (The "-1" value seems to be the best, you have to enable it to proper use character shadows and some distant objects are now visible.Other values like "1" slightly changes the colors/mood in some levels)

- xr_lodoffset -1 (This override the default lodoffset but i don't see any visual difference)

- xr_lodscale -1 (This controls how far you have to be for the objects/models to change between the "high" & "low" polygon versions).The "-1" renders everything at the highest possible LOD always


Custom Resolution

It's possible to use custom resolution as high as your GPU can go. To do this you have to open the "Environment.cfg" which is found in your "Documents=>Syndicate" and change the "VID_DWIDTH" & "VID_DHEIGHT" to your liking.You also have to change from Full screen to window mode to properly work by changing the "VID_FULLSCREEN" from "1" to "0".You can also toggle between Full screen and window by changing "VID_FULLSCREEN_WINDOWED_TOGGLE_ENABLED" to "1"


SweetFX

For SweetFx to work you have to place all your files in the Syndicate folder and move the "d3d9.dll" , "dxgi.dll" , "injector.ini" in the Win32_x86_Release folder
 
SweetFX

For SweetFx to work you have to place all your files in the Syndicate folder and move the "d3d9.dll" , "dxgi.dll" , "injector.ini" in the Win32_x86_Release folder

Thanks for the info. Regarding SweetFX, if you use Boulotaur2024's injector, you only have to place the files in the executable folder xD So far from my testing, his injector is better in every way.
 
Project C.A.R.S. is both a beautiful game, and a thoroughly screenshottable one. It is one step away from being a camera simulator too, due to having (multiple) free cameras, manual DOF and FOV, timestop, and adjustable TOD, all built into the game, no hacks.

Before going through the numerous keyboard shortcuts, keep in mind: The free camera and the camera control are inherently different. Free camera is basically no clip, and the camera control is centered on the car, and you can switch between easily (note the presets too). That and TOD is set before a race, there is currently no key command to change it. Luckily you can set the timescale to 240x.

Keyboard Shortcuts:

From this link:

P: Pause. Pretty essential.
Ctrl-I: AI control of player car.
Ctrl-T: switch to trackside cameras.
[ ]: decrease/increase FOV.
F1: display developer menu.
BACKSPACE: goes back a level in F1 menu.
Ctrl-P: cycle to next post processing filter.
Ctrl-Shift-P: switch post processing filters off.
Ctrl-F: free camera.
Ctrl-S: display FPS.
W,A,S,D: move seat or the free camera with Y,H for up and down
TAB: cycle lap info
Ctrl-+ & - (Numpad): Full damage/repair damage of car
Alt-+ & - (Numpad): Full damage/repair damage of all cars

Camera Edit Mode (Build 159+)
To enter the mode you press Ctrl-K.
Then the following keys become active:
Numpad 2: increase pitch
Numpad 3: switch lights on/off
Numpad 8: decrease pitch
Numpad 4: increase yaw
Numpad 6: decrease yaw
Numpad 7: increase radius
Numpad 9: decrease radius
Numpad 1: increase roll
Numpad 3: decrease roll
Numpad -: increase FOV
Numpad +: decrease FOV
D: forward
A: backward
W: up
S: down
Q: left
E: right
SHIFT key in combination with any of the above: slow down camera movement
Numpad 5: reset to original settings for current camera

Custom DOF mode:
F3: on/off
F4: reset

Focus plane distance:
F5: decrease
F6: increase

Sharp field depth:
F7: decrease
F8: increase

Transit to blur depth:
Shift + F7: decrease
Shift + F8: increase

Blur:
Shift + F5: decrease
Shift + F6: increase


save/load of edited camera state:
Ctrl + F11: save camera state to current slot
F11: load camera state from current slot
Alt + F11: move to next slot (wrap to first slot when on last one) and load camera state
Shift + F11: move to previous slot (wrap to last slot when on first one) and load camera state

CTRL + Page Up: Jump to car forward
CTRL + Page Down: Jump to car backward

A few tips:

SLI - To get proper SLI utilization/scaling (which is working quite nicely in the recent builds), copy the pCars.exe and rename the copy "AFR-FriendlyD3D.exe". This will run the dx9 version of the game, so if you want SLI and dx11, you need to make a shortcut to the new .exe, and add -dx11 after the quoted target in the properties of the shortcut, as in .... -FriendlyD3d.exe" -dx11.

The Dev menu that is brought up with F1 can be handy to get some interesting shots. Sometimes turning off ambient lighting or diffuse lighting can make the shot more enticing, even though it is 'cheating' the light.

When attached to the car, then switching to free camera, then unpausing, you will lose motion blur on the road (makes sense, but keep that in mind. I've messed up a few shots that way.)

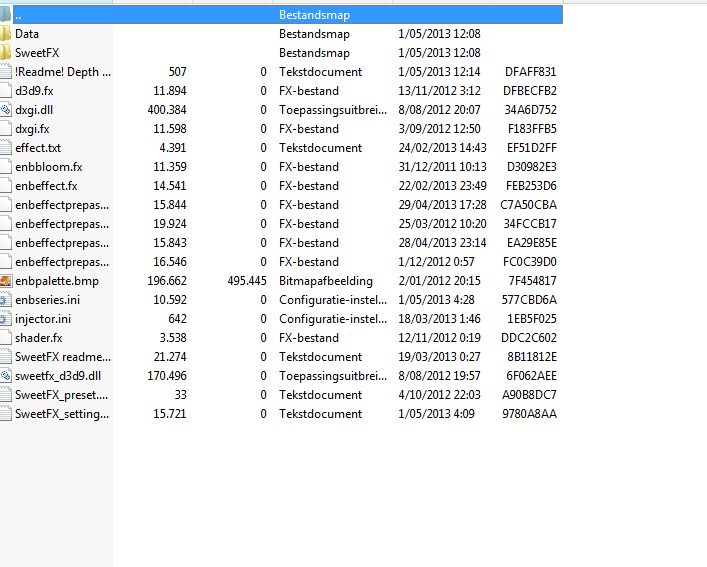
Config files are located in User/Documents/CARS.
 
GRID 2, as of now, has only its built tools available to screenshotting. One can either get a No - HUD gameplay shot from one of the car cams (with camera maneuverability in third person), and gain the benefit of no black bars and always-on motion blur, or take shots in the replay mode, which will add black bars, and act wishy washy with motion blur and DOF. The 'cinematic' mode seems to occasional use the two, but most often not, while the gameplay cameras incorporate motionblur, but limit your angles.

It may be useful to know that during a race, you can pause, change your resolution, and then go into a 'last-10-seconds' replay, whereas after crossing the finish line, you won't be able to change your res, but you get a replay of the whole race.
 
You don't actually get a free camera at any point in time in GRID? You're forced to use whatever angles they give you?

You get a locked rotational free camera, and the ability to tweak any of them a little, including the cinematic camera. You just don't get a 'noclip' camera.
 
Bout damn time we had a thread like this :D subbed to this

I take some nice shots from time to time but never had the knowledge to actually remove guns and HUD and all that jazz in a lot of games and this seems to be educating me very fast. Thanks GAF
 

CeeJay.dk

Neo Member
Download link - go to the files section and grab the misc file "Simple Runtime Window Editor 2_1"

...

It's also worth noting that this is NOT GPU downsampling. This is a software resize, and therefore will look uglier in-game than normal downsampling. But this matters not, for we only care about screenshots, and the screenshots will look FANTASTIC when resampled via FastStone, Photoshop, etc etc. Think TiledShot.... only you're actually running the game at this resolution.

Hmm.. I'm thinking that if it can make a big render window then I can make SweetFX scale the image down using bi-linear interpolation (which should look better) and then display it in the visible part.

That is .. shader based downsampling.

I have plenty on my hands at the moment though (most of it not related to SweetFX) so I can't promise it will be soon, but I think it's doable.

That would be amazing if it works how I'm thinking! Are you talking a SweetFX version of SRWE? Or a sweetfx shader downsampling for all games?
 
Little pcars tip:

Rain on roads is purty. But the rain texture in the air is not, nor is the foggy cloudiness sometimes.

So, set the weather to 'light rain' and something else clearish (i use hazy) to keep things bright.

Then when you're in free camera, if you pause the game while looking 180 degress away from your actual framing, the game will be running the rain sprites behind you when you turn back around. Pretty reflections, no ugly rain!

It's a little trickier when preserving motion blur, but just start out with a locked cam (ctrl + k to move it), facing away.
 

Thorgal

Member
WARNING: YOUR GAME WILL TAKE A SIGNIFICANT PERFORMANCE HIT.

lets take Skyrim as a example here but the process is the same for FO3 .NV and almost any other game borris has done.

For those who want to put ENB in GTA4 i can direct you to Sethos's amazing guide.

http://www.neogaf.com/forum/showthread.php?t=485905&highlight=gta4+enb


First go to the skyrimnexus and choose an enb

this is the one i am currently using.

download the file and open it either with winrar or 7zip.

click on the file inside and you will see this :

naamlooss5uex.png


drag ALL these files into your game directory
located at C:\Program Files (x86)\Steam\SteamApps\common\Skyrim

overwrite when asked.

next .go to boris's ENB site and search for skyrim and download the d3d9.dll file version that the creator of the enb specify's. in this case version 0.168 .

open the file and choose the wrapperversion ( the injector version is only advisible if the wrapperversion is causing problems) .

now ONLY take the d3d9.dll file from there and put it also in your game directory ( you wont need the other files so ignore them )


now we have to edit the ini file's to get the enb working properly.

go to documents /my games/skyrim

make sure these settings are like this in the skyrimprefs.ini.file


[Display]
bFloatPointRenderTarget=1
bTreesReceiveShadows=1
bDrawLandShadows=1
bShadowsOnGrass=1
iMultiSample=0
bFXAAEnabled=0
fGamma=1.2400

Afterwards change the file to make it read only ( otherwise the game might reset those values )

you did all that ?

good. your done .

launch your game and see if it works.

you can switch the ENB on and off by pressing SHIFT+ F12.

On version 139 and higher you can also press SHIFT+ ENTER to open a menu ingame where you can change values and switch stuff that the ENB included on and off ( SSAO. bloom. DOF etc..)


some screenshots wit this ENB.
WARNING. these shots where taken with the mods included on the nexus page and some other ones .


hope this was helpfull for u.
 
I might try RealVision again, but the first time I tried it out it just didn't look right to me. Then again, for some reason no game looks right running in either 720 or 1080p on this TV screen, everything looks way too sharp and dirty. Which is weird, since 1080p is its native resolution. It only seems to like 1600x900.
 

One3rd

Member
I had a PM about removing the hud and enabling tiledshot in RO2 and thought I'd share my response with the thread in the hope that it might help someone else. Most of this is just expanding on (and a direct copy of) what others have already posted about the UE3 engine but with some (possible) specifics for RO2.
----------------------------

I used the instructions found in the Screenshooters Compendium thread. Specifically, the UE3 tweaks that antitrop and MrRoderick posted about Chivalry. The hud command I used was different though, I used showhud.

Once putting the commands into the console they are saved into your ROInput.ini file.

My binds were:

Code:
setbind f6 showhud
setbind ThumbMouseButton2 tiledshot 4

Binding this to mouse button2 allowed me to move around to position the camera and take quick action shots. For ease, you could also bind this to any other key you want though.

Some things to keep in mind about using tiledshot.

  1. The number after the command is the number of tiles it will render in height and width at your current resolution. This means that a tiledshot 4 at 1920x1080 will render 16 tiles at that resolution and then stitch them together. My shots were coming out at 7680x4320...which was taking from 10-15s to render each time I took a shot. Depending on what I was trying to capture I would change this number, reducing it to 3 to get action shots as this reduced the wait to about 2-5s between each shot. You could even go down to tiledshot 2 which would still give you a 4k rendered image of 3840×2160.
  2. Tiledshot also tiles the hud/weapon in each tile as well...which ruins the shot if you are running around in first person view with a weapon up. You can use the weapon switch to take a shot while the player arm and weapon are off screen but I found that using spectator mode was by far the easiest solution. You can follow a player in 3 different viewpoints and also go free roam (which I prefer).
  3. Any lighting effects from cars (strobe effect) will also appear in each tiled shot, so position your camera so that these light sources are not in your FOV at all.
    I've found that even if an object is physically blocking the light source it still renders. Ruined a fair number of shots before I found this out.
  4. Any effects from injectors being used (SMAA, FXAA, SweetFX, etc...) will not show up in the tiledshot image.
  5. Taking large images with tiledshot allows you to be more liberal in what shots you take. Snapping a whole scene then cropping what you find most interesting. At a high enough resolution even the cropped images are going to be 4k, enough for a really good IQ with most aliasing removed. The only caveat here is that the draw distances are not very long for a lot of the assets in the game. I'm sure these can be tweaked in the ini files though but I haven't investigated.

Also note that if you want to remove these bindings, you can just delete the entries in the ROInput.ini file. The ones I had created from the above setbinds are below and were located at the bottom of the ROGame.ROPlayerInput section

Code:
Bindings=(Name="ThumbMouseButton2",Command="tiledshot 3",Control=False,Shift=False,Alt=False,bIgnoreCtrl=False,bIgnoreShift=False,bIgnoreAlt=False)
Bindings=(Name="F6",Command="showhud",Control=False,Shift=False,Alt=False,bIgnoreCtrl=False,bIgnoreShift=False,bIgnoreAlt=False)

While searching on how to have bodies and decals stick around longer I found another option for hud removal on reddit. This one is more geared towards playing without a hud but still having the option to view the map, tactical view, and command widgets. I haven't tried this yet but it looks like it would help immersion.

http://www.reddit.com/r/redorchestra/comments/12deug/a_guide_to_tweaking_red_orchestra_2_heroes_of/
 

One3rd

Member
No HUD, No Weapon, and FreeCam

Chivalry's not too bad to get into a nice setup for screens. The tough part is catching the action.

As with many multiplayer games, simply go into spectator mode. This removes the weapon and allows freecam obviosly, but for the HUD: Press (~) to go into the console, and enter

ToggleHUD 0


Voila.

To add on to this, I was messing around a bit with Chivalry today. Here's my suggestions:
This is only recommendable for taking screenshots of bots in Spectator mode. If you like to play the game, save your bindings because this will fuck all dat up!

-- Once in the game, bring up the console with (~).

-- Type the following commands, you will only need to do this once:

- SetBind X ToggleHUD
- SetBind C Pause
- SetBind V Tiledshot 4


-- Now you can quickly tap X to remove all the UI elements.

-- You can obviously use whatever keys you want, I like X, C, and V because they are accessible without moving my fingers away from WASD and your Pause binding should be in an easy to reach place to get great action shots.

-- Once the keys are bound you can float around in Spectator mode and observe the action, pausing/unpausing to look for interesting combat poses. You can then press the Tiledshot binding while the game is paused, expect significant delays.

** WARNING: Including the skybox in any Tiledshots will cause corruption/distortion. Avoid using the Tiledshot command if the skybox is visible. I leave Fraps open in case for just this reason.

iIMXqjRvBHc5i.png


ibkXknaNDLCGZM.png

Expanding on the Togglehud command, make sure to turn the hud off when you are not looking at a team waypoint. If you do, the waypoint text will stay on your screen until you enable the hud again. If this happens just look away, toggle the hud on then off again.

Tiledshots - Removing the grey border.
After finding that some of my Tiledshots were showing grey boxes in the image (the size of each tile) even when the skybox was not visible, I performed a couple of tests to see if it could be removed. [EDIT: found a better solution by disabling vignette]

tiledshot 4 with vignette enabled - notice the faint grey border in each tile.

tiledshot 4 with vignette disabled - no grey border and a clean image.

There are two options to disable vignette:

1. Disable vignette in the UDKSettings.ini file. This removes the vignette border around the screen and removes it from each tiled shot.

To disable, go to your My Documents folder, then My Games\Chivalry Medieval Warfare\UDKGame\Config and edit the UDKSettings.ini.

Under the [AOC.AOCPlayerController] section (at the top) change bEnableVignette=True to bEnableVignette=False. Save the file, then start-up Chivalry.

OR

2. You can also disable this from the console as well. Type "enablevignette 0" at the console and it will disable; enablevignette 1 enables it again.

Here are a couple tiledshots with vignette disabled and the skybox showing, notice that there is no shading around each tile.

"Pain" Vignette
Found one thing to be aware of when taking tiledshots in a game that you are playing and not spectating. There is a dark red "pain" vignette border that shows up when you get hit and sticks around until you've recovered almost all your health.

Original shot with Fraps showing the pain vignette.

Tiledshot after taking damage. Notice the pain vignette around each tile.


So, if you are not in spectator mode and want to take tiledshots, make sure that you don't get hit...or at least wait until you've healed up and the pain vignette has been removed from the screen before taking tiled shots.

Remove Weapon From View
This has already been posted by others but is worth mentioning again. Another tip for first person view is that you can use the "weapon swap" trick to remove the weapon from view to take a clean shot if you time it right.


PlayersOnly, Slomo, Ghost

Edit the UDKGame.ini file in C:\Documents\My Games\Chivalry Medieval Warfare\UDKGame\Config. Under the [AOC.AOCPlayerInput] section, at the end of the other binds, add in the UE3 binds that you want to use. I haven't tried anything other than what I've put below but there are likely more that work.

Code:
Bindings=(Name="F4",Command="ToggleHUD")
Bindings=(Name="F5",Command="tiledshot 4")
Bindings=(Name="F6",Command="tiledshot 5")
Bindings=(Name="NumPadOne",Command="Slomo 0.1")
Bindings=(Name="NumPadTwo",Command="Slomo 0.3")
Bindings=(Name="NumPadThree",Command="Slomo 1.0")
Bindings=(Name="Add",Command="Pause")
Bindings=(Name="Subtract",Command="PlayersOnly")
Bindings=(Name="Decimal",Command="Ghost")
Bindings=(Name="Decimal",Command="Walk",Alt=True)
Bindings=(Name="Divide",Command="ToggleHUD")

Note that PlayersOnly, Ghost, slomo will only work in a local game that you are running with bots, does not work in online multiplayer for obvious reasons (you aren't running the server). I had tried previously to get PlayersOnly and slomo to work without success, either something has changed with a recent patch or I was not using the correct spelling for PlayersOnly. On testing this out yesterday I found that this is case sensitive...and I was using "playersonly" in my bind. =P
 
I have a stupid question about Steamshots. Steam allows you to store an "uncompressed" file as well, but how does it stack up quality wise compared to, say, Fraps? I've seen people able to distinguish Steamshots at first glance, but is the difference really that apparent?


It looks exactly the same to me. The filesize is exactly the same. I use a controller, and the button combination for screenshots is really handy, which is why I'm asking.
 
Because steam used to not capture lossless screenshots. Back in the day (that is, a few months ago?) Steam only captured horrendously compressed JPGs. Dark times....

I only started a few months ago, must've narrowly missed those dark times. Good to know, though, thanks!
 

Alo81

Low Poly Gynecologist
I have a stupid question about Steamshots. Steam allows you to store an "uncompressed" file as well, but how does it stack up quality wise compared to, say, Fraps? I've seen people able to distinguish Steamshots at first glance, but is the difference really that apparent?


It looks exactly the same to me. The filesize is exactly the same. I use a controller, and the button combination for screenshots is really handy, which is why I'm asking.

If you bind Fraps screenshot key to be the same as steams and post two identical images - one from steam and one from Fraps, I can get some proof to see if there is any difference in quality or not.
 

Spazznid

Member
I shall do this. For science.

I can tell that the Fraps one looks a TINY little itsy bitsy better than the steam one.


Also I can tell which one is the Fraps one because there's a slight delay when you press the button to when steam takes the shot. The one with the snowflakes higher is the fraps one. Steam's is harder to capture fast shots with...
 

antitrop

Member
I can tell that the Fraps one looks a TINY little itsy bitsy better than the steam one.

Also I can tell which one is the Fraps one because there's a slight delay when you press the button to when steam takes the shot. The one with the snowflakes higher is the fraps one. Steam's is harder to capture fast shots with...

IQ looks the same to me.
 
Top Bottom