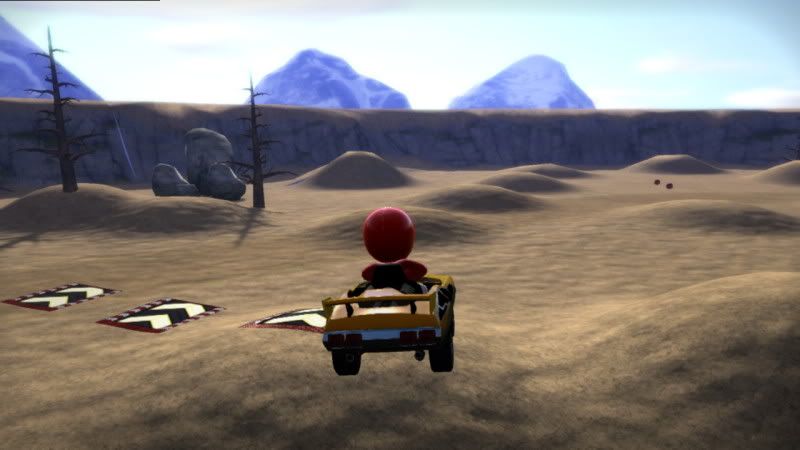
The track editor only lists 4 themes. Alpine is the only one available in the beta, the others are desert, what appears to be beach/island/ocean, and... forest/jungle?Teknoman said:So far i've just seen the desert ruins area and the alpine area. I think Market Run is based on a middle eastern environment, but havent played that one yet.
If they dont have an outerspace/futuristic area, someone's not doing it right.
-
Hey Guest. Check out your NeoGAF Wrapped 2025 results here!
You are using an out of date browser. It may not display this or other websites correctly.
You should upgrade or use an alternative browser.
You should upgrade or use an alternative browser.
Modnation beta thread of low framerate awesomeness
- Thread starter Mik2121
- Start date
Dead Prince
Banned
How do i arrange the layers for the mod? I need one layer to be at the bottom and the rest on top.
wind_steaker
Member
PSN: HaloumiFace
here are some pics of my new track Cliff Edge Rendevous which should be up ... now
and my racer :
I'll get some pics of Alpine Boogie up soon")
here are some pics of my new track Cliff Edge Rendevous which should be up ... now
and my racer :
I'll get some pics of Alpine Boogie up soon
Dead Prince
Banned
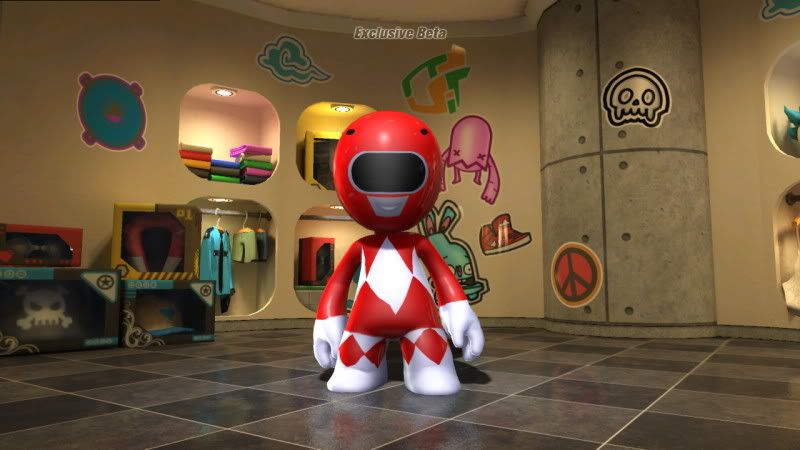
red power rangers :lol.
just saw someone's green ranger.
lol. thank god i can use tinypic on the ps3 :lol.

and saw this one too. so much creativity with the stickers.

just saw someone's green ranger.
lol. thank god i can use tinypic on the ps3 :lol.
and saw this one too. so much creativity with the stickers.
Dead Prince
Banned
if anyone goes to the beta forum can someone suggest an option to drive backwards? I don't like to be restarted just to go to the right way.
SolidEyeSystem
Member
Press L2.DMPrince said:if anyone goes to the beta forum can someone suggest an option to drive backwards? I don't like to be restarted just to go to the right way.
And those mods look good.
wind_steaker
Member
I think I've gone crazy : made yet another track, its just too easy. This one has you driving through really thin cracks in a mountain and is called Crevaces...
I need to get on that T-Rex Kart! :lol
I need to get on that T-Rex Kart! :lol
Shao Kahn Brewing a Stew
Banned
I've been in Kratos mood lately. Created Kratos, Warmobile and track called Depths of Hades... didn't know I spend 8 hours working on it :/
That said, I agree with every and any problem others had with this game. Track editor is awesome but kinda picky. Wish it was a bit more user friendly.
That said, I agree with every and any problem others had with this game. Track editor is awesome but kinda picky. Wish it was a bit more user friendly.
Dead Prince
Banned
SolidEyeSystem said:Press L2.
And those mods look good.
no. i mean if you drive backwards like driving the wrong way. it doesn't restart and put you back the right way.
AranhaHunter
Banned
SolidSnakex said:Just tried it out and it doesn't work.
That sucks, hope they release a cheap $10 wheel like the MK one then.....
Also is anyone having problems connecting online? Finally have they confirmed if the game will have custom soundtracks?
kirbutashi
Member
So, is there no way to play with friends in the beta? I only a cross instance gameplay error each time I try to invite a friend playing the beta. 


Thunderbear
Mawio Gawaxy iz da Wheeson hee pways games
DMPrince said:no. i mean if you drive backwards like driving the wrong way. it doesn't restart and put you back the right way.
What games do? Usually you just get the warning flashing on the screen "You're driving the wrong direction" in most arcade racing games.
The framerate is the biggest killer for me at the moment. I agree they also need to work on the physics, I don't feel any forces when taking turns or accelerating.
The customization, however, is amazing. Almost, if not as because it's apples and oranges, as good as Forza but for a cartoony racer. Track customization is fantastic too.
Anyway, complaining here, which there's less chance of actually making a difference to complaining on the beta forum is kind of funny. Us all that have the beta and complain here should just post our comments on their forum. It's as easy as logging in with your PSN ID.
Bearillusion
Banned
Am I the only one who thinks it is a bit sad that best thing people have to say about a game has nothing to really do with the core game? It would be nice to know the devs nailed the racing part of the game before they spent time with character customisation.
I like the racing.. I'll admit I couldn't drive very well at first but after 15minutes or so I was drifting around the corners like nothing. IMO the main things that need fixing are the frame-rate and load times. Also fix some minor glitches with the customization. And polish!Bearillusion said:Am I the only one who thinks it is a bit sad that best thing people have to say about a game has nothing to really do with the core game? It would be nice to know the devs nailed the racing part of the game before they spent time with character customisation.
Dead Prince
Banned
Thunderbear said:What games do? Usually you just get the warning flashing on the screen "You're driving the wrong direction" in most arcade racing games.
The framerate is the biggest killer for me at the moment. I agree they also need to work on the physics, I don't feel any forces when taking turns or accelerating.
The customization, however, is amazing. Almost, if not as because it's apples and oranges, as good as Forza but for a cartoony racer. Track customization is fantastic too.
Anyway, complaining here, which there's less chance of actually making a difference to complaining on the beta forum is kind of funny. Us all that have the beta and complain here should just post our comments on their forum. It's as easy as logging in with your PSN ID.
Mario Kart.
Corran Horn
May the Schwartz be with you
These pictures of mods are great. Makes me wish I had those skills in this game or LBP :lol
No, Mario Kart just has lakitu tell you you are going the wrong way.DMPrince said:Mario Kart.
Dead Prince
Banned
But he didn't pick you up, turn you around to go the right way after 3 seconds of going the wrong way.RagnarokX said:No, Mario Kart just has lakitu tell you you are going the wrong way.
Teknoman said:The one picture with text chat, and someone puts penis in it.
no- p e n i s. There's a difference, stop typing filthy words on a forum.
netguy503 said:no- p e n i s. There's a difference, stop typing filthy words on a forum.
:lol touche.
Mik2121 said:Funny enough, I felt like the game had some really low framerate issues the first day, but after that I have not felt it at all. I just thought I got used to it, but maybe.. maybe they somehow "fixed" it? That can't be even possible D:
Really I havent experienced any slowdown as of late. However, I still have online connection issues.
Thunderbear
Mawio Gawaxy iz da Wheeson hee pways games
DMPrince said:But he didn't pick you up, turn you around to go the right way after 3 seconds of going the wrong way.
If you don't turn around when the screen is telling you that you are going the wrong way, you are either 5 or not very bright. I don't see it as a major complaint...
But there are lots of valid criticisms, but I do think it's a waste to complain here and not on the beta forum.
Thanks to rc213's generosity, I'm in the beta. While I haven't had much time to go too in depth with the character and kart creation, I like what I've seen thus far.
I am disappointed that there isn't a SIXAXIS steering option. Hopefully this will be amended in the final release.
I am disappointed that there isn't a SIXAXIS steering option. Hopefully this will be amended in the final release.
So I just published a track!
This is the first of a series of 4 tracks that will be named "RGX Village". It's the first set of a long series I would make in the final game. All the tracks in that series would be a "remix" of Super Mario Kart tracks or inspired by them. If you notice, the layout of RGX Village 01 is similar to the layout of Mario Circuit 01.


Of course those pics were taken in time trial mode so you will not see the weapon placement or other karts.
.
This is the first of a series of 4 tracks that will be named "RGX Village". It's the first set of a long series I would make in the final game. All the tracks in that series would be a "remix" of Super Mario Kart tracks or inspired by them. If you notice, the layout of RGX Village 01 is similar to the layout of Mario Circuit 01.
Of course those pics were taken in time trial mode so you will not see the weapon placement or other karts.
.
Here is my latest track. I've made and uploaded 6 tracks already, but I like this one the most, as it's quite short but full of small shortcuts and whatnot. The CPU has some issues in a couple spots, but playing all with humans there should be no problems at all.
The name is: Spring Flats


I have another very short and nice one called Dirty Plains. Anyway, my ID is Mik2121, if you find one of my stages I think you can check all the others, so go ahead and download them
The name is: Spring Flats
I have another very short and nice one called Dirty Plains. Anyway, my ID is Mik2121, if you find one of my stages I think you can check all the others, so go ahead and download them
kirbutashi
Member
Getting an error or anything? I've had no trouble. Its the easiest way to start getting votes on your track.Teknoman said:Cant seem to host any races with custom tracks...
The only way in the beta I can find to do a CPU race is by using the test race in the track creator. I don't think your track has to be remixable, just published and probably able to be downloaded.Teknoman said:Any way to set up a quick race against CPU opponents only? Also do your levels have to be set to remix on to be able to host a race with them?
Hello and good morning. I have two questions:
1)Can the game be played from either a hood or bumpercam view?
2)Does the game support any of the available FFB steering wheels...Driving Force Pro, G25, etc?
Thanks.
1)Can the game be played from either a hood or bumpercam view?
2)Does the game support any of the available FFB steering wheels...Driving Force Pro, G25, etc?
Thanks.
Kazuma Kiryu
Member
i just realized i had another(!) modnation theme voucher. here you go guys, third one incoming!
E7M6-NGB8-M46Q
don't really know if anyone's interested in it, but i'll just put it here
E7M6-NGB8-M46Q
don't really know if anyone's interested in it, but i'll just put it here
Jme
Member
isamu said:Hello and good morning. I have two questions:
1)Can the game be played from either a hood or bumpercam view?
2)Does the game support any of the available FFB steering wheels...Driving Force Pro, G25, etc?
Thanks.
No and no. At least not in the Beta.
British Monsoon
Member
NeoGAF member's created tracks;
GAF Name---PSN Name---Track Name(s)
Bootaaay - Bootaaay; Canyon Climber, Mountainside Climb, Mountain GP, Sunset Drive
kirbutashi - Kirbutashi; Crisscross, Detours, Lakeside
Mik2121 - Mik2121 - Dirty Plains, Spring Flats
MyFaceIsOnFire - MyFaceIsOnFire; Windmill Town
RagnarokX - ArgorokX; Island Hop, Street Maze
Ranger X - RangerX; RGX Village 01
Teknoman - TeknomanEX; Roundrock Hills
wind_steaker - HaloumiFace; Alpine Boogie, Cliff Edge Rendezvous, Crevaces
Hey, wind_steaker - i'm having trouble finding Crevaces, is it published?
Also, Mik2121 what are the names of your other tracks? I can't find a way to view all the tracks you've created.
Go to Edit > Mod Track > Branches (the bottom left option).
GAF Name---PSN Name---Track Name(s)
Bootaaay - Bootaaay; Canyon Climber, Mountainside Climb, Mountain GP, Sunset Drive
kirbutashi - Kirbutashi; Crisscross, Detours, Lakeside
Mik2121 - Mik2121 - Dirty Plains, Spring Flats
MyFaceIsOnFire - MyFaceIsOnFire; Windmill Town
RagnarokX - ArgorokX; Island Hop, Street Maze
Ranger X - RangerX; RGX Village 01
Teknoman - TeknomanEX; Roundrock Hills
wind_steaker - HaloumiFace; Alpine Boogie, Cliff Edge Rendezvous, Crevaces
Hey, wind_steaker - i'm having trouble finding Crevaces, is it published?
Also, Mik2121 what are the names of your other tracks? I can't find a way to view all the tracks you've created.
Dragnet said:How are you guys creating shortcuts? I can't do it!
Go to Edit > Mod Track > Branches (the bottom left option).
Already usedkazuma_pt said:i just realized i had another(!) modnation theme voucher. here you go guys, third one incoming!
E7M6-NGB8-M46Q
don't really know if anyone's interested in it, but i'll just put it here
If anyone happens to have spare codes, please PM me one
kirbutashi
Member
You can also select Breadcrumbs to create shortcuts that go offroad.Bootaaay said:Go to Edit > Mod Track > Branches (the bottom left option).
For anyone that either doesn't know or doesn't have access, here is the modnation tutorial posted on the playstation.com beta forum:
TRACK STUDIO INTRODUCTION
Track Studio is located in the Creation Station, which you can drive up to in the ModSpot or can be accessed through the Start menu.
To start building a track, you can choose to first Lay Track or Modify Terrain.
Lay Track allows you to drive out your track using the R2 button for acceleration and L2 to reverse. Press L1 to place your start line. The Auto Populate feature is a quick way to place props on and off the track - like trees, houses, road surface types, signs, boost pads and item pods. With one button press, the Auto Populate tool will do all the heavy lifting for you. Or you can choose to add all of these manually.
Modify Terrain lets you build mountains, valleys and lakes. Once you've made your terrain, then you can lay your track on or around it.
Lay Track Controls
L1- Places your Starting Line, and the point where you'll start building out your track from
R2- Accelerates the roller to drive your track
L2- Puts the roller in reverse
TRACK STUDIO BASIC TERRAIN
Let's take a look at the Terrain tools. By now you've already picked a theme, which sets the basic flavor for your world.
Bring up the Mod Terrain feature, located under the EDIT option on the Circle menu and presto! Now can sculpt scenery to make a great race and create cool landscapes. Pick from one of the many sculpting brushes and spray it out like an airbrush. You can also invert your brush by toggling L1 and now instead of building up terrain you're carving into it. Use this to make lakes and rivers. You can also quickly scale and rotate your brushes using the Directional Pad.
Almost all the modes in Track Studio have multiple undo functionality in case you make a mistake. Just press R1 and it's gone. Undo too much? Hold L3 and press R1 to Redo. Be sure to use the R-Stick to control your camera view and admire your track from every angle. Another useful way to see the world you're creating is Camera Tilt. Just hold down L3 and then move the R-Stick up and down. Like other item lists in Track Studio, your sculpting brushes are conveniently minimized on the right side of your screen, ready to be pulled up by pressing on the Square whenever you need them.
TRACK STUDIO ADVANCED TERRAIN
There are four terrain brush types in the editor on the right side of your screen: Sculpt Terrain, Paint Surface, Ground Cover, and Level Terrain.
First up are the Sculpt Terrain Brushes. These let you raise and lower the landscape of your world. Turn molehills into mountains quickly and easily. Paint Surface brushes allow you to paint alternate surfaces on your terrain such as dirt or gravel. Ground Cover lets you spray down different types of long grass - use the Eraser tool to clear out a path and make your shortcut a little more obvious. Last, we have the Level Terrain Brushes. You can set these to a particular height, allowing you to modify terrain consistently at that level. You can tilt level terrain brushes as well, creating some useful angles in the terrain that wouldn't otherwise be possible.
You can use sculpting brushes in two editing modes: Sculpt Anywhere and Sculpt Along Track. 'Sculpt Anywhere' is the most common way to alter the terrain. As the name suggests, in this mode you and your brushes go anywhere. Sculpt Along Track conforms your cursor to the track path and track side. In the Road Style section of Mod Track, one of the options you have is to make the main road surface invisible. Editing terrain using 'Sculpt Along Track' is a way to ensure your terrain still follows your track.
TRACK STUDIO MODIFY TRACK
In the circle menu, go to Edit and then Modify Track.
There are six categories here: Basic Modify, Sub-Theme Painting, Re-Pave, Advanced Modify, Shortcuts and Breadcrumbs. Basic Modify lets you quickly adjust three main components of your track: width, banking and the ups and downs referred to in Track Studio as Lift.
Sub-Theme lets you add or remove fences, tunnels and bridges. You can also swap between the many road surfaces available or even go with the 'no road surface'. (Its the grey sub-theme brush). In some of the modes, you can use the D Pad to choose which part of the track you want to modify: left or right side, the whole track or even just the run-offs.
Re-Pave is a mini version of the initial steamroller experience. Select start and end points on your track and re-drive that portion of the track.
For the hard-core track builder, Advanced Modify gives you finer control of your track's shape. You can pull entire corners out further or lift track sections. If you do a major change, you may find some props on your track. Use the Select Props option, hold the X button and you can draw a marquee or lassoo around a group of props. Just complete the loop and you can choose to move them as a group or delete them. (more details below)
Use Branches to create alternate routes along you main track. Select start and end points just like you do in Re-Pave. Track Studio will automatically offer you a branch route, but if you want you can hop back into the steamroller and customize it.
Breadcrumbs serve two major purposes and are a vital part of advanced track building. First, they tell the AI racers and weapons where they can leave the main track and take alternate routes. Second, they allow both you and AI racers to leave the main track without automatically resetting.
TRACK STUDIO BREADCRUMBS
Breadcrumb Paths allow racers to leave the main track path without resetting and tell AI Racers and weapons where they can do the same. When in Breadcrumbs mode, scrub along the main track until you find the spot where you want to start and then hold down the X-button and draw your desired path away from the track. When you've finished drawing out your path, simply return to the main track and release the X-button. You'll see a series of dots or "breadcrumbs" laid out now on your track - but don't worry, you don't see them when you race the track. Breadcrumb Paths will always want to move in a forward, so if you make a path that ends further back on the track than where you started, the path direction will automatically flip. Also, a Breadcrumb Path cannot overlap itself, and it can't cut completely across the main track. (Breadcrumb paths can also mess with the driving logic AI racers.)
So to make a breadcrumb path easier for AI racers to follow, try to remove obstacles and fences that would otherwise block their path. It's usually a good idea to use Breadcrumbs in combination with Terrain Surface Brushes. Paint out a path with your Surface Brushes and then lay down a Breadcrumb Path along it. This makes your alternate path a lot more obvoius, so consider adding Props and road signs as other visual clues.
TRACK STUDIO TESTING AND PREVIEWING
Track Studio offers three different preview options: Test Drive, Preview Mode and Test Race. Test Drive puts you in your Kart close to where you are working, allowing you to quickly jump between editing and testing. Preview Mode gives you full control of your camera for that 'bird's eyes view' of your track. This is essential when you want to see how different areas of your track are coming along. Test Race is the full-meal-deal, offering you the total race experience complete with HUD, timers and weapons. Test Race always places you at the starting line so you can see how your track plays from start to finish. All three modes will also drop in AI Racers so you can see how the karts will handle the bumps and turns. You can reach the testing modes from the Main Circle Menu, but you can also use a shortcut by hitting R3 to launch the Quick Menu. The Quick Menu lets you instantly jump to either Preview Mode or Test Drive. When you back out of either mode (press Circle) you'll return automatically to the last place you were editing.
TRACK STUDIO BASIC PROP EDITING
There are piles of Props in Track Studio and each one serves a different purpose. Some spruce up scenery and add distinctive style to the world you create. Others, such as Jumps, Boost Pads and Item Pods have specific gameplay functionality. Some props called 'Smackables' like barrels or road signs break or explode on contact. More advanced Dynamic Props hold special properties and can be turned on and off with pressure pads or triggers.
All Prop types are accessible in Place Props located under the Edit option on your trusty Circle Menu. Placing Props and Selecting Props are the two main modes for Prop Placement. You always start in Place Prop mode, where you can choose from list the prop you'd like to place. As with other item lists in Track Studio, all your Props are conveniently minimized on the right side of your screen. Press the Square button to maximize the full list. Press X to place a prop. With some props, holding the X button down will cause it to spray multiple copies. Experiment with different props to see which ones spray.
You can also quickly scale or rotate a prop with the Directional Pad. If you want to select a Prop that is already in the world, press L1 to toggle to the Select Props mode and your cursor will snap to objects as you get close to them. And remember, everything in Track Studio can be undone. Press R1 to undo. If you undo too far, hold L3 and press R1 to redo.
Remember to use your camera view to check out your handywork. Use the R stick to control your camera. Hold L3 and move the R stick up and down to use Camera tilt and really get the bird's eye view. The last photo you take will be the one that is saved as your track's thumbnail image.
TRACK STUDIO SETTING PROP HEIGHT
Select the prop, scale or rotate it however you like, and move it into position. If you want to set a Props' height however, two more advanced options are available that involve what we refer to in Track Studio as 'Pinning'. Notice that if you raise a mountain, the trees raise with it. The majority of Props in Track Studio start out being pinned to the terrain. Any Prop can be unpinned by holding the Triangle button and pressing the Directional Pad up and down. The one special case to keep in mind is Smackable Props. While you can unpin them and set their height, once the race begins they'll automatically fall to the ground.
There are three surfaces that a Prop will pin to: the Road Surface, the Ground Surface or the Water Surface. As you move an object around it will try and make the best decision as to what it should pin itself to. You can manually override the Prop's choice by holding Triangle and pressing the Directional Pad right/ left to toggle through the possibilities at that current location. Incidentally, this is a handy way to jump between levels in some cases, for instance if your Road overlaps with an overpass.
TRACK STUDIO PLACING PROPS ALONG THE TRACK
As with editing terrain, there are two different ways you can drop Props: Place Anywhere or Place along Track. Each mode has its advantages depending on what you want to do. Place Anywhere is the most common way to place Props and allows you the freedom to move anywhere in the world. Need to quickly place Props alongside your track, like a row of houses and trees? Then select Place Along Track. Your cursor conforms to the track path and trackside so you can easily scrub along the track and place objects on or beside it. Because the cursor is constrained to the track, pushing up on the L-Stick will always move you forward along the track, pushing Down will move you backwards and Left and Right will move you side to side, relative to the track and regardless of the camera position. What this means is that sometimes, depending on your camera angle, the cursor won't appear to go where you were expecting.
Push Up when you want to move forward on the track and you'll get the hang of it in no time. Also, if you want to quickly scrub along the track you can change speeds by toggling the Triangle button.
TRACK STUDIO DYNAMIC PROPS
There are two parts to a Dynamic Prop: a Dynamic Object and a Trigger. Think of it like a light. The bulb is the dynamic object, the light switch is the trigger that turns it on. In Track Studio we like to make things ever simpler than a light switch, so all Dynamic Objects can just be dropped into the world even if you do nothing else they'll work as soon as the race begins. But if you want a Dynamic Object to activate on a specific event, for instance when someone drives over a pressure pad, then you're going to want to hook your objects up to Triggers.
You have multiple triggers to choose from: Pressure Pads activate when you drive over them; Invisible Regions activate when you drive through them (in gameplay you won't see them and they won't affect the speed or handling of your kart), and Shootable Triggers activate when a weapon hits them. Once you've placed a Trigger and Dynamic Object in the world, connecting them requires only a few simple steps. First, make sure you're in Prop Selection mode. A common mistake is to place a prop and while you're still in Prop Placement mode wonder why you can't lock onto it. Press L1 to toggle between Prop Placement and Prop Selection. From Prop Selection mode you can easily lock-on to the Trigger you want. Now press Square to launch the properties panel. Press Square again to enter Connection Mode. When you move the cursor in this mode you will see the connection line. Simply move the cursor to the Dynamic Object you want and lock-on to it. Press X to accept the connection and you're done.
Play around with the properties of both the Trigger and the Dynamic Object to get various results. Keep in mind that a single Trigger can be connected to multiple Dynamic Objects and, equally, a single Dynamic Object could be activated by several different Triggers. Also take note that Jumps and Wanderers cannot be connected to Triggers.
TRACK STUDIO THEME MIXING
The props on a given track are automatically tailored to match the theme you chose at the start, such as jungle, desert, seaside, etc. To get started, maximize the prop list by pressing Square and press L1 or R1 to switch themes. Then place props just like you normally would. What if you reached the 3 theme limit per track and there's a sheep from another theme you want to still add? You're going to have to dump one of the other themes to get Bo Peep in there. Go to the Currently Used list, which is the last tab on the Prop List Menu. This shows you all of the props you have for that particular theme. You can use this list to select and delete props in your world by pressing the Triangle button. Every copy of that particular prop is instantly deleted. This is a great shortcut!
You can also change the entire theme of a world if you like. Go to the Main Circle Menu and look for theme switching under Track Management. But once you change a theme, you can't undo it. You can always choose that initial theme again, but not all of your props will be in the same place.
TRACK STUDIO BEST PRACTICES
Let's go through a checklist of things you can add to your track.
Item Pods: These are essential if your track is designed for face-melting action races.
Boost Pads: Boost Pads are another key element to a great race, however don't go 'boost crazy' or you might find that your track doesn't handle very well. They're great for long straight aways or at the base of hills.
Directional Arrows and Road Signs: A few well placed Directional Arrows or Road Signs can ensure your racers are worrying about the opposition rather than the direction they're going or the blind upcoming corner.
Track Variation: A well-stocked track needs to have a good balance of twists, turns, eye-watering straight-aways, elevation changes, jumps and ramps. Also, make sure to include at least one truly killer moment that racers can look forward to on every lap and something they'll remember your track by.
Branches, Breadcrumbs and Shortcuts: Give racers choices, ideally ones that offer high risk and high reward. Up the ante and see who has the courage to push their luck.
Dynamic Props: These can really energize a race by adding surprise and a hint of danger. So go ahead, challenge your racers' skills while adding luck and timing as factors as well.
Surfaces: Want to keep each leg of the race feeling springtime fresh? Vary your road & terrain surface types. There are plenty to choose from, and each theme has a few of its own.
*There's a few things I shouldn't have to tell you, but I'm going to do it anyway. Can you race it yourself? Can the AI? If Yes, good. If No, then you may need to change some things - like remove props that completely block the road, or narrow the cavernous pit that's currently so wide that no one can cross it. Too much water on the track will cause players to reset as well.
TRACK STUDIO BUDGETS AND CLEAN-UP
Most of the time you won't have to worry about maxing out the items in your world. There's plenty of room for you to work with. But, like most things in life, there is a ceiling for how much stuff you can play with. There are four types of Budgets in Track Studio: Track Budget, Prop Budget, Terrain Budget and the Theme Mixing Limit. You can only make your track so long, so if you plan on adding alternate routes after your first drive with your steamroller, be sure to set aside some budget for that.
When it comes to Props there are actually two budgets: Total Props and Unique Props. The first time you place a Prop, it uses more budget space than all the subsequent copies. Kind of like business cards: setting up the first one costs a lot. The second one costs almost nothing. So you can have thousands of the same tree in your world because all but one are actually copies. If they were all Unique Props you'd run out of Budget at lot sooner. As well, you can only have so many things showing up on-screen at once. If a lot of props are clustered together they may start to pop in and out.
If you want to delete multiple Props, there are three ways to do it, depending on your needs. One way is to use the Select Multiple Props in Prop Placement, to lasso and delete a group of props. Another is to go to the Currently Used Tab in the Props List, where you can delete all of a particular prop. Finally, if you want to easily remove all the Props in the world you can go to the Clean Props option located under Reset in the Track Management Section of the circle menu.
If you find you're maxing out your terrain budget, it may be because instead of deleting unwanted terrain you're painting over it. Suppose you build a mighty mountain, then change your mind and flatten it with a Level Terrain Brush. You haven't deleted the mountain, just added a layer on top of it that flattened it out or lowered it. It's like sweeping dirt under a rug; the dirt's still there, it's just out of sight. Out of sight, out of mind is a fine mantra if you've got Budget to burn, but if not, you may want to reclaim terrain budget by deleting terrain. To do this, go into the Terrain Cleanup option located in the Mod Terrain section of the Circle Menu.
The last thing to remember is that while you can pull props from other themes, you can only mix Props from the theme you're in and two additional themes (for a total of three). So if you're planning to mix and match, choose your three themes well.
MODS AND KARTS MODIFYING
Before you can modify a part, you first have to put it on your Creation. Do this by highlighting a part in a list and then Pressing X to add it. Press X again to remove the part. Bear in mind that a few parts, like the wheels for instance, can't be removed. If you try, ModNation will default to something workable. If you want a "live preview" on your character/kart of each part, simply Hold X and move the L-Stick to navigate the list. It'll apply each item as it comes up so you can see what it would look like quickly and easily. Once you've placed a part that you like, press Triangle to color or modify it. Most parts can be more than just colored, so pressing Triangle will put you into Modify Mode. Here you can scale, rotate or position the item any way you choose. Press L1 to go into Advanced Modify mode and you can Non-Uniform Scale, Skew, Flip and adjust Height.
MODS AND KARTS COLORS AND MATERIALS
Many parts of your Mods and Karts can be colored, so generally all you have to do is select the part you want to color and press the Triangle button to access the Color Picker. While you can change up to three colors on most parts, some will only allow you to change one or two. When you have the Color Picker up, Press L1 or R1 to scroll through all the colors of the rainbow and then move the L stick to select the shade and hue you want. If you can change more than one color on that part, press L2 or R2 to tab between the color channels. Want more options? The Color Picker gives you access to three other cool features: Swatches, Material Properties and Match Colors.
Swatches give you quick access to colors that are already on your Mod and Kart. They're invaluable for making sure you match exact colors from one part to another. And UFG suggests some Mod-friendly colors as well.
Material Properties let you change the 'material' of a part, for instance making something look more metallic. Not all parts can use material properties, though, so keep your eyes peeled for when the option is available.
And finally, Match Color automatically copies the current color across many other parts of your Mod or kart. This is especially useful when you're trying to make costumes and uniforms, because you can make all parts match with a single press of the button.
Here's another secret that makes color matching easier. Color Swatches carry over from Mod to kart, which is great for ensuring your Character and kart are coordinated. Since Match Color does not pass between Mod and kart, you'll want to use the Swatches to ensure your Mod and kart hit that identical shade of hot pink.
kirbutashi
Member
And the rest
MODS AND KARTS BASIC STICKER EDITING
Each Mod and kart is broken down into regions, such as head, body, arms and legs, or for the kart left side, right side, top, front and rear. Within each region you can work with multiple stickers to create your very own modern art masterpiece. Convince rich socialites to pay millions for your creations. Or just look cool as you fly towards the finish line.
Editing stickers is a straightforward business. Pick a region, like the Head, then press X on Add A New Sticker. Flip through several tabs to find the sticker you want and then modify it to get just the right look. You can position, scale, and rotate a sticker, flip it, skew it, and play with the color and material properties. You can also duplicate a sticker if you want multiple copies or just similar ones to modify later.
One of the real powers when editing stickers comes from grouping them so you can edit several together. In the Sticker Layers screen you can add or remove a sticker from a group by pressing L1. Once you've added several stickers to a group press X on any stickers within that group to modify them. You will return to the Modify screen and can now position, scale, and rotate the stickers as a single unit. You can also have more than one group per region, which can be quite useful for keeping different stickers distinctively grouped together. Say you wanted three different logos on the front of your Kart, each composed of 10 separate stickers. Even though they're in the same region, you can keep each 10-part logo separate so you can easily go back and reposition or modify one without having to mess with the others.
Add a new group or change the Target Group by pressing Left or Right on the Directional pad. You'll notice that the Number of the Target Group updates to reflect the change. When you press L1, the sticker you're adding will go to that Target Group.
MODS AND KARTS ADVANCED STICKER EDITING
You always start editing stickers from the Sticker Layers screen. The Clipboard is a great tool that allows you to cut, copy, insert, or replace stickers. Press Triangle to cut a Sticker or Sticker Group. This removes it from the list and adds it to the clipboard. Hold L3 and press Triangle to change from "Cutting" to "Copying" the sticker. This lets you add the sticker or group to the clipboard but keeps the original in the list as well. Pressing Square will Insert a copy of whatever is on your clipboard to the level below the highlighted layer.
Holding L3 and Pressing Square will Replace the highlighted sticker layer with a copy of the sticker on your clipboard. You cannot do this with a sticker group, however, only individual stickers. Sounds pretty advanced and maybe a bit confusing, but it's pretty intuitive once you get in there and get your hands dirty!
Some clipboard tips:
-Use Cut or Copy to move stickers and groups to other regions.
-Replace is a great way to swap a new sticker with a sticker that is already scaled and positioned correctly even if it's in a group. Why do more work than you have to?
-When you want to delete stickers, just Cut them. When you leave the screen they will be gone forever.
Tight for time? Here are a few shortcuts for the Sticker Layer Screen that'll save you some thumb-skin:
-Instead of always scrolling up to the Add New Sticker Layer, you can hold L3 and press X to create a new layer at your current position in the list.
-Hold L1 and push the L-Stick Up and Down to quickly add multiple stickers to a group.
-Hold R3 and push the Directional Pad Up and Down to quickly move the current layer above or below the next layer.
*Got the hang of stickers and created that perfect logo or work of art? You can share your stickers between creations using the Load Sticker Set located in the Stickers section of the Circle Menu. From here you can merge or replace stickers from one creation to another.
ONLINE - INTRODUCTION
You've got multiple modes to choose from. Join a Casual Race that someone's already set up. Or you can Host a Casual Race. You pick the mode, the track, and all the rules.
Or pit yourself against ModNation's best in MRC Ranked Races. You can choose between Single Races or a Series of 5. These races pay out double the XP for rising to the challenge. With XP, the better your finish position, the bigger the payout at the end of each race. You also get speed, style, and combat bonuses, so don't hold back.
Online Sharing
There are two parts to sharing: Publishing and Downloading.
Publishing puts your creations out there for the public to vote on, download, race with and remix. Once you've built a track, kart, or Mod, go to the Sharing Kiosk inside or just outside the Creation Station. The Publish section will show you the available slots that you can publish to. Press X to see a list of all your creations, then choose one and you'll get you can enter any details you want about your creation: Description, Keyword, Locked for Remixing or Downloading.
Once you've finished with the details, press Start to publish it and now your creation is online for everyone to enjoy.
The flip side of publishing your creations is downloading others. You can select a player or statue in ModSpot and choose View Creations to download the the character or kart that you're looking at, or other creations made by the Player. You can also go to the Sharing kiosk to use the Search features to browse through all the creations that are published in ModNation. The Search browser lets you search by Highest Ranked, or Most Downloaded, Search By Text, Newest, Keywords, and Surprise Me.
Tight for time? Here are a few shortcuts for the Sticker Layer Screen that'll save you some thumb-skin.
Instead of always scrolling up to the Add New Sticker Layer, you can hold L3 and Press X to create a new layer at your current position in the list.
Hold L1 and Push the L-Stick up and down to quickly add multiple stickers to a group.
Hold R3 and Push the Directional Pad up and down to quickly move the current layer above or below the next layer.
Got the hang of stickers and created that perfect logo or work of art? You can share your stickers between creations using the Load Sticker Set located in the Stickers section of the Circle Menu. From here you can merge or replace stickers from one creation to another.
wind_steaker
Member
Bootaaay said:NeoGAF member's created tracks;
wind_steaker - HaloumiFace; Alpine Boogie, Cliff Edge Rendezvous, Crevaces
Hey, wind_steaker - i'm having trouble finding Crevaces, is it published?
it should be... I'll check when I can get on in a few hours!
I've had trouble finding tracks on here myself though, might be something to do with being in the UK? I'll have another go at finding your tracks this eve.
Dead Prince
Banned
as long as you publish the custom track others can join. [saw it on the advice/tip during loading]Teknoman said:Cant seem to host any races with custom tracks...
British Monsoon
Member
kirbutashi said:You can also select Breadcrumbs to create shortcuts that go offroad.
Oh wow, awesome - I was wondering how to do offroad shortcuts. Thanks for posting that tutorial too, I haven't bothered to check out the beta forums (probably should though).
wind_steaker said:it should be... I'll check when I can get on in a few hours!
I've had trouble finding tracks on here myself though, might be something to do with being in the UK? I'll have another go at finding your tracks this eve.
Yeah, the search seems a bit picky and doesn't always seem to bring up results - also, has anyone managed to figure out how to add someone as a favourite creator? You can search for tracks made by your favourited creators, but i'm seeing no option for adding someone.
GodofWine said:What is the driving / handling / physics like in this?
It's not very physics intense, and while the karts seem to handle simply enough at first the driving is all about drifting skill.


Jme
Member
Bootaaay said:NeoGAF member's created tracks;
You missed mine I posted it a few pages back..
handofg0d - jmehatesyou - Mountain Rally