• Hey, guest user. Hope you're enjoying NeoGAF! Have you considered registering for an account? Come join us and add your take to the daily discourse.

Plastic Scale Modeling Age |OT| Planes, tanks, cars, sci-fi & more

Leunam

Member
Loving that color. Is there a decal for the Honda badge on the front? The Ferrari I'm working on has similar features on the engine and body and I'm tempted to just use my smallest brushes and paint them on rather than use the decal.

I want to make one of those Star Destroyers with all the windows lit up. Is that hard?

Depends. Any experience with fiber optics? That's generally how I've seen those done.
 
Loving that color. Is there a decal for the Honda badge on the front? The Ferrari I'm working on has similar features on the engine and body and I'm tempted to just use my smallest brushes and paint them on rather than use the decal.

Luckily I have some metal decals from an nsx kit I completely botched a few years ago. Gonna see how those fit. Worst case i'll just use a tiny brush and just tattoo some paint onto it like I did with the interior heater red/blue shift.
 
Nice Vampire! There's one of those in the aircraft museum that's in my city. The only one Japan ever got I guess. I kind of want to get the Airfix kit just to build that.

Thanks! Our local air force museum has a couple of NZ Vampires, a single seater on display and a twin seat trainer version (same as the model) in a storage hangar. I scrutinised photos of it to get my decals just right, and I even scratch built a first aid box decal (just behind the canopy) to make it even more authentic.

I wish, that's my favorite Ferrari and I can't find a kit anywhere.

That's a really cool plane. This raises a question for me: how do you all display your completed models? I was thinking about getting that one Ikea glass display case once I have enough models to put in there.

Just on a simple bookshelf for now, along with my diecast jets. The lighting's not great and the models kinda blend in to the background, so thinking about alternatives.

20150315_111816.jpg


Here are a couple of progress pics on the civic i'm building.

vsYxNe7l.jpg

Looks great. Really tempted to have a crack at a model of my own Honda DC5.
 
There used to be a fibre optic Star Detroyer kit, released about the same time as the fibre optic Enterprise-D kit.

STAR%20DESTROYER%20BOX%20ART%202.jpg


Most people use LEDs now, but depends on the situation.
 
Ahhh cool thread. I got into Warmachine kind of recently, posted some pics in the miniature gaming thread. I like that style of painting, where it's a bit more impressionistic. Like, you're playing the toys on a table usually only looking at them from a few feet away, make sure you get the major colors right and then pic a few minute details to pop. Painting like that is more a cool puzzle of "how efficiently can I reach good enough".

That said, there's some really impressive high-detail work in this thread.

That crackle paint looks cool. I might check that out for slopping on around model bases, make them look like they're in the desert. Seems like a quick way to get a nice look across.

I've been wanting to get into Warmachine myself - not sure where to start, really. I wish the miniature community on GAF was a bit more active. What faction are you collecting?
 

Brakke

Banned
I've been wanting to get into Warmachine myself - not sure where to start, really. I wish the miniature community on GAF was a bit more active. What faction are you collecting?

Yeah that thread's pretty dead. I'm in on Khador and a bit of Circle. I started up with a few friends, did a journeyman league together, worked out really well. If you live near a solid board game store there's a good chance they'll do journeyman leagues occasionally. That kind of slow grow is definitely the thing to do.

I'm happy to chat about it over PMs if you have any questions. It's a cool thing, I've been real happy with it so far.
 

Wubby

Member
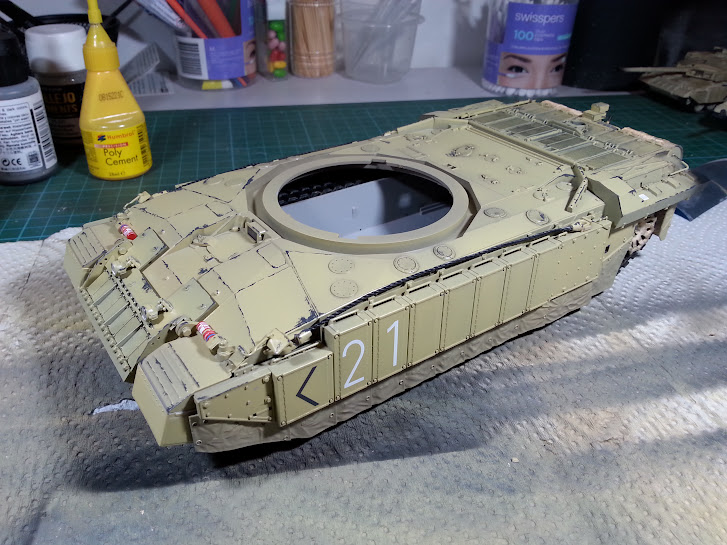
I posted this in the gundam thread but wanted to post it here too. I'm going to add more to it here than what I posted in the Gundam section. I mentioned on the last page I've been wanting to review these...

God Hand Ultimate Nippers SPN-120

jvx8lwBth75EP.jpg


I picked up these nippers last December. I actually have three of them (shh that's a secret). Originally I bought my first pair and felt pretty lucky to snag them. If you follow God Hand on Facebook or Twitter they will post occasionally when they are in stock. They sell out fast. Super fast. My second two was a Left handed and right hand set that I got lucky and got during a New Year promotion they had. Both for the price of one.

I just want to start off saying that nippers are my favorite hobby tool. I enjoy cracking open a new model box and cutting the parts off of the trees. For years my go to pair of nippers has been the Tamiya Sharp Pointed nippers. I loved those nippers. When God Hands first came out I skipped getting them because I figured there was no way they would be an improvement to the Tamiya nippers I'd been using and at 4000yen bit pricy! It wasn't until I saw Japanese master modeler Kawaguchi-san sing their praise that I gave in. By that time however they were no where to be found. It took me a few months of trying before I finally got a pair.

Anyway onto the nippers...

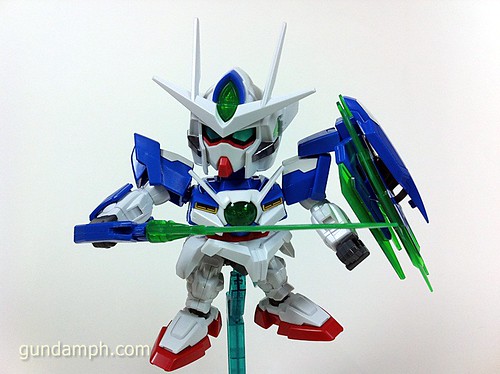
These nippers are unique in that only one side is sharpened. And boy is it sharp. The sharpened side is polished to a mirror finish while the other side is just a blunt edge. This has the affect of stressing the plastic less when cutting through it. The sharpened side really just cuts through plastic like butter. You can use these nippers to cut nubs off the kit so cleanly you won't need to go back and clean it with a file/paper. Nubs on round parts will still need to be cleaned a bit. Works best on flat surfaces.

jbykAwP2lrvIP9.jpg

jbhoPYpReLwwQC.jpg


Due to the way they are sharpened however this also means that these nippers are not really ambidextrous. Not to fear though they do sell a set for lefties the SPN-120-L (the red handled ones). Though the left handed pair seems to be a bit hard to find. Which is saying something because the regular set is always sold out everywhere as well. I managed to get lucky and got both of them from God Hand directly.

There are some downsides. God Hand recommends not cutting anything larger than 3mm. Also they can only be used for plastic. And soft plastic like Bandai is best. I've heard of people breaking their ultimate nippers on harder plastic like the clear aircraft canopy parts. Bandai clear is soft enough you don't have to worry. These nippers will also more than likely get dull at some point. In Japan you can send them back to the factory for 1,000yen or so to be resharpened. How long it would take for them to get that dull I can't say. I've built about ~15 kits or so since getting mine and they are still sharp as ever. I guess another downside would be the cost. 4,320yen msrp... if you can find them. For those living overseas the best option you have I would say is to place a back-order for them at HLJ and wait till they get more in stock.

Here are some comparison shots to my Tamiya nippers.

jbf8ez0Ngr6fhU.jpg


As you can see the blade part is much thinner. This also makes it easier to get into some tighter spaces which is good.

My Tamiya Sharp pointed cutters are over 5 years old now. They've been moved over as my medium duty cutters. The Tamiya pair still makes a good cut. Just isn't as smooth as the God Hands. Leaves a bit more of a mark. They also cost half as much and are a lot more readily available.

This isn't my picture I stole it from another site. I couldn't get any good close up shots of the cuts with my camera. The God Hand cut is on the left and Tamiya on the right. As youcan see the GH leaves a bit less of a stress mark.


For me they were worth it. I live in Japan so if they do get dull I can send them back for sharpening. Are they necessary not really... I just love nippers ^^..
 

Leunam

Member
Those are really cool. And the only way for non-Japanese residents to get a pair is through HLJ? I really like the slim design of the actual blades. The clippers I have now are standard size and it can be a little clumsy cutting some tighter areas.

So I've finished the engine bay for my Ferrari:

sUQjbOSl.jpg


I'm not doing much additional work besides what is asked of on the instructions. I'm also having some difficulty with the fit in some cases, and some of these mold lines are brutal. The struts above the air cleaner were really annoying to install because not only is the contact point on either side absolutely microscopic, but they were also about an 1/8" short during assembly because parts don't seem to fit the way they should. As I understand, that's sometimes an issue with Revell kits.

Regardless, that's one stage of the car done. Next up is the interior.
 

Wubby

Member
Those are really cool. And the only way for non-Japanese residents to get a pair is through HLJ? I really like the slim design of the actual blades. The clippers I have now are standard size and it can be a little clumsy cutting some tighter areas.

Shoot, I take back what I said about HLJ. They've now stopped taking backorders. I do believe you can find on US amazon but will be double the cost (not worth it). Hobbysearch and amiami both have as well but I think they just list it as out of stock so you would just have to get lucky ordering when they do have with them. HLJ is still the best bet probably... if they let people place back orders again.

So I've finished the engine bay for my Ferrari:

I'm not doing much additional work besides what is asked of on the instructions. I'm also having some difficulty with the fit in some cases, and some of these mold lines are brutal. The struts above the air cleaner were really annoying to install because not only is the contact point on either side absolutely microscopic, but they were also about an 1/8" short during assembly because parts don't seem to fit the way they should. As I understand, that's sometimes an issue with Revell kits.

Regardless, that's one stage of the car done. Next up is the interior.

Ahh.. Enzo? Looks good so far!

I have a Tamiya 1/24 Enzo in the stash somewhere... It's one of those things along with my 1/350 Yamato I don't want to touch for fear of it looking bad haha.
 
Started building my 1/72 Airfix Canberra bomber... quite an odd cockpit arrangement.

tumblr_nlcom4ISS31sar356o3_540.jpg


Also the pilot figures supplied look a bit on the small side compared to this standalone 1/72 pilot.

tumblr_nlcoqkUch51sar356o1_540.jpg


It's quite a cool kit because the decals replicate the brief period when we slapped a silver fern over the usual RAF roundels, just before the red dot became a kiwi.

20150317_225555.jpg
 

Leunam

Member
Thanks for the info Wubby. And good eye! That is an Enzo. I picked up a Tamiya kit that was discontinued the last time I went shopping for supplies and now I'm really eager to build that. At a quick glance, the instructions are way better than the ones for the Enzo.

Looking good, lastplayed. Really weird offset cockpit.
 

Impotaku

Member
Besides some BB senshi gunpla i have been building the last scale model i built was this kit to build a mini taiko no tatsujin arcade machine, i ended up getting the hot glue and drill out, to mod it with some internal lights to replicate the arcades lighting.

Was a fun kit to build

SAM_1259%20res.jpg


SAM_1260%20res.jpg


SAM_1264%20res.jpg


SAM_1268%20res.jpg


SAM_1270%20res.jpg


SAM_1271%20res.jpg


SAM_1275%20res.jpg
 

Impotaku

Member
Several hours of painting later the head and legs are complete on my Quant, had to paint and panel line a lot to fill in the missing detail one of the problems of SD kits they may have less parts but they need a lot more paint work compared to master grades.
IMG_0601%20res.jpg
 

Impotaku

Member
Thanks.

I'm just using acrylic paints and painting by hand with a brush. SD kits are just too small to airbrush accurately (well it's beyond my skill level) with a normal brush though i can usually get most of the details, however it takes a while to clean up the lines and stuff.

What i love with SD kits is the more time you take to detail each part the more amazing they look when complete. Love gundams in SD form they just have far more character, they are a weakness of mine.
 

Leunam

Member
SD Gundam aren't really my thing, but I can totally appreciate good modeling skills.

SD Zaku on the other hand are something I can totally get behind.
 
Subscribed because I've always wanted to try this out but never have the patience. Looking forward to seeing how that civic model turns out.
 

Wubby

Member
SD Gundam aren't really my thing, but I can totally appreciate good modeling skills.

SD Zaku on the other hand are something I can totally get behind.

I'm not a huge SD fan either. There are some I do love though, Knight Gundam, Knight Unicorn, BB Guntank, SD Neo Zeong. All the ones that can transform into HG size kits... What was I saying about not liking SD's again? lol

That looks neat. It says it's for advanced hobbyists though, I've never built a scale model.

That's also a wood kit... Maybe a but tough. I found this on HLJ but it's papercraft. That could be easier. It's pre-printed and laser cut it says so all you should have to do is put it together I would think. And keep it in a safe spot once it is put together! Don't know how big it is either.

To be honest though for a Mini piano your best bet is something already made / intended for dolls.

http://www.ebay.com/bhp/miniature-piano
 

Impotaku

Member
90% complete, took a lot of painting but it's nearly done just the sword & shield to build and put on but i thought i'd do a few progress pics.

This is what it looks like if you use the crappy stickers and don't bother to paint & line your details.
5663999752_5564efd3e5.jpg


If you add several hours of patient painting you get this :)
SAM_1301%20res.jpg

SAM_1302%20res.jpg

SAM_1304%20res.jpg
 
^ Looks great!

Finally put the Canberra together. It required a hell of a lot of elbow grease to fill in and sand down every single gap. The worst one was the bomb bay doors, there was a 1mm gap running all the way down the middle when closed. I guess Airfix intends for you to have them open...

tumblr_nlyen7ZjaN1sar356o1_1280.jpg


Now just waiting for a set of Eduard precut canopy masks to arrive in the mail before I start painting.

In the meantime I bought this...
product.jpg


The 1/350 beast of a kit. Pretty excited, but I hope I don't cock it up, it wasn't exactly cheap.
 

antonz

Member
Decided to do something crazy that is going to take me upwards of 6 months. Got my hands on a Super Star Destroyer resin Model kit. Plan to do full fiber lighting etc. on.

This is what the kit looks like. Not mine as its in process of shipping but gives an idea. 38" long

DSCN0176_zps5b9f035f.jpg
 

Mobius 1

Member
I have a Möbius-1 kit that's I'm dreading on ruining. Might practice on a cheap F14. Though I don't want to ruin that one either.
 
That SSD looks beastly, it's just longer than the Enterprise I've just got!

I made a start on the bridge. It's a bit rough, but my hand and eyesight were tested at such an extreme scale!

20150415_203132.jpg


20150419_210802.jpg


20150419_211126.jpg


The only decals it came with were the view screen and wall displays, the rest I looted from old decal sheets, such as the turbolift door, dedication plaque, helm buttons and radar display. I really don't have anything for the rows of semi-circle console lights and buttons, so just left them blank.

Now the question is; angled or straight?

20150419_211337.jpg


20150419_211349.jpg
 

Jube3

Member
I was in a Star Wars mood today and decided to do a speed build/paint of the R2D2 Bandai kit I picked up over the weekend. Really fun kit, very similar to a simpler RG gundam kit. 25 bucks and it also came with R4D5. I'm going to pop off a few of the blue panels and paint them again, not happy with the rush silver I put in it. I need to add some brown to it either through a wash or pigment. It was a super fun build though, bring on the AT-ST.

17187567650_5a97c81709.jpg

Looks great! I thought about getting that, I've got the Bandai tie advanced, two tie fighters to accompany it, and the 1/12 stormtrooper kit all sitting in my backlog. I'm tempted to get the AT-ST too.

Still chipping away on my Enterprise though. I ordered some 1/350 scale naval figurines and added some to the shuttle bay.

tumblr_nodog1Vvfh1sar356o1_1280.jpg
 

NEO0MJ

Member
So...anyone excited for any upcoming kit? I've got my eye's on Kotobukiya's 1/72 Death Stinger.

ds3_zpsckyzqp5v.jpg


With its tail extended behind it becomes 44 CM long, which is pretty big. I'd rush to preorder but I have yet to build my Gojulas kit.

Gonna post some pics of a kit I finished last week. A straight out of box build, but I'm pretty happy with it.
 

Leunam

Member
I've got a Mazda 787B that I've got on the back burner. I plan on working on it sometime this year, but for now I'm busy with miniature painting.
 
Some recent projects

USS Enterprise finally done (posted this in the Trek thread a while ago)

20150604_125434.jpg


Bandai's new 1/72 Tie Fighters

20150714_143622.jpg


20150714_170629.jpg


20150714_165656.jpg


And currently working on a Challenger 2 tank.

20150803_192220.jpg
 

NEO0MJ

Member
Nice work! I'm working on a tank kit I recently ought myself, the Tamiya Churchill MK.VII. But it's a pretty old kit and its been a long time since I worked on anything that needed glue, plus it looks like I might need putty to fill some spots. Any tips?
 
Thanks :)

Ah the Churchill, nice tank. I guess it depends on what sort of gaps you're talking about. The good thing about tanks, and especially the WW2 variety is that they were mostly welded and bolted together, so messy seam lines don't look all that out of place. For small gaps I've taken to using superglue applied with a brush. It dries rock hard and won't shrink as modelling putty tends to do over time. That's what I used for the Enterprise's saucer gap. I applied a small bit of superglue, then waited for it to dry, then kept applying until I had enough to sand back. The only trouble is that it dries so hard that sanding it back takes a lot of elbow grease.

20150514_150319.jpg


Was worth it though, as you can see the gap virtually disappeared, and won't shrink at all.

20150604_140234.jpg


For larger gaps you could try filling in with spare plastic or sprue, then sand back once it's all dried in place.
 

NEO0MJ

Member
Thanks for the quick response! Gonna try that. Also, any tips on dealing with the tank treads? Will sealing be enough after painting them or should I do something more to make sure they don't chip with time?
 
No worries, always nice to put a bit of life back into this thread lol.

You're talking about the rubber tracks right? Painting them and applying a matt varnish should be enough. They won't get much movement once they're on display, so shouldn't start peeling off.

The only trouble I've had with stuff like that is rubber tyres on my LAVIII. I painted them and then wrapped them around the wheels, which stretched and warped the vinyl (or whatever it is) and some paint peeled away. Was no biggie though, it kinda looked like weathering in the end.
 

TAJ

Darkness cannot drive out darkness; only light can do that. Hate cannot drive out hate; only love can do that.
I used to build a lot of models. Like the level 3, or what not. And then I would burn them.

Anyone else do that as a kid? Model/Paint/Burn?

There was a teenager in the neighborhood when I was a kid who would build models himself and then let us help him blow them up. If they were planes we'd "fly" them on fishing line and explode them mid-line.
 

Caesnd

Member
Anyone experienced with scratch building?

Been wondering how to make two mirrored symmetrical shapes with irregular curvatures/geometry. Is 3d scanning and machine processing the only (time economical) way to do this?

In essence, how would someone go about creating something like this (sculpting half of it is one thing, but achieving such symmetry seems to go beyond just measuring with callipers).

Also, the entire thing was made in Sculpey polymer clay (probably went like rough shape -> burn -> refine - burn etc), so laminating techniques and other hard machining tools are not in the cards here... I think.

Not every part of the model can be casted as duplicates either, as some parts (legs, abdomen etc) have asymmetrical detail as well.
 

kiunchbb

www.dictionary.com
Anyone experienced with scratch building?

Been wondering how to make two mirrored symmetrical shapes with irregular curvatures/geometry. Is 3d scanning and machine processing the only (time economical) way to do this?

In essence, how would someone go about creating something like this (sculpting half of it is one thing, but achieving such symmetry seems to go beyond just measuring with callipers).

Also, the entire thing was made in Sculpey polymer clay (probably went like rough shape -> burn -> refine - burn etc), so laminating techniques and other hard machining tools are not in the cards here... I think.

Not every part of the model can be casted as duplicates either, as some parts (legs, abdomen etc) have asymmetrical detail as well.

The only thing I can think of is Resin casting: https://www.youtube.com/watch?v=joexdltgj-k

The duplicate part will be smaller than the original, so you have to duplicate the part twice.
 

NEO0MJ

Member
For those with experience mixing paints can you give me any info on what went wrong here? I used a Marabbu universal primer (I didn't want to use the bottled tamiya primer I have), and after leaving it for a day put tamiya acrylic gold leaf on the spoon followed after two hours with clear red. I used Tamiya acrylic thinner with both.

While I like the resulting color (planning on using it as Kemet's Phoenix main color) it seems bubbles have formed and there are some areas with a strange uneven streak.

Edit: Oh, and the paint seems kinda runny, though that might be because of the shape of the spoon and how I just painting it with the rush immediately after dumping it in the paint canister. Maybe I should dry the brush first.
 

Wubby

Member
For those with experience mixing paints can you give me any info on what went wrong here? I used a Marabbu universal primer (I didn't want to use the bottled tamiya primer I have), and after leaving it for a day put tamiya acrylic gold leaf on the spoon followed after two hours with clear red. I used Tamiya acrylic thinner with both.


While I like the resulting color (planning on using it as Kemet's Phoenix main color) it seems bubbles have formed and there are some areas with a strange uneven streak.

Edit: Oh, and the paint seems kinda runny, though that might be because of the shape of the spoon and how I just painting it with the rush immediately after dumping it in the paint canister. Maybe I should dry the brush first.

I've never heard of Marabbu primer... Is it a lacquer like the Tamiya? And I am correct in assuming that you brush painted this not sprayed? Tamiya acrylics are famous for not being very brush friendly. Some say it's pretty workable as long as you use the Tamiya Paint Retarder (light blue/green cap).

I've never attempted a candy finish with brush painting. Airbrushing is the preferred way to go... Also should probably polish the primer smooth before applying the metallic. Not sure if waiting just two hours between the gold and clear is enough time either.. I'd probably give it a bit more time.

Take a look here see if this helps at all:

http://www.ghostofzeon.com/diy/painting/candyalclad.html
http://gunplacore.blogspot.jp/2013/04/tutorial-candy-coats.html

Also as a side note! I just got hired by HLJ! I start next month. You may see me on Hobbylink TV eventually... I may also be getting my own show to talk about scale models but not sure yet. Have quite a few things to take care of first (ugh moving).
 
Also as a side note! I just got hired by HLJ! I start next month. You may see me on Hobbylink TV eventually... I may also be getting my own show to talk about scale models but not sure yet. Have quite a few things to take care of first (ugh moving).

That's awesome for you! Congratulations.
 

NEO0MJ

Member
I've never heard of Marabbu primer... Is it a lacquer like the Tamiya? And I am correct in assuming that you brush painted this not sprayed? Tamiya acrylics are famous for not being very brush friendly. Some say it's pretty workable as long as you use the Tamiya Paint Retarder (light blue/green cap).

I've never attempted a candy finish with brush painting. Airbrushing is the preferred way to go... Also should probably polish the primer smooth before applying the metallic. Not sure if waiting just two hours between the gold and clear is enough time either.. I'd probably give it a bit more time.

Thanks for the help. You know, I should have done more research on the primer. I just assumed it was arcylic because almost everything else in the store was. I really hate how limited my options are, especially regarding paints. I really wanted to buy alclads a few months ago but I can't import them so I have to use what they sell locally. As for why I'm using a brush what I'm working on is tiny and unwieldy and I feel I'll need the more easier to control regular-ass brush than an airbrush.

pic2591301_md.jpg


They're barely 3 CM tall so yeah.

Also, congrats on the new job!
 

Leunam

Member
Also as a side note! I just got hired by HLJ! I start next month. You may see me on Hobbylink TV eventually... I may also be getting my own show to talk about scale models but not sure yet. Have quite a few things to take care of first (ugh moving).

That's super cool. Congratulations!
 
Probably out of the realistic realm for most of us here but does anyone know anything about modeling HUGE stuff like 1/100 battleship?
Seen many made but don't even know where to start...
or heck even find a kit.
 
Top Bottom