• Hey, guest user. Hope you're enjoying NeoGAF! Have you considered registering for an account? Come join us and add your take to the daily discourse.

DIY |OT| "Can We Fix It?"

1pOMF5P.png


What is DIY?
DIY is an acronym for “Do It Yourself.”

Why would I DIY when I can just pay someone to DIFM [Do It For Me]?
There are a lot of reasons!
  • Cost. By doing things yourself, you’re saving money on labor charges, as well as getting your own materials at cost instead of a laborer’s surcharge.
  • Knowledge. By doing things yourself, you’re learning valuable skills that will help you accomplish projects quicker and easier later on in the future. Not only that, but learning new things throughout your life helps prevent cognitive impairment and boost your self-esteem!
  • Pride. A little bit of pride is good for you! Doing things yourself gets the project done, and YOU did it. With your bare hands (and other tools). Dat feel of pride is hard to match.

What should I post?
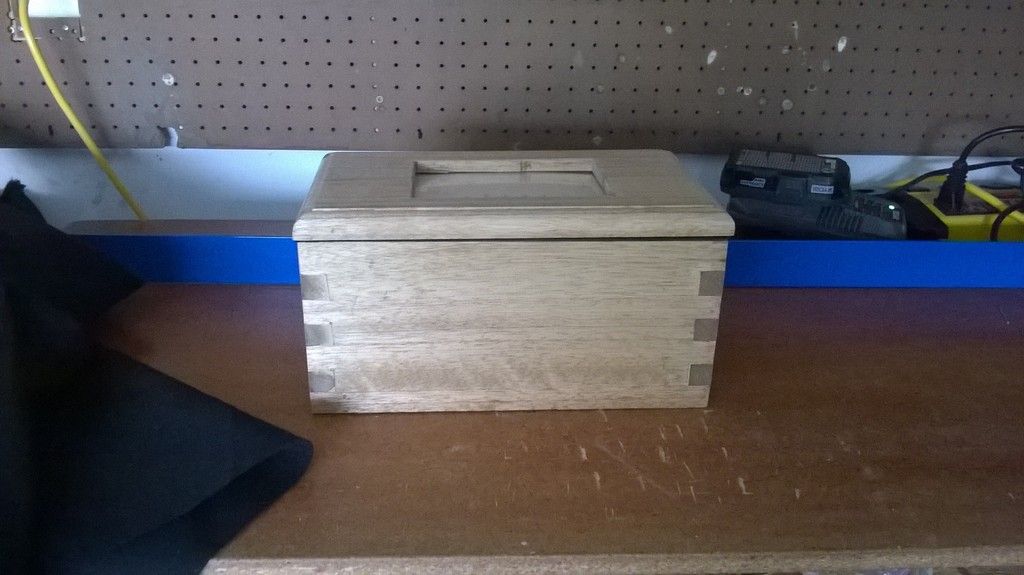
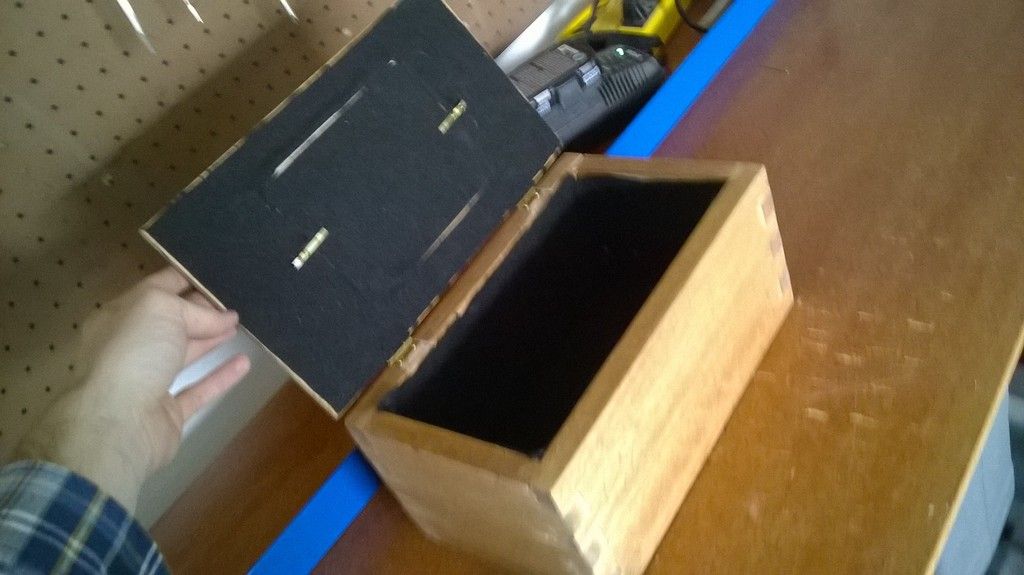
Anything that you do yourself! Are you building an emulation station from a Raspberry Pi? Are you redoing your landscaping? Building a fence? Fixing a toilet? Putting in floors? Making origami? Creating words in your Alphabet Soup? It’s all on the custom-built cherry table here.

What if I’m lost?
Go ahead and ask here. There are a ton of smart people on GAF. Also, check out the links below for good DIY sources.

Ana-White.com - This website has very noob-friendly plans for all skill levels and project types. It's a great place to start.
Better Homes & Gardens - Yeah, it's cheesy, but there's some good advice in here. Lots of fantastic landscaping ideas.
Pinterest - This is seriously one of the best things ever in the DIY world. There are SO MANY links to great projects in here, with good search tools. The main downfall is differentiating the good projects from the unsafe/crappy projects.
 

Dalek

Member
This is a tremendous idea for a thread. I have some upcoming housework I need to do and I'm a novice.
 
My most recent project. Built this for my mother-in-law for her birthday.

Keepsake box with a picture frame using Box-Joints.

WP_20150417_001_zpsr6v5gmur.jpg


WP_20150417_002_zpsoji7zjbj.jpg


Found a nice mahogany 6' board at Menards for $19, then found a piece of felt at a fabric store for $5. I had the Danish Oil and Wood Filler/Glue sitting around, so the total price was <$25. Ended up turning out okay!


YES WE CAN!
 
I'm putting in some raised garden beds this weekend in my backyard. Anyone have any raised bed tips?

Will post pictures once it's done.
 

The Boat

Member
Great thread, I've been looking for a DIY project, although I have no idea what to do. Fixing stuff or building it with your hands is an amazing feeling.
 

nicoga3000

Saint Nic
I am putting in a fence in a few weeks myself (with the help of a coworker) as it will cost us thousands less to avoid going with a contractor.

I also need to replace one of the boards by a gutter on our house. It's starting to rot. I imagine it shouldn't be too hard, just gotta figure out what the hell to do.
 
I am putting in a fence in a few weeks myself (with the help of a coworker) as it will cost us thousands less to avoid going with a contractor.

Oh cool, I just built a privacy fence last year!
Things to remember -
-Call before you dig
-Even if you call, you'll probably still find lines that you'll cut. As long as you call, you won't be held liable for them.
-If you're using an auger to dig the holes, having a second person to hold it is helpful because it's a pretty strong machine.
-Digging holes yourself with a shovel & post-hole digger isn't that bad, but takes a lot longer.
-If you use concrete for your posts, make sure it bows out at the bottom of the hole. If not, your posts can sink over time because it looks like a carrot in the ground.
-Don't make your gates too big unless you have good support. I made this mistake and it sags pretty badly.
-Nail guns are awesome. If you have access to one or can rent one, TOTALLY do it. It saved me a ton of time putting the pickets up.
-If you're doing wood pickets, let them breathe for about 3 months or so after you put up the fence, THEN stain them.

Hope that helps! Good luck!
 

Dalek

Member
I really need to reprint my kitchen cabinets. I've never painted before-is this something I can easily do? Or am I going to get in over my head?
 

Wreav

Banned
Ana White already in the OP? Good man!

Made this Ana bookshelf for my son's room with very little experience. Used a Kreg Jig for the first time, which made it pretty damn foolproof!

bookshelf13-1024x768.jpg


I'm putting in some raised garden beds this weekend in my backyard. Anyone have any raised bed tips?

Will post pictures once it's done.

We did 4ft square with untreated cedar boards. Took about half an hour to build, and just set it right on the lawn, no post holes or anything. It's been great!
 
I really need to reprint my kitchen cabinets. I've never painted before-is this something I can easily do? Or am I going to get in over my head?

You can totally do it! I've actually looked in to this a bit.
Some of the things you really need to ask:
-Are these wood cabinets?
-What color do I want them?
Those will impact the process.

You'll need to remove the cabinet doors, then all the hardware.
If it's real wood and stained, you'll need to give it a good sanding before you stain & finish it. This part sucks and will take a long time, but it's all uphill from there.
From there you should have a blank sheet. If you want to stain it, use some wood conditioner first, then put a few coats of stain, then a few coats of poly on it. If you're painting, make sure you prime it, then paint it the color of your choosing.

Anyone with more experience can correct me if I'm wrong, but that's the gist I get.

Here's a good link to get you started.
http://www.diynetwork.com/how-to/sk...try-and-woodworking/painting-kitchen-cabinets
 
Ana White already in the OP? Good man!

Made this Ana bookshelf for my son's room with very little experience. Used a Kreg Jig for the first time, which made it pretty damn foolproof!

bookshelf13-1024x768.jpg


We did 4ft square with untreated cedar boards. Took about half an hour to build, and just set it right on the lawn, no post holes or anything. It's been great!

Oh sweet! Did you use anything as a weed/grass barrier? I have 1 of 3 built so far using leftover cedar pickets/2x4s from last year's fence venture, and will put some wood mulch around it, but I don't know what to do to keep all the weeds from popping up. I heard newspaper works? Idk.

What did you use for soil, too? Or am I looking too much into this lol.

Also, +1 on the build. That looks like one of those 6-cube things you can buy for $40 at Target, except yours has significantly higher quality and looks way cooler. I've been thinking about investing in a Kreg Jig, but I just haven't taken the plunge yet.

Yeah they are wood but not high quality.

Gotcha. If they are full wood, the major step after taking the doors and hardware off is sanding it down. This part is really not fun. If you have or know anyone that has an orbital sander, that would be insanely valuable for this. You need to sand it down to its original wood color before you can stain it. It's totally a doable project on your own, though! It's just going to take some time. It'll probably take you a whole weekend to sand, then another week or two to finish it.
 

Wreav

Banned
Oh sweet! Did you use anything as a weed/grass barrier? I have 1 of 3 built so far using leftover cedar pickets/2x4s from last year's fence venture, and will put some wood mulch around it, but I don't know what to do to keep all the weeds from popping up. I heard newspaper works? Idk.

What did you use for soil, too? Or am I looking too much into this lol.

Didn't do a weed barrier, just tilled up what little grass was already in that area and discarded. Put about 2 feet of mixed of topsoil/vermiculite/peat moss (had to buy separately and mix ourselves). Killing any ants in the area with diatomaceous earth, since we have a kiddo and indoor/outdoor cats.
 
Didn't do a weed barrier, just tilled up what little grass was already in that area and discarded. Put about 2 feet of mixed of topsoil/vermiculite/peat moss (had to buy separately and mix ourselves). Killing any ants in the area with diatomaceous earth, since we have a kiddo and indoor/outdoor cats.

Gotcha. My whole yard is grass-a-plenty, so I'm looking at the best ways to keep it down where I'm doing this. I have some of that black weed barrier, but I keep reading about how bad it is, so I think I'm going to use newspaper and cardboard.

Also, good advice on the soil! I've never had much of a green thumb, so I'll follow your advice on it.
 
Cool thread considering what I am knee-deep into at the moment. I'll get some pics and project deets up tonight after the sun sets.
 
Currently finishing my basement for my mother in law. I'm doing almost all of it myself with the exception of electrical and some natural gas lines.

So far, I've only framed my basement about 2/3rds the way so not a whole lot to show yet. But after finishing my soffits, I felt the desire to share what I've done so far and maybe keep me motivated.

Anyways, here are some pics and a video of my progress.

Brought equipment down:
IMG_0021.JPG


Cat6 connections: Loved these BELDEN connectors:
IMG_0050.JPG


IMG_0273.JPG


IMG_0277.JPG


Soffit height:
IMG_0280.JPG


IMG_0291.JPG


IMG_0299.JPG


IMG_0302.JPG

Video

Will post more as I progress, please feel free to add suggestions.
 
Cool thread. I've been married to a remodel for the last two months. I've done everything but the cabinets. That includes electrical (added downlighting and pulled three new circuits to the kitchen), plumbing, moving a gas line, tiling, removing popcorn ceilings and more. I also contracted out the ceiling texture. I will try and update with pictures shortly.

Edit: I'm going to try and build a planter box for my wife with some of the block I demo'ed earlier in the remodel.

Edit: I'm doing crown on a vulted ceiling this weekend.
 
Cool thread. I was briefly toying with the idea of making a small wooden stand for my Amiibos... I'm only a little bit embarrassed to say that.

I have zero experience with woodworking of any kind, would a three tiered wooden stand with shallow holes drilled for each Amiibo figurine be too complicated to be my starter project. I have access to most woodworking tools, but I'd need to learn how to use them.
 
Currently finishing my basement for my mother in law. I'm doing almost all of it myself with the exception of electrical and some natural gas lines.

Oh man, good stuff! My dad and I remodelled his basement about 10 years ago or so, and did some of the same things. I gotta tell ya - I'm not a drywall fan lol. When you get to that point, I do not envy you.
Also, putting Cat5 in all rooms is pretty much instant resale value. I don't know if they'll want to sell any time soon, but you just really helped seal the deal.
(Also, if you could, when you add photos, post them on a later page. I don't want to scare off any new readers by having a wall of pictures on the first page!)

I'm in an issue now where I can't do TOO much awesome stuff to my house, because it would price us out of our [starter] neighborhood when we go to sell in a few years

Cool thread. I was briefly toying with the idea of making a small wooden stand for my Amiibos... I'm only a little bit embarrassed to say that.

I have zero experience with woodworking of any kind, would a three tiered wooden stand with shallow holes drilled for each Amiibo figurine be too complicated to be my starter project. I have access to most woodworking tools, but I'd need to learn how to use them.

Naw dude, that wouldn't be too hard at all!. The main thing is to draw it out first, even if it's a very basic and crappy drawing. It helps to get what's on your mind on paper - it's good for the building process to know what goes where and when to build it.
I'd say the best way to make the circle hole for the amiibo would be to find the diameter of the base, and then find one of these kinds of drill bits that's just a bit larger:
how-to-drill-a-cabinet-access-hole-10.jpg

Mark on the bit with tape how far into the wood you want it to go; that way you have a consistent stopping point throughout the whole project for how deep it is.
Another option for the holes is to use 2 pieces of wood of the same size, but drill the hole all the way through one, like below: (pardon my crappy Paint skills)

Untitled_zps4wrlk2qs.png


You'd then glue the boards together. I hope that made sense XD sometimes it's hard to explain without drawing it out.
 
Here's some ... I'll have to upload the bathroom ones and more of the greatroom once it's all done. The bathroom tile looks slick. Mounting 2x1 tiles at first seems easy but it's hard unless the shower wall is perfectly level. Which it was NOT. lol

Pulling three new circuits through the attic sucked BTW. So did adding down lights. I'm glad I grew up with an electrician father though. I can do and am not scared by electrical which most people are.

Holy cow, that's a nice place! I LOVE the brick in the first photo!

In regards to things being "perfectly level," I got some great advice from my late grandfather who was a carpenter and built many houses:
When you're building a house, things will go wrong. You try to make things level, but it doesn't always happen because of many other factors. The goal is to make it LOOK level. If you have a room where everything looks fine, and then you hang something that should be level according to all your tools, but just looks off to the rest of the house - just make it look good.
I know it's kinda shoddy advice, but you can't really change the foundation of your house without massive overhauls that you most likely can't do yourself and requires a contractor and a crew. So sometimes it's good to just... go with it.

Also, electrical stuff still kind of scares me. I have had very little experience with it. I'm hoping to hang a new light in a dark hall sometime in the next couple years, but I'm pretty sure I'll need some help from outside sources since I have NO CLUE what I'm doing, and my attic is really hard to navigate through.
 
Adding one light to a hall is easy. As long as you have attic space. If not you're chopping walls. I can help you if you have questions.

We actually built out studs to a level surface for mounting Duroc and then tried to further level the Duroc using thin set. It was still out of square. We did a good job, but it becomes more difficult if you have high and low spots of thin set on a tile.

That brick wall was demo'ed first thing. It was 8' tall and really closes the space. Tearing it down opened the space up. This pictures are from almost the se vantage point.

Edit: taking off popcorn ceiling is aweful lol
 
That brick wall was demo'ed first thing. It was 8' tall and really closes the space. Tearing it down opened the space up. This pictures are from almost the se vantage point.

Oh, ha, I misinterpreted what it was you were doing to the place. I thought that was something you added to the house XD. I could see how it would open everything up, though.
 
Naw dude, that wouldn't be too hard at all!. The main thing is to draw it out first, even if it's a very basic and crappy drawing. It helps to get what's on your mind on paper - it's good for the building process to know what goes where and when to build it.
I'd say the best way to make the circle hole for the amiibo would be to find the diameter of the base, and then find one of these kinds of drill bits that's just a bit larger:
how-to-drill-a-cabinet-access-hole-10.jpg

Mark on the bit with tape how far into the wood you want it to go; that way you have a consistent stopping point throughout the whole project for how deep it is.
Another option for the holes is to use 2 pieces of wood of the same size, but drill the hole all the way through one, like below: (pardon my crappy Paint skills)

Untitled_zps4wrlk2qs.png


You'd then glue the boards together. I hope that made sense XD sometimes it's hard to explain without drawing it out.

Thanks for the encouragement and tips... did a little searching and found this

http://imgur.com/gallery/P68cT/new

Pretty much exactly what I was going for, but I like your idea of horizontal boards instead of vertical blocks, are there cons I'm not thinking of though?

Also, absolutely horrified to be asking about a tiny trophy stand when I'm surrounded by pics of these full on remodels...

Oh man, don't be horrified! These smaller projects are nothing to sneeze at, and are insanely fun. I personally prefer them, because they're usually things you want to do instead of things you have to do.

Those plans you posted are cool! I don't exactly know where you'll find 4 1/4" x 2 3/4" wood for the back tier, but you may be able to jury rig something to work with it. Something like this (side view):

2_zpszzx2vkjp.png


Doing it this way, you can easily just get a 4- or 6-foot board of Oak or Mahogany from Menards for ~$15 - $30 (depending on where you live), and cut them to length.

Looks like, for the holes, he used my first method of drilling a certain depth with one of those special drill bits (you can tell by the tiny hole in the middle), which is apparently 2".

Totally bookmarking that link you sent, btw. I have a buddy that has a ton of amiibos, and this would make for a great birthday gift.
 
I'm just gonna say that in DIY, it's extremely important to have the correct tools. That trophy stand would be easier if you had a table saw.

How are you planning on drilling out the countersunk holes for your trophies?

Have you considered building this out of ply and making a hollow box?

Using a butterfly bit seems really innacurate without a drill press.
 

Linkhero1

Member
I like this thread. I'm pretty terrible at DIY stuff but I've had a few instances where I was successful.

The one I'm most proud of is replacing my car dash stepper motors. The stepper motors of my car dash were non-functional due to manufacturer going for cheap stepper motors with a short life-span. Basically, I didn't know how much fuel was in my car or how fast I was going at times since the motors would randomly stop functioning. I ended up following a step by step guide with no pictures to remove my dashboard, remove the circuit boards, desolder the broken stepper motors, solder new stepper motors, run a few tests, and put everything back together. I tend to break stuff whenever I try to fix it so I was pretty proud of myself. Saved myself anywhere from $500-1000. The replacement stepper motors cost me about $20.
 
I'm just gonna say that in DIY, it's extremely important to have the correct tools. That trophy stand would be easier if you had a table saw.

How are you planning on drilling out the countersunk holes for your trophies?

Have you considered building this out of ply and making a hollow box?

Using a butterfly bit seems really innacurate without a drill press.

I've considered nothing but what's been posted here and in that imgur guide.

I've got access to a table saw.
 
I've considered nothing but what's been posted here and in that imgur guide.

I've got access to a table saw.

It's pretty easy with a table saw. A hollow box might be cheaper and easier to find materials, but it's probably not easier to build. A box would require multiple joints, a ton of cuts and probably a lot of prep for finish.

This is the type of board you will want to buy.

http://www.homedepot.com/p/Unbrande...ressure-Treated-Pine-Lumber-6320254/100053994

You may have to go to a lumber place and select something of nicer quality. A higher grade lumber will have more rings, less knots and such. You might want to try a different wood too. Like Walnut or Cherry. These will stain nicer and look richer.

The piece should be easy to cut with a table saw and a miter saw. Cut three pieces at 15' lengths on the chop saw. Make sure they are exact. If they're not, you'll have sanding to do on the sides. You'll want to take note of the saw blade. It takes away material as well so you don't put the blade on the center of your measurement. You'll end up short by half the length of the blade. You'll want to run the side of the blade up to your mark.

With 3 pieces of 6" x 15" block you can start to use the table saw and cut the length of the block to get your exact pieces. With a 10' board to start you should have enough material to make two of these things so don't worry about fucking up. You have spare material.

The directions on cutting the holes are pretty good on that site. They use a butterfly bit. If you don't have a drill press, you'll want to hold this bit as level as humanly possible when drilling out the holes. There's the risk of slightly tilted trophies otherwise. I would also mark the side of the drill but with a permanent sharpie or something. That way you know when you've reached your desired depth.

He just says "glue together". You'll want some larger C-Clamps here. I'm assuming you have access to a table saw you should probably have access to some clamps. I would sand the wood before gluing together BTW. Once it's together it will be more difficult to sand near inside corners.
 
Oh man, good stuff! My dad and I remodelled his basement about 10 years ago or so, and did some of the same things. I gotta tell ya - I'm not a drywall fan lol. When you get to that point, I do not envy you.
Also, putting Cat5 in all rooms is pretty much instant resale value. I don't know if they'll want to sell any time soon, but you just really helped seal the deal.
(Also, if you could, when you add photos, post them on a later page. I don't want to scare off any new readers by having a wall of pictures on the first page!)

I'm in an issue now where I can't do TOO much awesome stuff to my house, because it would price us out of our [starter] neighborhood when we go to sell in a few years

My bad.

Yes, drywall is my other concern as well. I think I can handle hanging it and first coat but I think I want to get someone in to do the final coats, I'll probably make decide when I get to that point though.
 
My bad.

Yes, drywall is my other concern as well. I think I can handle hanging it and first coat but I think I want to get someone in to do the final coats, I'll probably make decide when I get to that point though.

Ha, no problem man! You didn't have to take off that many. I was just afraid you were going to add more as time went on, which might have gotten a little overkill. It's all good.

Yeah, drywall is no fun. You will probably need 1 other person (at least) to help you with it, since it's a lot of "holding up large pieces while other stuff happens."

I'll put them back up on a different page. I totally get it, I just got a little excited :)

I'm debating on purchasing a drywal lift. I've been watching this guy. Guy is such a good teacher, so thorough. I love youtube for DIY stuff.
 

nicoga3000

Saint Nic
Oh cool, I just built a privacy fence last year!
Things to remember -
-Call before you dig
-Even if you call, you'll probably still find lines that you'll cut. As long as you call, you won't be held liable for them.
-If you're using an auger to dig the holes, having a second person to hold it is helpful because it's a pretty strong machine.
-Digging holes yourself with a shovel & post-hole digger isn't that bad, but takes a lot longer.
-If you use concrete for your posts, make sure it bows out at the bottom of the hole. If not, your posts can sink over time because it looks like a carrot in the ground.
-Don't make your gates too big unless you have good support. I made this mistake and it sags pretty badly.
-Nail guns are awesome. If you have access to one or can rent one, TOTALLY do it. It saved me a ton of time putting the pickets up.
-If you're doing wood pickets, let them breathe for about 3 months or so after you put up the fence, THEN stain them.

Hope that helps! Good luck!

Thanks for the tips.

We're actually using screws for the posts so that we can remove them later in case they need replacing. And because we have an irrigation system, we have to use a post-hole digger...Gotta hand dig where the posts will go for the first 12" or so to make sure we don't hit the lines. It's annoying, but it is what it is.

Permit application has been submitted, so it's just a matter of time before we go spend $1500 on material, haha.
 

mrklaw

MrArseFace
Tips for downlighters in the roof space? We have 10-12 in our bathrooms and they have space around them in the loft - so insulation pulled back etc so there is no fire risk. But this leaves them open to the loft space, and now they all have dead wasps visible where they've crawled in for the light-heat ND died.

How can I stop them getting in while making sure the lights are not a fire hazard? bonus points for any tips on how I'll change the lights without dead wasps raining on me?
 

Red

Member
Just got a house and doing lots of improvements. Biggest challenge may be properly staining the basement concrete. Never done that before, and after pulling the carpet up found it needed some serious prep:


Hope I'll have some good after pics.
 

Xero

Member
im in the last year of my plumbing training but i live in an apartment. However I can share some tips for plumbing.
 

GhaleonEB

Member
Suggestions for covering up tiny dry wall holes (less than an inch in diameter)?

Spackle, fill it a touch proud, then sand it down when dry.

So last year I built this shed, 10x12 with a small porch on the back. It's tiny, but big enough to store our bikes, garden tools and give me a workshop just big enough to work in. A few projects since then:

Pull outs for the pots and pans cabinet:

CARQQ9xUsAIeWNL.jpg


And under the sink:

CCxlp1eUUAAGiIY.jpg


Made cabinets in the pantry, a loft bed for my daughter, a bookcase that fit under one end of it, and a few other small projects. Next month we tear down and rebuilt the deck out back. Fun stuff.

Two Youtube channels I suggest:

House Improvements is by Shannon, a Canadian general contractor who goes into a lot of detail on how to do various DIY home improvement. Much more detailed and thoughtful than most out there. Plus, he's super since since he's Canadian.

I also like Jon Peters, for his furniture and home improvement projects.

Subscribing he hell out of this thread.
 

mrklaw

MrArseFace
I like how a 10x12 shed is tiny. In the UK the average size is probably 6x4 - just big enough for your tools and shit. I have an 8x6 and that is considered large. Yours would sell as a 1 bed studio flat in central London :)
 

GhaleonEB

Member
I like how a 10x12 shed is tiny. In the UK the average size is probably 6x4 - just big enough for your tools and shit. I have an 8x6 and that is considered large. Yours would sell as a 1 bed studio flat in central London :)

Yeah, I should rephrase: it's a good sized shed. It's just small for a workshop. :)
 

Rorsach

Member
I fucking hate DIY but i can't get away from it. Too expensive to let someone else do it.

My big jobs so far (some with help of my father, who has been a classic carpenter all of his life):

Built a 3 meter brick extension to the living room, with slanted windows.
Extended and replaced the kitchen
Built a loft-extension across the entire house
Replaced the stupid spiral staircase with a straight hardwood one
Rewired half the house
Put in a couple of walls in the loft to create an extra bedroom
Placed wood flooring all through the house.

Jobs to do in the next couple of months:

Replace all wooden single pane windows with modern double-pane insulated ones
Replace all wood siding with Rockwool lines
Replace the insulation behing the siding
Move an inner brick wall on the first floor to make two identical sleeping rooms,. instead of a big one and a small one.

Things that need to be done next year:

New bathroom.

Bleurgh....
 

VanWinkle

Member
Spackle, fill it a touch proud, then sand it down when dry.

So last year I built this shed, 10x12 with a small porch on the back. It's tiny, but big enough to store our bikes, garden tools and give me a workshop just big enough to work in. A few projects since then:

Pull outs for the pots and pans cabinet:

CARQQ9xUsAIeWNL.jpg


And under the sink:

CCxlp1eUUAAGiIY.jpg


Made cabinets in the pantry, a loft bed for my daughter, a bookcase that fit under one end of it, and a few other small projects. Next month we tear down and rebuilt the deck out back. Fun stuff.

Two Youtube channels I suggest:

House Improvements is by Shannon, a Canadian general contractor who goes into a lot of detail on how to do various DIY home improvement. Much more detailed and thoughtful than most out there. Plus, he's super since since he's Canadian.

I also like Jon Peters, for his furniture and home improvement projects.

Subscribing he hell out of this thread.

Man, I love that shed! Just went through the album and I'm so impressed with your craftsmanship. I have been heavily contemplating building one around that size, but it's a big project. I think it's the roof I'm most worried about. There's a lot going on with that aspect of the building.

Also like those drawers. I'm building an under-cabinet drawer that can hold a small trash can, because our other one is in our utility room, and it's kind of a pain to walk over there every time I throw something away.
 
Top Bottom