• Hey, guest user. Hope you're enjoying NeoGAF! Have you considered registering for an account? Come join us and add your take to the daily discourse.

Show off your homemade consoles/arcade cabinets!

storafötter;171661684 said:
Pretty much. It is a dream to be able to do this type of work but I am way too afraid to even try. The Raspberry 2 could be fun to experiment with.

Pi is a great place to start. I used one to make a media server that sits in a shoebox under the stairs. Costs very little, there's tons of documentation and advice on the internet and its easy enough to work with. I'd only rarely worked with Linux or used the command line before and I found it fairly easy and very enjoyable.

Haven't done the retro-gaming thing with it yet but its seems to be incredibly capable all the way up to PS1. Plus, that SNES from the OP. Holy. Fuck!
 

Codiox

Member
All these great things fill my retroheart with joy. Awesome work guys. Rich, the SNES looks like a SNES on steroids, fucking awesome!
 
Pi is a great place to start. I used one to make a media server that sits in a shoebox under the stairs. Costs very little, there's tons of documentation and advice on the internet and its easy enough to work with. I'd only rarely worked with Linux or used the command line before and I found it fairly easy and very enjoyable.

Haven't done the retro-gaming thing with it yet but its seems to be incredibly capable all the way up to PS1. Plus, that SNES from the OP. Holy. Fuck!

Thanks for the tip! had to laugh at the shoebox but thats brilliant honestly. Yeah the snes one is pretty tempting or with an NES. My NES is pretty gutted so it would be nice to use its shell for something fun.
 

anx10us

Banned
Hey, I've got a Pi running Mame and a couple of Arcade sticks. Any pointers as to where I can find some plans to build a cabinet?

Loads of plans here, http://jakobud.com/plan-list.php I used the Donkey Kong Jr ones to build my Fix It Felix Jr, you need to be able to print at 1:1, buy some MDF sheets, in my case two 1.2Mx2.4M sheets, grab a long ruler, pencil jigsaw, sander, screws and a bit of improvisation.

As long as you have basic wood working skills, cutting in a straight line, cutting a curve with a jigsaw, using a drill to drive screws its reasonably easy with a bit of patience..
 

Lettuce

Member
Bought this Taito Egrets II as just a rust old shell (no monitor, sticks, buttons or harnesses) and refurbed it with a new colour scheme....

qIIga7R.jpg
6t50k5F.jpg
a1X0fc3.jpg
Q9Xp5LP.jpg

and my PinCab......


...which i hardly ever play :(

and the very first cab i ever built....


And finally not an actual cab but i think is cool anyways....


anx10us

Banned
Bought this Taito Egrets II as just a rust old shell (no monitor, sticks, buttons or harnesses) and refurbed it with a new colour scheme....

and my PinCab......

...which i hardly ever play :(

I'm glad you saved an Egret2, not really convinced by the colour scheme though, I have an original in white, but each to their own I guess.

How does the PinCab play, I have an Addams Family original but have wondered about building a virtual pin

Do the coin slots actually function or are they merely for show?

I would assume they do, its pretty easy to hook the coin slot up to an original jamma board or a PC playing Mame, its as simple as the coon slot sending a signal for each credit which is then converted to a key press (5 in Mame) to add coins. Gives a proper Arcade like experience ..
 

Lettuce

Member
and last weekend this (work in progress)
tkp0cpH.jpg

Ah nice, thats going to be my next project, i think there called Lowboys and are mainly used in Australia...there like half the height of a normal cab with the monitor as a look down onto angle. What size monitor is that and how have you gone about securing it in the cab please?

I'm glad you saved an Egret2, not really convinced by the colour scheme though, I have an original in white, but each to their own I guess.

How does the PinCab play, I have an Addams Family original but have wondered about building a virtual pin.

Yeah plays good will be even better when Pinball Arcade gets their cab build released...obviously cant compare to the real thing but needs alot less maintenance and you can have 60+ real life tables in 1 cab
 
storafötter;171663850 said:
Thanks for the tip! had to laugh at the shoebox but thats brilliant honestly. Yeah the snes one is pretty tempting or with an NES. My NES is pretty gutted so it would be nice to use its shell for something fun.

Here's my shoebox "masterpiece":

drpStjQ.jpg


ZI8RG1V.jpg
 
Haha

Amazing. No ones gonna steal that, that's for sure.

British engineering at its finest. But really, what software setup do you use? That's my next project.

Running Raspbian, with 2 external HDDs (total of 3tb). Mounted the HDDs as windows SMB shares. I have a Mac Mini in the living room running Kodi which can then easily pick up the drives on my network. Same goes for any other devices (laptop, tablets etc). The SMB share makes it easy to manage files etc from my laptop as well, given that the Pi is headless. the guide I used mainly is here: http://www.raspipress.com/2013/05/turn-a-raspberry-pi-into-a-nas-network-attached-storage-server/, it was generally pretty straightforward.

BTW the drives and the RPi are sitting in the shoebox on a stand made of Lego. Proper homemade cobble!

those ventilation holes are pretty much useless

I guess, but they make me feel better about it being in a shoebox. And so far its been running for months, 24/7 without any heat issues. So even if they don't do anything major, they haven't done any harm either.
 
Hopefully the bump from the dead is appreciated, this is a cross post from the Retropie thread, thanks to Rick I got the inspiration to copy/recreate his idea, looks like a SNES but it has HDMI, WIFI, USB power and can use a wireless xbox360 controller, pictures below .. also plays everything from N64, Genesis, SNES, c64, Spectrum to NeoGeo and MAME ..

I love this idea. Really cool way to do it.
 
Ah nice, thats going to be my next project, i think there called Lowboys and are mainly used in Australia...there like half the height of a normal cab with the monitor as a look down onto angle. What size monitor is that and how have you gone about securing it in the cab please?


Yeah plays good will be even better when Pinball Arcade gets their cab build released...obviously cant compare to the real thing but needs alot less maintenance and you can have 60+ real life tables in 1 cab

the monitor is 17 inch and just put 2 wood holders in the back and then some screws in the front troughth the plastic and thats it,

i make arcades on demand here in my city and last week i made this.
m225GgS.jpg

17 inch lcd monitor, advmame with 400 games selected, its really easy just put games but my idea is put the best of the best.

now im making another, people like this new model desing by me because the size is perfect to move and light.
j8XEJ2N.jpg
 

playXray

Member
Don't need a controlblock unless you are using wired real pads.

OK Rich, I've finally got all the parts I need!

Can you give me a rough list of what you did in what order?

At first glance I'm looking at:

1) Get RetroPi from website
2) Write it onto 16GB SD card
3) Get Pi booted up
4) Install Xbox 360 controller
5) Set up Retropie
6) Open SNES chasis
7) Wire up the PowerBlock
8) Set up PowerBlock on Pi (?)
9) Build everything into the case and secure (with duct tape?)
10) Install some games

Does that sound about right? I've some experience using Linux web servers but don't have much experience in Raspbian. Is there anything else I should know?

EDIT: it's OK, I got it all sorted! It was much easier than I expected :)
 

nakedeyes

Banned
So this week I started work on an idea I had in my head for a while - making a games console using a raspberry pi, housed inside a SNES. I managed to pick up a broken SNES for cheap on ebay that was dirty as hell - but cleaned up spectacularly. Using a mishmash of cheap parts, a raspberry pi B 2 and a control board, I did the following:

- added HDMI and USB power ports.
- hooked up the front controller ports to the pi
- set up retropie with 16gb of storage, wifi and bluetooth.
- mounted the pi and controlblock to the inside of the case using some plastic spacers and a little bit of superglue
- hooked up the power button and led. Power switch turns the pi on and shuts it down when switched back.
- a lot of fucking around with the linux shell

Turned out quite well I think:


(ignore the tape - this is an older photo. it's much better organised and secured now)


Plays everything from NES to SNES to GBA and PS1 like a dream. Played some Sonic 2 and Symphony of the Night earlier...on this SNES. Good stuff

right, now show yours. lets see what awesome shit gaf has come up with

Dude, I can't thank you, this thread, and the rest of the people in this thread, enough. I saw your original post on this a while back and decided that I had to give this a try ( I have a friend that is a huge RaspPi proponent, so he helped me take the plunge as well ).

So yeah, I pretty much shamelessly ripped off your project ( and the other similar ones floating around gaf and the net ). I stuffed a RaspPi into Super Famicom case. I had SO much fun doing it. I have probably put around 80 hours into it ( prolly 30% hardware stuff and 70% configuring, setting up, and playing with software ).

Anyways, post coming soon with more details and some pics of my particular build, just cause it seems fun to share, and it seems like a lot of people are doing these types of projects and every little bit of stuff shared helps it seems :)
 

nakedeyes

Banned
Ok, here is a bit more of a detailed post about my Rasp Pi Super Famicom build. I wouldn't say I am finished with it, but it is entirely usable and the only real thing I want to do is some hardware stuff with the power ( which my local Radio Shack is currently out of the bits I need to make happen ).

I made a HUGE evernote document as I went along compiling the ~15 tutorials I needed for all the various things. I may try to compile my own full tutorial at some point with all the info together, but we will have to see how my motivation works out. I learned a lot but I still have a load to learn myself about this stuff.

Ok. ok.. So I started with basically what Rich had, but my personal requirements for mine were:
  • I have a huge collection of PS images ( I legitly had something like 300 PS1 games, and I have archived them all ), and I really wanted to be able to use them. So I needed at least ~600 GB for all the images I wanted on there.
  • Really wanted to be able to use the 8 Bit Do SFC30 controllers, AND a DualShock 4 when I want to for the PS games. Ideally all wireless via bluetooth.
  • Wanted to try and do the hardware bits of hooking the actual power and reset buttons to the pi ( and program scripts for them to do fun things ).. I did this. I originally also wanted to wire up the SFC controller ports to the Pi, but I haven't done this yet, and I think I might end up foregoing this in order to hack some USB ports there on the front.. not sure yet. The SFC30 controllers work so well, I doubt I would ever use them if I went through the trouble of wiring the controller ports up.
  • Wanted to be able to cut the power with the SFC power toggle switch, without just yanking power from the pi, so I hooked up the Mausberry circuits power switch circuit. It was SO easy to use and works perfectly for this project.
  • Wanted to be able to pair all BT controllers without a keyboard, so I wanted to hook it up so that you can tap the Reset Button a certain way to do the pairing sequence.
  • WiFi, Bluetooth, Keyboard, HDD storage, all built in the tiny case.

Here are some pics:
The pretty much finished product. Both 8BitDo SFC30 controllers, the dualshock 4, and the keyboard ( just for when its needed!! which is pretty just emergencies and additions ).
fFQNVB4.jpg
I need to get a couple more bits, so I can build a power terminal in the back, I have an HDMI terminal ready to go, but until the power is ready, this little rear panel is open.
Eeh6vyW.jpg
A Hidden USB cable for charging and wired controller use, just kinda crammed in the cartridge slot. Its actually not too bad, but I am probably going to hook up two USB ports out the front of the controller ports as a 2nd phase.
iROq8Oe.jpg
A glimpse of the inside. The system is upside down here ( so the top of the console is face down on my desk here ). Left to right, you can kind of see:
  • The 640 GB Seagate harddrive.
  • The USB hub sitting right on top, the hub has 4 outlets, 1 to power the Pi, 1 for the HDD, and 2 ( 1 only used currently ) for ancillary USB cable use.
  • The Pi itself. It has 4 USB hubs, which are filled with 1 Wifi adapter, 1 Bluetooth adapter, 1 wireless keyboard proprietary adapter, and 1 USB to go to the HUB devices
  • The GPIO ribbon that comes out of the pi and hooks up to: the power LED, the reset button, and the mausberry power circuit.
GOXG38w.jpg
Inside of case before I gutted it.
zXvVrqN.jpg
Inside the shoebox I was using while I waited a month for the SFC shell. This is the breadboard I used for prototyping, and the button I used to first play around with. ( Really nice button!! Was thinking of mounting on the SFC case for something, but really, the Reset button sequences can do just about everything )
ypyhNPA.jpg
Another pic of the button from the outside
VAi6ABn.jpg

So here is are the parts I ordered for this project:
  • Rasp Pi 2 Starter Kit from amazon ( 79.99$ for me when I got it.. this is the one I purchased ) .
  • Super Famicom case. 26$
  • This Pluggable USB Hub with special extra powering. 16$
  • About 15$ in various buttons and switches that I thought I might put in the thing, but I have yet to use any of them in the actual SFC. Wont count this toward total investment :)
  • 2x 8BitDo SFC30 controllers. 31$ a pop when I got them. They are so excellent!
  • Logitech Wireless USB keyboard / mouse
  • Mausberrycircuits.com power circuit for safe shutting down. 14$
  • 9$ USB Bluetooth 4.0 dongle.
  • 4$ short HDMI extender
  • 4$ security bit to open up the Super Famicom

My approximate total: ~$210.. This includes the 2 bluetooth controllers. I also had a spare 640 GB USB 2.0 small HDD laying around, so I didn't have to buy anything there. Pretty rad!

Here is a hodgepodge of info about features and steps I had to take to put the thing together:
  • Power Switch / Circuit - I soldered up the original power switch from the SFC to the Mausberry Circuits power circuit, then plugged its I/O pins to the right ones on the Pi, then just downloaded their script. I was skeptical about this thing working, but it was probably one of the most painless parts of the whole project. With this thing set up, I can leave the system plugged in to the wall, but only supply power to the Pi itself when the SFC power switch is up. Then, when you switch it off, it signals the Pi to shudown safely, waits until it is ready, then cuts the power to the pi again. Super awesome.
  • Reset Button / Power LED - This was alot of work and was mostly new stuff to me, but it was super fun and I was surprised how well most of this stuff works as long as you are patient and careful with your soldering and take your time with your programming. I had never programmed python, but I am a pretty adapt software engineer, so it picked it up pretty quick. Quickly got a script running that would light up an LED and would take in input from a button. Set this script up as a daemon on the pi so it would run on startup in the background. Wrote a quick library that allows me to set up different pressing sequences to different function callbacks. Hooked that stuff up to the ds4drv driver, and away you go! Then when I got the SFC case, I hooked up the reset button ( had to pry it off the main board ) to my existing setup, paired down the wiring to remove the breadboard ( just plugged alot of things straight in to the ribbon cable ) and set up some sequences with my code to be used with the reset button ( 1 press for exit current game, 2 presses for DS4 pairing, 4 presses for reboot, 1 hold for 5 seconds to just shutdown ). AWESOME!
  • Controllers - Man this took alot of work. Its not too hard to hook a controller or two up over bluetooth. But I had an issue getting TWO of the 8 bit Do controllers to work at the same time due to the kind of unique / weird way they pair with devices. I also had a fucking HELL of a time getting the Dual Shock 4 to pair. Eventually I got it to work with the "ds4drv" driver that is floating around. The 8 Bit do controllers are remembered by the system, and can pair by simply turning them on at this point ( about 1 in 20 times it kinda doesn't work and I have to force the system to forget and repair the device and Im golden. Ill hook up a reset button press sequence to this at some point ). Then if I choose to use the DS4, I just tap the Reset button twice while the controller is discoverable and it does the rest for me.
  • USB HDD - Had to just setup retropie to pull the PSX, N64, GBA, and NeoGeo roms off of the HDD, the SNES, NES, Atari, Genesis, and Master System Roms live on the internal 8GB microSD card ( which is left about half empty for save game space )
  • Retropie Software / Linux setup - Man, just be ready to spend at least twice as much time as you are guessing setting up Retropie and the Pi itself. I am a computer scientist and big boy programmer for a living, with hundreds of hours of linux experience from college ( but its not my main platform ), and this took me FOREVER! Not trying to toot my own horn, just saying, its a fair amount of trial and error and googling around even if you are a computer pro. Maybe if you are a linux and python pro, this will all be a cakewalk, I dunno. I also spent a LOAD of time making sure my "scraping" went well for my ROMs ( where it searches the internet for cover pics / info of your roms ).. with something like 4000 total ROMs on the platforms, even the quick script based solutions took forever, and then I kinda went over them by hand after.

Anyways, I think I am going to do a quick tour and throw up a youtube video at some point. Thanks again to Rich for the inspiration and NeoGAF at large for being the best!
 

Thorwor

Neo Member
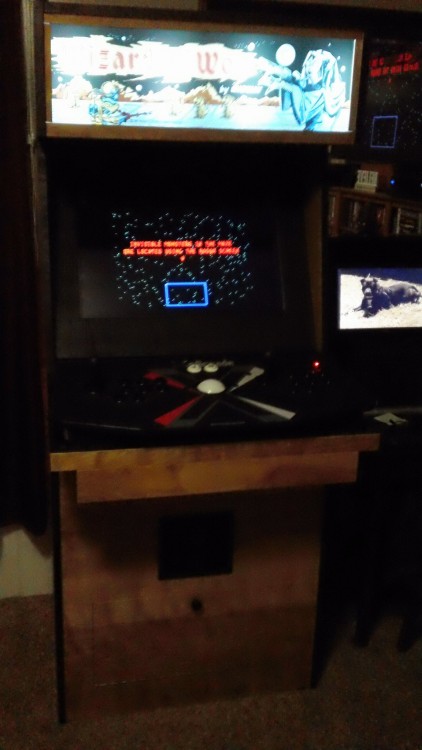
I just finished my dream arcade cabinet. It includes Wi-Fi, Bluetooth and a Lan port for online competition as well
aa4d2411bc5348f5c5564661d437274b.jpg
16f57e6c667218e3a6eab36d530a2dee.jpg
ae0e747d19eda647b84989a9f7679a0b.jpg
4fe68a3f255526d3f78546c2eebc549f.jpg
as an HDMI output to put it on the big screen if desired. I used an X-Arcade Tankstick for the controls and Recalbox for the front end.
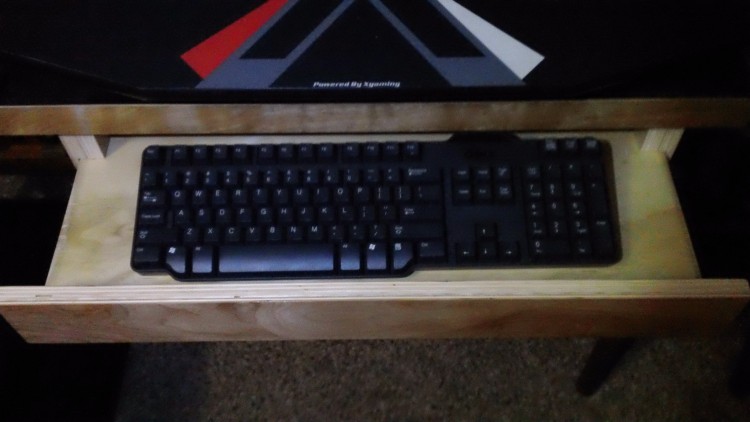
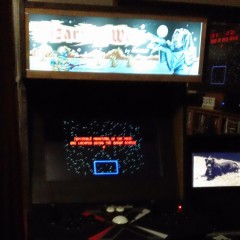
I used a Wizard or Wor marquee (one of my all-time favorites) but added a hindged door above it for quick change as well as access to the LED lighting. There is another access door behind the controls to access the USB hub for changing over to usb controllers if desired for the many console emulators it has. There is also a lower storage compartment for storing the console controllers, owners manual, etc.
Sound controls are on the back and include volume, treble and bass adjustments. Yes, there's a subwoofer in there for sound that really thumps!
The coin door in non-functional, but has a lighted simulated coin slot and return. I opens to reveal additional storage for the lighting remotes (front & back) as well as the RF power on/off remote. Notice that the coin door lock is missing... it should arrive by Saturday according to tracking but is actually a power on/off switch disguised as a lock. It turned out exactly like I pictured it in my head.
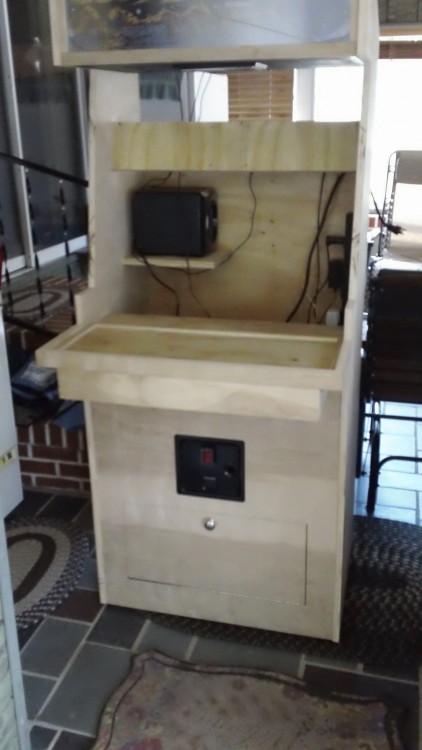
The cab is made from high-end birch plywood with a gloss lacquer finish to bring out the grain. It's going in my living room so I wanted it to look like a piece of fine furniture rather than a toy. It took five days to complete the cabinet and about two solid weeks to set up the emulators and download over 100,000 rom files. I'm pretty happy with it.
 

Thorwor

Neo Member
So this week I started work on an idea I had in my head for a while - making a games console using a raspberry pi, housed inside a SNES. I managed to pick up a broken SNES for cheap on ebay that was dirty as hell - but cleaned up spectacularly. Using a mishmash of cheap parts, a raspberry pi B 2 and a control board, I did the following:

- added HDMI and USB power ports.
- hooked up the front controller ports to the pi
- set up retropie with 16gb of storage, wifi and bluetooth.
- mounted the pi and controlblock to the inside of the case using some plastic spacers and a little bit of superglue
- hooked up the power button and led. Power switch turns the pi on and shuts it down when switched back.
- a lot of fucking around with the linux shell

Turned out quite well I think:


(ignore the tape - this is an older photo. it's much better organised and secured now)


Plays everything from NES to SNES to GBA and PS1 like a dream. Played some Sonic 2 and Symphony of the Night earlier...on this SNES. Good stuff

right, now show yours. lets see what awesome shit gaf has come up with
That's really cool. The tiny size of the pi makes it so versitle. I put one in a full size cab for my first build, but my next one will be something much smaller. If I can find an old Commodore Vic 20, I think it would be perfect for the project!
 
Top Bottom