-
Hey Guest. Check out your NeoGAF Wrapped 2025 results here!
You are using an out of date browser. It may not display this or other websites correctly.
You should upgrade or use an alternative browser.
You should upgrade or use an alternative browser.
NeoGAF Learns to cook - Let's share recipes!
- Thread starter Go_Ly_Dow
- Start date
- Status
- Not open for further replies.
here's some of the old onkelC cooking threads:
http://www.neogaf.com/forum/showthread.php?t=114208
http://www.neogaf.com/forum/showthread.php?t=122952
http://www.neogaf.com/forum/showthread.php?t=114208
http://www.neogaf.com/forum/showthread.php?t=122952
phillipgessert
Member
Uhh... When you guys say heat the oil, how long for? Since there is no time listed.
Also subbing to this thread. I'm not just looking for things to learn to cook but also new food to try")
It will usually shimmer when heated, if you roll it around in the pan it makes that shimmer a little more obvious.
The Librarian
Banned
Subbed. Good idea for a thread!
SneakySneaks
Member
First off, an easy gravy recipe for those who want to make a dish that doesn't have enough fat for a proper gravy.
You need Beef Tallow (or Suet), bullion cubes (or better than bullion paste), flour, beef stock, black pepper and salt. Optional: Red Wine + Personal Taste seasonings.
Put some beef tallow in pot on medium low heat, amount doesn't matter, only rendered fat does. When you have about 1/4 cup of liquid fat pour take out the cracklins'.
Turn the heat to medium and add a max of 1/4 cup flour. I use 1TBS at a time. Add until your flour/fat mix is a nice paste. Brown the paste for a bit.
When the paste is a golden color add the beef stock and whisk until incorporated. Then add a bullion cube or two (depends on personal preference, start with one).
When that is incorporated add pepper, salt and red wine to taste.
There you go a simple gravy for roast beef, potatoes or poutine.
Recipe 2: New England Style Roast Beef
For Roast
Eye Roast: Try not to get one with the Tendon in the middle.
Olive Oil
4+ Carrots
4+ Garlic Cloves
Beef Tallow
1 Onion
3 Sticks Celery
1 Jalapeno
For RUB:
Whole Coriander
Mustard Seeds
Juniper Berries
Black (or Mixed) Peppercorns
Garlic Cloves
Salt
How:
1) Make a mirepoix with the carrots, celery, onion, garlic, tallow and jalapeno. Roast at 400 for 30 minutes or more depending on flavor profile preferred. The more “burnt” the veggies the deeper the flavor.
2) For roast preheat oven to 200.
3) Toast the spices in a dry pan until fragrant then mix the rub in a blender. Cover the roast in olive oil and put the rub all over it.
4) Put the roast on top of the mirepoix and cook until the internal temp is 134.
5) When done, rest the roast and de-glaze the pan with red wine or beef stock.
6) Strain the mirepoix into a pot, use this as an au-jus for dipping.
You want this at medium-rare at most. If you cook this over 140 I will email a picture of me angrily glaring at you.
Not really, but please this is supposed to be on the rare side so do not overcook this
Great thread, been just throwing food into my cast iron and been very satisfied with most of the results. Anyone have some tips or recipes for some good ol' dutch oven cast iron cooking would be greatly appreciated.
You using a cast iron skillet or just dutch oven? Cast iron is an amazing cooking device and I do all non-saucepan stovetop cooking in there.
Uncle Pickman's Everything But Red Meat Marinade
1/4 cup olive oil
1/2 tablespoon soy sauce
1/2 teaspoon paprika
1/4 teaspoon ground red pepper
1/2 teaspoon oregano
1 teaspoon ground mustard
1/4 teaspoon coarse sea salt
pinch of black pepper
1 clove minced garlic (remove the green stem from the middle of the clove)
This works great with country style boneless ribs (pork shoulder) and pork tenderloins, and tastes really good on chicken as well.
Also for a bit more work but an awesome result, check out this recipe. I've made these a few times and they're divine.
http://www.foodnetwork.com/recipes/stuffed-pork-chops-recipe1.html
1/4 cup olive oil
1/2 tablespoon soy sauce
1/2 teaspoon paprika
1/4 teaspoon ground red pepper
1/2 teaspoon oregano
1 teaspoon ground mustard
1/4 teaspoon coarse sea salt
pinch of black pepper
1 clove minced garlic (remove the green stem from the middle of the clove)
- Mix all your dry ingredients together and stir them thoroughly.
- Toss them into a 1 gallon ziplock bag, and then pour in the olive oil and the soy sauce.
- Push most of the air out of the bag and then really agitate the shit out of it until all the spices are suspended in the oil.
- Open the bag, insert your meat, and then squeeze all the air out of it again. Massage the meat through the bag in order to get the mix all over it, and then stick it in the fridge for at least an hour, and as long as overnight.
- When you're ready to cook, take your meat out and let it warm up for about 15 to 20 minutes before taking it out of the bag, wiping the excess oil off (I usually grip it through the back and slick it off from there) and then cook it in the pan or roast it in the oven.
This works great with country style boneless ribs (pork shoulder) and pork tenderloins, and tastes really good on chicken as well.
Also for a bit more work but an awesome result, check out this recipe. I've made these a few times and they're divine.
http://www.foodnetwork.com/recipes/stuffed-pork-chops-recipe1.html
Bulbo Urethral Baggins
Banned
1 part coke. 100 parts whiskey.
Set timer for September 1.
Set timer for September 1.
bennywhatever
Member
Perfect Over-Easy Eggs

I started making this a couple years ago trying to imitate eggs I had in a local restaurant in French Lick, IN. It turned out better than the restaurant! My camera sucks so the appearance is kinda janky.
Cost: Very Cheap
Time: 15 minutes
Serves: 1
Skill Level: Beginner/Intermediate
Flavour traits: Tangy sweet, hint of cheesiness
Nutrition notes: Good source of protein
Ingredients
(3) Large Eggs
(2) Tablespoons Oil of choice
(1/4) Cup Water
(2) Tablespoons Parsley
(1/2) Cup thinly sliced Ham
Cheddar Cheese (quantity unimportant)
(1/4) Cup Salsa of choice
Cooking Guide
-In a small saucepan, cook the Ham on Medium/High heat until the corners are crisp.
-Remove the ham onto a plate atop a napkin.
-Crack the eggs and put them in a cup. Do not whisk.
-Put the Oil in the small saucepan, adjust heat to Medium/Low.
-Wait a minute for pan to adjust to the heat and then put the eggs in softly, trying not to pop the yolk.
-After sitting for a minute, add the water.
-Wait 3-4 minutes until the egg whites look edible.
-Add however much Cheddar you want on top depending on how cheesy you want. I use 1/2 cup.
-Add the Ham, spread evenly.
-Add Parsley
-Add & spread Salsa evenly.
-Wait 1 minute for cheese to melt.
Scoop it onto a plate and you're done!

I think this is an absolutely invaluable book for people who want to learn how to cook, but find the whole thing daunting. It's not really a recipe book designed for beginners, but it is a mammoth book and the reason for getting it is that the authors give you their recipes and the REASONS why they choose the ingredients and methods that they do. It makes for an interesting read, plus you'll pick up on the reasons why you wouldn't use eggs to bind in certain situations or use buttermilk instead of normal milk or brine vs. salting, etc.
Edit: I'll attempt to make gamjatang(pork neckbone stew) for my girlfriend this weekend and if it turns out good I'll post the recipe.
bennywhatever
Member
I don't know if any of you have ever poached eggs before, but it's a little bit tougher than any other form of egg-cooking. Here's a guide I use. Poached eggs are freaking amazing.
http://www.thekitchn.com/perfectly-poached-some-tips-an-139882
http://www.thekitchn.com/perfectly-poached-some-tips-an-139882
As someone who very soon is going to start living on their own without knowing how to cook much, I think this can be a very nice thread.
Anyone mind sharing their favorite online sources for recipes that are beginner friendly? Like... step by step or something? Or videos? I don't know. I've tried looking for some while "preparing" but I'm kind of intimidated. What about books, too? My mother can cook but doesn't have a wide range of dishes... actually, it's very much limited lol.
Thanks!
I came up with this sandwich a few months ago and it's stood the test of time as an easy-to-make breakfast. I've gotten a lot better at making it and I'll make a proper step-by-step guide in a few days.
Going to start cooking a lot soon so I'm subscribing.
Going to start cooking a lot soon so I'm subscribing.
bennywhatever
Member
As someone who very soon is going to start living on their own without knowing how to cook much, I think this can be a very nice thread.
Anyone mind sharing their favorite online sources for recipes that are beginner friendly? Like... step by step or something? Or videos? I don't know. I've tried looking for some while "preparing" but I'm kind of intimidated. What about books, too? My mother can cook but doesn't have a wide range of dishes... actually, it's very much limited lol.
Thanks!
We've all gotta learn somewhere, so don't be afraid to screw up a few dishes.
The Betty Crocker site has a lot of good, easy recipes. It's where I got most of mine when I started. Tastewise, they're usually very "down-home cooking" type of stuff, so there may be more butter than you want.
http://www.bettycrocker.com/
Some of the best investments you can make for cooking are:
-A Crockpot. Seriously, this thing is amaaaaaaazing.
-A very nice large pan with a lid.
-A chicken thermometer.
-A few really good knives.
-A cutting board.
-Various spices: Oregano, Parsley, Basil, Thyme, Garlic powder/salt.
Over time, you'll acquire more and more tools for better cooking. The best thing you can do to get cookware is to get married XD
NandyRewman
Member
Homemade Meatballs
Not something very complex, or particularly exciting for that matter, but tasty and filling. No picture at the moment, but I am cooking it later, so if I can make it look presentable, I'll add a few shots.
Cost: not too bad.
Time: 15 min prep, 30 mins to 1 hour cooking.
Serves: 2, though very easy to scale up.
Skill level: low
Flavour: can be quite spicy, depending on how long you leave the chilli in for.
Nutrition notes: can be quite salty, but not too unhealthy.
Ingredients
For the meatballs:
250 grams mince beef
1 egg
Ground nutmeg
Ground cinnamon
Lemon juice
Garlic purée
Salt, preferably Maldon salt
Black pepper
For the sauce:
2×400g tinned plum tomatoes
Red wine vinegar
2 garlic cloves/garlic purée
Fresh chilli
Salt
Pepper
(Optional: I like quite a simple sauce, but feel free to any any herbs you like really. Recommended ones would be basil, rosemary and thyme, but really most things fast nice)
150 - 200 grams dried pasta.
Step 1
Prep the meatballs:
1. Add mince, to mixing bowl. Then add garlic, just a tsp, or more if you like garlic, a tablespoon of lemon juice, a spronling of both the nutmeg and cinnamon, the egg and seasoning.
2. Stir together vigorously, until they can be formed in balls. Size of balls depends on how many you want. I usually go for about 10 balls all together.
3. Cover balls in cling film and place in fridge.
Step 2
Cook the sauce:
1. Add the tomatoes to a sauce pan, put over a medium-low heat.
2. Add whole fresh chilli, jab holes in the side with knife, to tomatoes. Leave for 5 to 10 mins, stirring occasionally.
3. Add garlic. I prefer purée because I'm lazy, but cloves are probably better. Crush cloves and add to sauce, or squeeze in purée to taste. Also add red wine vinegar, a tbsp is fine. Now leave sauce to reduce. Continue to stir occasionally.
4. In a frying pan, drizzle some oil, vegetable or olive, about a tsp, and place in meatballs. Do this before turning heat on to ensure a even cook. Turn heat onto medium.
5. Cook meatballs until outside has browned but inside is still pink. You can check by prodding them gently to see how firm they are. When done, add to sauce but be careful not to add too much of the oil.
6. The waiting game. Continue to cook sauce until it has reduced enough to your likingliking and season to taste. I prefer a very well reduced sauce, so I would leave for about 30 mins. I'd say simmer for at least 10 mins, but after that it's personal preference.
7. Cook pasta in some lightly salted water.
8. When sauce is done, add to drained pasta and enjoy. Serve with warm bread.
GeekyDad
Gold Member
One easy recipe I always like to share is Fettuccine Alfredo, something so many folks seem to think is more complicated than it is and end up opting for that terrible jar stuff at the supermarket. I won't give exact measurements, as I tend to go easy on the butter, but the basics are: heavy whipping cream, butter, salt, lemon juice (fresh), fresh-cracked pepper, salt, and parmesan cheese.
Melt butter (I use about 3 tablespoons) on low heat to clarify. You can saute some garlic if you like in the butter before adding the cream, but it's optional. Add cream (about a cup), lemon juice (about a tablepoon), salt (about two teaspoons -- careful, though, as the parmesan is already salty) and pepper (pinch). Raise heat to medium to get the cream mixture warm, but don't allow it to boil. During that time, be heating your water up for your fettuccine. When you boil your noodles, don't let the water boil at a rage -- just a steady, rolling boil is what you want. Use about a tablespoon of cheap oil in the water to help keep the pasta from sticking (also salt the water for flavor), but you will still need to separate the pasta from time to time. Once your cream mixture is up to a warm temp, lower the heat to low and wait for your pasta to finish cooking (about 13 minutes for dry noodles). Drain pasta, put it back in the pot, and pour the cream mixture over the pasta. Now add about a cup of parmesan and mix.
Done. Takes about 15 minutes to make. It's easy, requires mostly stuff that's cheap and usually kept in most households, and it's damned delicious, not to mention filling. But it's rich, so don't eat too fast. Enjoy your food!
DJ_Lae
Member
I have three or four recipes that I start from this tomato base:
-1 pound ground beef
-1 onion, diced
-1 can (28oz I think) of diced tomatoes. You can use fresh tomatoes but I've done it before and it tastes identical
-1 can tomato paste
For using as a chunky spaghetti sauce or use in lasagna:
-1 can mushrooms, drained (can use fresh but doesn't matter)
-1 pepper, chopped. I like green but red works fine too
-2 tsp dried oregano
-1/2 tsp or more of garlic powder (again, can use fresh cloves)
-tiny bit of chili flakes or chili powder
-1 tbsp mustard (yes really)
Brown the beef, soften up the onions, peppers if you're using them, then dump in all the canned stuff and spices. Simmer gently and stir once in a while for half an hour, an hour, slow cook it for 8 hours, pressure cook it for half an hour, doesn't really matter. Salt and pepper to taste, chop up some parsley and sprinkle after.
Or skip the pasta route and use:
-1 or 2 cans of beans (I usually go a larger can of black beans and a regular can of red kidneys)
-couple of tbsp of chili powder
-2 tsp cumin
-1/2tsp garlic powder
-whatever else you like in a chili
When I make chili I generally add a bit more ground beef and favour red or yellow peppers. Sometimes I'll throw in a can of corn or some chopped fresh corn or frozen kernels near the end.
Either way both variations are something I make frequently, though I modify them depending on my mood, especially the method of cooking. Other than browning the meat and onions there's really no hands-on stuff required, especially if you use a slow-cooker, so it's good for mindless days. It's pretty brainless cooking.
I have made it with all fresh ingredients before and other than being a lot more prep work the end product was nearly indistinguishable due to the long cooking time.
We've all gotta learn somewhere, so don't be afraid to screw up a few dishes.
The Betty Crocker site has a lot of good, easy recipes. It's where I got most of mine when I started. Tastewise, they're usually very "down-home cooking" type of stuff, so there may be more butter than you want.
http://www.bettycrocker.com/
Some of the best investments you can make for cooking are:
-A Crockpot. Seriously, this thing is amaaaaaaazing.
-A very nice large pan with a lid.
-A chicken thermometer.
-A few really good knives.
-A cutting board.
-Various spices: Oregano, Parsley, Basil, Thyme, Garlic powder/salt.
Over time, you'll acquire more and more tools for better cooking. The best thing you can do to get cookware is to get married XD
Subbed. My girlfriend and I usually cook 3-4 times a week, and are always looking for new ideas.
Some tips:
-Pinterest. There are so many people pinning amazing food on Pinterest. It's your friend.
-Don't keep your dried spices around forever. They lose potency much more quickly than you'd think.
-Learn how to make like...three or four things well. Once you do that, cooking other things comes much easier. Master those first few recipes (it'll take a couple of tries).
-A lot of "premium" ingredients actually ARE worth the extra cash. Meat, olive oil, fresh mozzarella, etc. (not everything is though)
-Buy fresh when you can. It's also typically worth it (unless you're buying something out of season).
-When you like a recipe that you find online, print it out. If you make modifications, make notes on the recipe itself. Buy a binder with sleeve protectors and put the recipe in the sleeves. Easy to clean off, you can always find your recipes, etc.
-ALWAYS shop with a list.
Some additional equipment:
-A baking stone (can cook chicken/fries/pizzas and make them crispy without additional oil)
-A large cast iron skillet (amazing for making lots of things fried and crunchy)
And be honest with yourself. Don't buy too much at the store if you know you'll eat dinner out four times during the week. We still have trouble with this one, because random things do come up.
Pops Maellard
Member
Amazing thread, subbed. I love cooking and have treated it as a hobby ever since I started living on my own, but some of my favorite recipes were sourced from stuff like this.
Edit: Should probably pitch in something while I'm here; here's a chocolate cheesecake recipe I've been fiddling with for a while. I found a better NY cheesecake recipe a few weeks ago, but it's not quite as consistent and the results are much worse if not perfectly assembled.
Crust: 1 package of graham crackers (4.8 ounces)
1/4 c. sugar
1-1/2 tbsp melted butter
Crush the graham crackers pretty finely, mix with sugar and butter in a small bowl and then transfer to the pan.
Cheescake: Three 8oz. packages of cream cheese
1/2 c. + 1/8 c. sugar
1 tsp. vanilla
7 oz. of milk chocolate chocolate chips
2 oz. of bittersweet chocolate chips
3 eggs
Blend the cream cheese, sugar and vanilla together, then add the eggs one at at a time.Melt the chocolate, let it cool briefly (unless you want an awesome looking albeit weirdly textured cheesecake) and slowly mix it in. Pour this into the pan and bake it at 325 F/163 C for 50 minutes.
Arguably more desert fare than the rest of what's in this thread so far, but I'm horribly irresponsible so I often find myself eating it for breakfast.
We've all gotta learn somewhere, so don't be afraid to screw up a few dishes.
The Betty Crocker site has a lot of good, easy recipes. It's where I got most of mine when I started. Tastewise, they're usually very "down-home cooking" type of stuff, so there may be more butter than you want.
http://www.bettycrocker.com/
Some of the best investments you can make for cooking are:
-A Crockpot. Seriously, this thing is amaaaaaaazing.
-A very nice large pan with a lid.
-A chicken thermometer.
-A few really good knives.
-A cutting board.
-Various spices: Oregano, Parsley, Basil, Thyme, Garlic powder/salt.
Over time, you'll acquire more and more tools for better cooking. The best thing you can do to get cookware is to get married XD
Haha man a dream to find a Husband that can cook for me. Maybe I could cook with him, I dunno, pfft.
On a serious note, thanks so much, very appreciated! I'm pretty excited to start, I just honestly don't know where. Cooking/preparing food is honestly an art form/medium of its own that can be very exquisite, or quite half-assed.
Amazing thread, subbed. I love cooking and have treated it as a hobby ever since I started living on my own, but some of my favorite recipes were sourced from stuff like this.
Edit: Should probably pitch in something while I'm here; here's a chocolate cheesecake recipe I've been fiddling with for a while. I found a better NY cheesecake recipe a few weeks ago, but it's not quite as consistent and the results are much worse if not perfectly assembled.
Crust: 1 package of graham crackers (4.8 ounces)
1/4 c. sugar
1-1/2 tbsp melted butter
Crush the graham crackers pretty finely, mix with sugar and butter in a small bowl and then transfer to the pan.
Cheescake: Three 8oz. packages of cream cheese
1/2 c. + 1/8 c. sugar
1 tsp. vanilla
7 oz. of milk chocolate chocolate chips
2 oz. of bittersweet chocolate chips
3 eggs
Blend the cream cheese, sugar and vanilla together, then add the eggs one at at a time.Melt the chocolate, let it cool briefly (unless you want an awesome looking albeit weirdly textured cheesecake) and slowly mix it in. Pour this into the pan and bake it at 325 F/163 C for 50 minutes.
Arguably more desert fare than the rest of what's in this thread so far, but I'm horribly irresponsible so I often find myself eating it for breakfast.
If you're having mixed results with your other cheesecake, I strongly recommend cooking to an internal temperature instead of a set time. When making NY cheesecake I cook to a temp of approx 155F and so far it has had the best results. Letting it cook over 160 usually results in cracks, and less than 150 results in possibly undercooked eggs. I also use a water bath but that's just me.
GAF - a quick read digital thermometer is the best way to take the fear out of cooking!
bennywhatever
Member
shall post my amazing spaghetti bolagnase recipe tomorrow
Oh please please do. I love spaghetti bolagnese.
We've all gotta learn somewhere, so don't be afraid to screw up a few dishes.
The Betty Crocker site has a lot of good, easy recipes. It's where I got most of mine when I started. Tastewise, they're usually very "down-home cooking" type of stuff, so there may be more butter than you want.
http://www.bettycrocker.com/
Some of the best investments you can make for cooking are:
-A Crockpot. Seriously, this thing is amaaaaaaazing.
-A very nice large pan with a lid.
-A chicken thermometer.
-A few really good knives.
-A cutting board.
-Various spices: Oregano, Parsley, Basil, Thyme, Garlic powder/salt.
Over time, you'll acquire more and more tools for better cooking. The best thing you can do to get cookware is to get married XD
I get Emailed stuff from them all the time. I got this that looks oh so good.

http://www.bettycrocker.com/recipes...ichn2=Core&niseg2=BC&nicreatID2=BC_08_14_2014
Code:
Ingredients
1 bag (20 oz) refrigerated cooked diced potatoes with onions
1 lb boneless skinless chicken breasts, cut into small pieces
1 pouch (8 oz) Old El Paso chile and roasted garlic Mexican cooking sauce
1 cup cooked real bacon pieces
2 cups shredded Cheddar cheese (8 oz)
2 green onions, finely chopped
1 package Old El Paso zesty sour cream seasoning mix
1 container (16 oz) sour cream (2 cups)
Directions
1 Heat oven to 350°F. Lightly spray 13-inch cast-iron skillet with cooking spray.
2 Spread half of the potatoes on bottom of skillet. In small bowl, toss chicken with 1/2
cup of the cooking sauce; spoon chicken over potatoes. Sprinkle half each of the bacon, green onions and cheese over chicken. Spread remaining potatoes on top; sprinkle with remaining cheese and bacon. Cover skillet tightly with foil.
3 Bake covered 1 hour. Uncover skillet; bake 15 minutes longer.
4 To serve, stir seasoning mix into container of sour cream. Top baked skillet with dollop of sour cream mixture and remaining green onion. Serve immediately with remaining sour cream mixture to top individual portions.bennywhatever
Member
MMMMMMmmmmmmm *dies*
I'd probably never cook it, since I don't normally buy much bacon or potatoes, but that looks damn good. Classic Betty Crocker.
I'd probably never cook it, since I don't normally buy much bacon or potatoes, but that looks damn good. Classic Betty Crocker.
Easy, Delicious Spicy Pulled Pork Sandvich
Cost: Low
Time: 10 minutes prep, ~4 hours waiting, 15 minutes finishing
Serves: Scalable
Skill Level: 2/5
Flavour traits: Rich, spicy flavour
Nutrition notes: Is good! One sandvich should be consumed as a meal. (I'll calculate the calories properly later)
Ingredients (Serving sizes are per person)
Pork Picnic Roast, ~4 oz
Peppers (pick your poison), ~1 oz
Garlic, 1 clove
Dill, 1 chopped tablespoon
Rosemary, 1 chopped teaspoon
Cayenne/Chili/Paprika (pick your poison), 1-2 teaspoons
Light Margarine, 2 tablespoons
Ginger Ale
Water
1 Bun (pick something nice)
Tools
Crock Pot
Fry pan
Cooking Guide
Dice peppers, garlic, dill, and rosemary separately and set aside, covered.
Place the Pork Picnic Roast into the Crock Pot. If the meat is larger than two fists pressed together, cut it in half and repeat this step as necessary.
Pour a 2:1 mix of Ginger Ale and Water into the Crock until the roast is 2/3rds submerged, and then mix in Cayenne/Chile/Paprika powder until the liquid is a rich orange. Set heat to Low and leave to cook.
Check on the roast in a few hours. This is really dependent on your crock pot, how big it is, how big the roast is, etc. Basically it'll take at least three or four hours, but you'll know you're ready to begin prep when grabbing and pulling lightly on the roast tears it along the grain of the meat in narrow strips. When ready, turn off the crock pot, drain the juices into the sink, and leave to rest while you finish the meal prep!
Place the Light Margarine in a small bowl, and then pour the diced rosemary and dill on top. Now, using the back of a fork's tines, mash the rosemary and dill until the spices achieve an even distribution within the margarine.
In a non-stick pan with a splash of oil, preferably Olive, fry your diced garlic and peppers. Whether you want it crunchy or soft is up to you, just fry 'em until they're the consistency you like. When finished, transfer the peppers and garlic to a bowl to prevent them from cooking further.
Cut the bun(s) in half and set it to toast using your oven, toaster oven, or toaster. I'm not picky. Once toasted to desired crunchiness, remove from cooking apparatus. Now spread your margarine/dill/rosemary mix on the bottom of the bun until an even coating is achieved.
Pull the pork apart, and place the 4 oz on the bottom side of the bun, before topping the pork with the fried peppers and garlic.
Top with fresh-cut onions, lettuce, cilantro, or tomates, per your own prefences.
Slice in half (because you're fancy, and you just made a fancy meal) and enjoy!
Variants, Obvious and the less so
For a less carb-heavy meal, you can make this with a tortilla wrap. It's also pretty good on a pita, though that's not necessarily less carbs. Obviously you can make this healthier by using a pork meat less fatty than a pork picnic roast, though if you want to get fancy the method used for making the pulled pork will also make some chicken that comes apart pretty easily.
If you want to really taste the spice and have a bit of sauce for the meat, drain some of the crock pot into a regular pot and then set to boil while frying up the peppers and garlic, which you then put into the pot with a bit of flour or cornstarch. Follow a gravy recipe for this one, and it requires a roast with some fat on it. Delicious, but the opposite of healthy.
zorlaczerohero
Banned
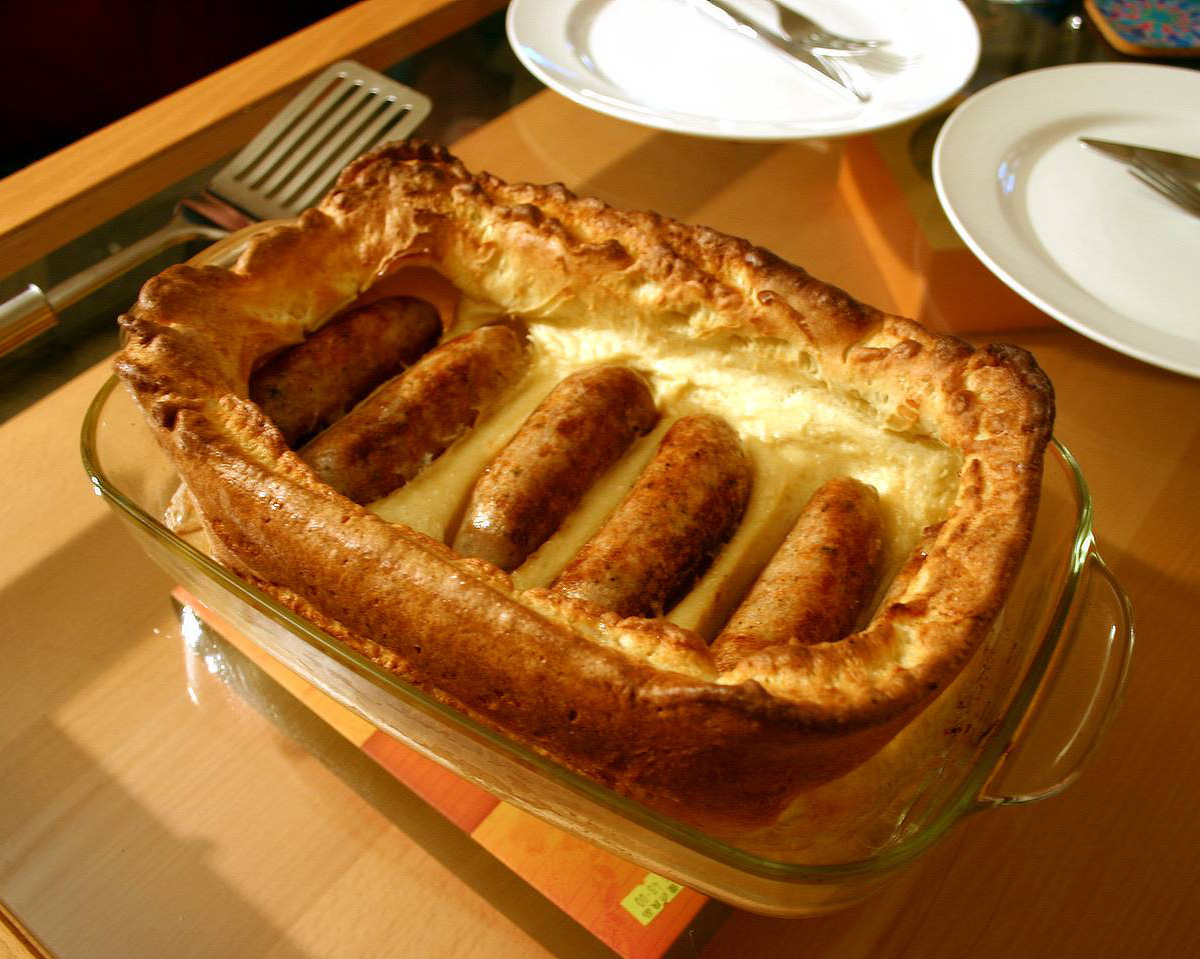
At a request here I'm posting a recipe for Toad in the Hole.
Cost: Cheap
Time: 1 hr 30 mins includes standing time
Serves: 4
Skill Level: Easy but Yorkshire pudding is a bugger to get right
Flavour traits: Porky Yorkshire goodness
Nutrition notes: Fat and protein
Ingredients
8 of your favourite sausages
3 fresh eggs
6 Tablespoons of flour
390mls of milk
2 tablespoons of good vegetable oil
Serve with buttered Mash and onion gravy
Cooking Guide
To start with get your favourite Sausage, add some vegetable oil to a large deep dish, I often use a Lasagne dish, pop the sausages in it and put in an 180c oven for about 30 minutes until just browning, turn a couple of times through cooking, then spread the sausages out evenly
and bang the oven up to 220c leaving the dish and sausages in.
To make the Yorkshire pudding takes experimentation, I've never used the same recipe in two different houses. Don't ask me why, it depends on how good your oven is, how warm the room is, how fresh the eggs are etc.
A basic recipe to start with is 1 fresh egg to 2 heaped tablespoons of Plain flour, then milk until double cream consistency. For a big dish I'll use maybe 3 eggs and 6 tablespoons of flour and 390 mls of full fat milk for instance.
Start by beating your eggs until smooth, then add to the flour in a large bowl, mix together and add full fat milk whilst mixing, add milk until it's the consistency of double cream (for 3 eggs about 390mls), then give it a good mix until no lumps remain. Leave this to sit for an hour or so.
Back to the Sausage, when the oven hits 220c take the Yorkshire pudding mix and as quickly as possible pour it into the dish around the sausages, the oil should be hot enough to sizzle when you put the mix in. Then close the door asap as you don't want to lose heat and let it cook for about 30 mins. It's done when risen and a lovely golden brown colour. Serve with Buttered Mash and Onion Gravy.
Cost: Cheap
Time: 1 hr 30 mins includes standing time
Serves: 4
Skill Level: Easy but Yorkshire pudding is a bugger to get right
Flavour traits: Porky Yorkshire goodness
Nutrition notes: Fat and protein
Ingredients
8 of your favourite sausages
3 fresh eggs
6 Tablespoons of flour
390mls of milk
2 tablespoons of good vegetable oil
Serve with buttered Mash and onion gravy
Cooking Guide
To start with get your favourite Sausage, add some vegetable oil to a large deep dish, I often use a Lasagne dish, pop the sausages in it and put in an 180c oven for about 30 minutes until just browning, turn a couple of times through cooking, then spread the sausages out evenly
Optional you can add Black Pudding cut into inch size pieces to the dish if you wish
To make the Yorkshire pudding takes experimentation, I've never used the same recipe in two different houses. Don't ask me why, it depends on how good your oven is, how warm the room is, how fresh the eggs are etc.
A basic recipe to start with is 1 fresh egg to 2 heaped tablespoons of Plain flour, then milk until double cream consistency. For a big dish I'll use maybe 3 eggs and 6 tablespoons of flour and 390 mls of full fat milk for instance.
Start by beating your eggs until smooth, then add to the flour in a large bowl, mix together and add full fat milk whilst mixing, add milk until it's the consistency of double cream (for 3 eggs about 390mls), then give it a good mix until no lumps remain. Leave this to sit for an hour or so.
Back to the Sausage, when the oven hits 220c take the Yorkshire pudding mix and as quickly as possible pour it into the dish around the sausages, the oil should be hot enough to sizzle when you put the mix in. Then close the door asap as you don't want to lose heat and let it cook for about 30 mins. It's done when risen and a lovely golden brown colour. Serve with Buttered Mash and Onion Gravy.
Thanks for this.I'm posting a recipe for Toad in the Hole.
Here's my protein post.
Full size picture. You need every pixel available to see how beautiful this looks.

Delicious Eye of Round
Cost: ~$4 a pound
Time:~3 hours
Serves: 6 people or Ron Swanson
Skill Level:Easiest recipe I know. Eggs are harder
Flavour traits:Beef
Nutrition notes
 rotein and more protein. Round is arguably the best cut of beef from a protein to fat/calories standpoint.
 Ingredients:
1 Eye of round roast
Salt and pepper to taste
Tools:
A pan big enough to hold you meat that can withstand 500 degrees
Tongs (Not absolutely necessary but incredibly useful if you don't like washing your hands every 5 seconds from touching raw meat.)
Foil (Optional as well but good for keeping warm while it rests.)
Cooking Guide
STEP 1: Pre heat oven to 500*F
STEP 2: Wash you meat for God's sake! Cold water rinse for just a bit.
STEP 3: Dry your meat off.
STEP 4: Cover all sides with salt and pepper. Fresh ground pepper is always preferable
Optional step: If you are a garlic lover slice garlic into sharp slices. Stab your meat and in the hole stuff a slice of garlic.
STEP 5: Put in roasting dish and let your meat sit for half an hour to rise to room temperature
STEP 6: Insert your meat into the oven and immediately change the temperature to 475*
STEP 7: Cook for 7 minutes per pound
STEP 8: Turn oven off without opening the oven. Leave it closed the entire time. Fight the urge!
(IMPORTANT NOTE): If you have a gas oven it won't retain heat as well so set the oven to the lowest setting, ideally around 175*
STEP 9:Let sit in the oven for 2-2.5 hours.
STEP 10: Take your meat out of oven.
Step 11: If you want to play it safe stick a calibrated thermometer in the roast. You want at least 130*
STEP 12: Cover loosely with foil and let your meat rest for 10 minutes.
Step 13: Slice thinly
STEP 14 Enjoy
Notes:
This is not my recipe. I want to spread the gospel.
If you like meals hot out of the oven/lower on time after about an hour/hour and a half you can turn it up to 300* for the final little bit so it comes out hotter and a little quicker. I wouldn't recommend this for beginners though and definitely recommend temping. This is what I did.
You can add any spices and rubs you want.
Do not cook this past medium. If you like your meat medium well and up use a different cut.
This is an inexpensive cut and cooked this way you really can't tell. Great nice meal on a budget.
Happy Bulking!
zorlaczerohero
Banned
Delicious Eye of Round
Nice! Reminds me of how this guy cooks his fillet steaks, makes some of the best steak I've ever tasted and I always do fillet this way now.
Just writing up my slow roasted Morrocan Lamb recipe, will be back in a while!
bennywhatever
Member
I never ever thought to cook Pork in a Gingler Ale mixture - that sounds freaking GENIUS.Easy, Delicious Spicy Pulled Pork Sandvich
DJ_Lae
Member
I never ever thought to cook Pork in a Gingler Ale mixture - that sounds freaking GENIUS.
I've never tried ginger ale but I have used root beer before and it was great - basically just adding sugar and acid and it works so well.
I think you can use Coke or other pop too - Dr. Pepper pulled pork might be interesting.
I made it with a slight variation.I'm posting a recipe for Toad in the Hole.
I made some ghee today. I took pictures of every step if anyone is interested in me posting.
End result of Ghee:

Toad in the hole in a freshly seasoned Cast Iron Skillet using Ghee instead of vegetable oil:

A slice with onion gravy:

Thanks for posting. It turned out delicious.
Question - what's the basics you need to outfit a kitchen? Just moved into an apartment and basically need to refresh entirely. Got:
Stove (2x heating things + tiny mini oven)
Microwave
Electric kettle
1x pot
1x wok/pan
3x metal bowls
1 plastic colander
Tongs
Plastic spatulas
Good assortment of decently maintained knives
2x cutting boards
And misc assorted Tupperware, cutlery, bowls etc.
Was thinking of getting a toaster oven and a crock pot. Bear in mind I moved to Japan and can barely speak the language and have no car, so getting stuff is even trickier lol
Slow cooker would be good, and offers more utility than a toaster oven, especially if you have a full oven and lack a dutch oven/stockpot.
I'd add a bunch of tea towels, a whisk, sheet pan, kitchen scale and measuring cups, cast iron pan, and wooden spoons. If you're looking for longevity I'd look to replace the plastic stuff, the tupperware, spatulas, and colander, with glass, wood, and metal.
I'd add a bunch of tea towels, a whisk, sheet pan, kitchen scale and measuring cups, cast iron pan, and wooden spoons. If you're looking for longevity I'd look to replace the plastic stuff, the tupperware, spatulas, and colander, with glass, wood, and metal.
My rule is usually only buying tools that I need when I need them. I guess if you want a more substantial answer it would be first asking you what you plan on cooking? You said you live in an apartment in Japan. Forgive me if I am way off but I am going to assume that space is an issue. Rice cooker, crock pot, cast iron skillet, a good pairing knife and a good chef's knife or Japanese equivalent are all great mulch-purpose kitchen tools. You can get by with only a few knives and would be far better off getting fewer, higher quality ones than a set for the same price with more inferior knives.Question - what's the basics you need to outfit a kitchen? Just moved into an apartment and basically need to refresh entirely. Got:
Stove (2x heating things + tiny mini oven)
Microwave
Electric kettle
1x pot
1x wok/pan
3x metal bowls
1 plastic colander
Tongs
Plastic spatulas
Good assortment of decently maintained knives
2x cutting boards
And misc assorted Tupperware, cutlery, bowls etc.
Was thinking of getting a toaster oven and a crock pot. Bear in mind I moved to Japan and can barely speak the language and have no car, so getting stuff is even trickier lol
Don't let the name rice cooker fool you, you can make far more than rice in a nice one including, soups, cakes, and steamed veggies. Also try to think of what style of cooking you'd like. If you like to set and forget a slow cooker would be great. Set it before work and have dinner waiting for you when you get home.
Nostremitus
Member
At a request here I'm posting a recipe for Toad in the Hole.
Cost: Cheap
Time: 1 hr 30 mins includes standing time
Serves: 4
Skill Level: Easy but Yorkshire pudding is a bugger to get right
Flavour traits: Porky Yorkshire goodness
Nutrition notes: Fat and protein
Ingredients
8 of your favourite sausages
3 fresh eggs
6 Tablespoons of flour
390mls of milk
2 tablespoons of good vegetable oil
Serve with buttered Mash and onion gravy
Cooking Guide
To start with get your favourite Sausage, add some vegetable oil to a large deep dish, I often use a Lasagne dish, pop the sausages in it and put in an 180c oven for about 30 minutes until just browning, turn a couple of times through cooking, then spread the sausages out evenlyand bang the oven up to 220c leaving the dish and sausages in.Optional you can add Black Pudding cut into inch size pieces to the dish if you wish
To make the Yorkshire pudding takes experimentation, I've never used the same recipe in two different houses. Don't ask me why, it depends on how good your oven is, how warm the room is, how fresh the eggs are etc.
A basic recipe to start with is 1 fresh egg to 2 heaped tablespoons of Plain flour, then milk until double cream consistency. For a big dish I'll use maybe 3 eggs and 6 tablespoons of flour and 390 mls of full fat milk for instance.
Start by beating your eggs until smooth, then add to the flour in a large bowl, mix together and add full fat milk whilst mixing, add milk until it's the consistency of double cream (for 3 eggs about 390mls), then give it a good mix until no lumps remain. Leave this to sit for an hour or so.
Back to the Sausage, when the oven hits 220c take the Yorkshire pudding mix and as quickly as possible pour it into the dish around the sausages, the oil should be hot enough to sizzle when you put the mix in. Then close the door asap as you don't want to lose heat and let it cook for about 30 mins. It's done when risen and a lovely golden brown colour. Serve with Buttered Mash and Onion Gravy.
Thank you!!!
zorlaczerohero
Banned
Slow roasted Moroccan lamb
Cost:$20-$30 depends on location
Time:20 mins prep 4-5 hours cooking
Serves:4-8 depending on use
Skill Level: low
Flavour traits: North African
Nutrition notes: Erm.... protein and fat
Ingredients
1 leg of Lamb with bone
2 tablespoons of Ras al Hanout or other Morrocan seasoning
150 grams Butter left out to soften
3 cloves of garlic finely chopped
pinch of Salt
good grind of black Pepper
200 mls water
Cooking Guide
Turn the oven on to as high as it will go, usually around 240c. Take the Leg of Lamb and score it all over through the fat just into the meat at about inch and a half intervals, take the butter, the garlic, the salt and pepper and the Ras al Hanout and mix together, then spread it all over the lamb really pushing it into the score marks, make sure it is completely covered, if you run out just mix up a bit more, you really can't overdo this so feel free to go wild.
Place the lamb in a large roasting tin then put in the hot oven, at this point you want the oven to really brown the outside, forming a crust of butter, spice and garlic. Cook at this temp for around 25-30 mins until it's very well browned then turn the oven down to 150c and add around 200 mls of water to the roasting tin. If it's looking ready to burn then leave the oven door open to lower the temp quicker.
Cook for around 4 hours, add more water as needed (keep about half an inch in the bottom of the roasting tray) and baste every 40 minutes or so.
What you'll get is a lovely spice crusty outside with tender, succulent, fall apart lamb inside.
I serve with a yoghurt and mint dip, flatbreads and maybe a veg tagine if I can be bothered.
I started doing this recipe with around 5 different spices, grinding them up etc, then in a rush one day I used Ras al Hanout and found I preferred it and it's a lot quicker! I'll occasionally add dried chilli for a kick if I know it's just for adults.
This is a really easy recipe, yet it's the one that everyone who's tried it asks for the recipe. The important bit is hitting it really hot at the start to form that crust and lock all the juices and flavours in. Many people suggest covering with foil, but I find it starts to steam and loses the crusty outside. If it's browning too much after lowering the oven just turn it down some more.
subbed
I love cooking-GAF threads. There's already a lot of good stuff I am going to try in here.
A request: Does anyone have a good (and fairly easy) Sesame Chicken recipe they wanna share? I know there are lots online in various places. I tried one once and it was not good. So I want to try one that someone has made and like before I waste the time to try another random one.
Go_Ly_Dow
Member
subbed
I love cooking-GAF threads. There's already a lot of good stuff I am going to try in here.
A request: Does anyone have a good (and fairly easy) Sesame Chicken recipe they wanna share? I know there are lots online in various places. I tried one once and it was not good. So I want to try one that someone has made and like before I waste the time to try another random one.
i know a really easy and simple sesame marinade if that helps
2 teaspoons of sugar
1-2 teaspoon sesame oil
light soy sauce - enough to mix with ingredients above and coat the chicken.
Coat the chicken with marinade and leave for at least an hour in fridge.
Light flavour so if you want more maybe add stuff like chili/garlic to it!
Thank you. Yes, that's is pretty much what I am looking for...a simple sesame chicken sauce or marinade recipe that I can build on to suit my tastes. What I tried before was very complex and skewed far away from my tastes to a point that I didn't know how to fix it.
(and I will of course be adding the garlic
- Status
- Not open for further replies.