WALL OF TEXT INCOMING. If anyone would rather I not include all this stuff in an actual post, please let me know, and I will remove it and try to find a web hosting option to link to intead.
So, in the last 10 years or so, I have had many game ideas in various forms, but hardly anything was actually FINISHED. I suppose I semi-finished one or two simple Windows puzzle games 5-10 years ago, in the sense that you might have been able to actually launch them, start a new game, play, win, and quit. You might have even been able to load/store the puzzle state, or load/store premade puzzles, but I forget.
At any rate, since I have been learning tiny bits and pieces with the UDK in my spare time, and the chances of me actually finishing anything are miniscule, I decided I would try to force myself to make something. Now, I acknowledge this will be incredibly simple. It will not be a game anyone in their right mind would WANT to play. It will only receive a 7/10 IGN rating. It will, in short, be a horrible failure. However, it will in theory be a complete installable game that will force me to quickly go through the process of making the whole thing.
I am going to lay out a rough "schedule" here, and post to update when I reach certain milestones. Since this is in my spare time I am not going to limit myself to a certain number of hours or days to finish. Instead, I am going to list the steps that I think I need to do, and give a certain amount of time to complete that step. Ideally, the total development time will be within the "budget" I lay out. I have made some step budgets very long, and I hope to finish early, but I wanted to allocate time for unforeseen problems.
STEP 1: SCHEDULE/DESIGN/PLANNING: 2 hours
==================================================
Since I already thought of this project and came up with a very simple game idea, this step primarily consists of writing down my thoughts. I am including the time it takes to write up this post. The design is below, though the final product may not fully match the design if I have too much trouble with any particular facet, or if I come up with a better idea and implementation within the development time constraints.
The game will be installed via the normal installer created by the Unreal Frontend tool. After installation, when the game is launched, it will present the user with a menu screen. Time permitting, there could be a decorative background image. There will be a button to start a new game, and a button to close the game and exit to Windows. All settings (graphical, control, etc.) will be preset in INI files. Users familiar with Unreal Engine 3 games will be able to edit the INI file to customize the settings if they want, since creating a settings/options screen would be too much work for this initial quick project.
If the new game button is pressed, a game level will load. There is only one level in the game, and it consists of a single room. Details about windows, decorations, lighting, and so forth will be postponed until the POLISH LEVEL step. The key design requirements of the room and player viewpoint are as follows.
The room will have enough space to lay out an 8x8 grid on the "floor" of some reasonable size (128x128 pixel squares are probably reasonable). The grid can either be invisible, or made visible to the player via coloring or a pattern, such as chessboard colors. If time permits, certain spots on the grid could have raised pillars, so that the "floor" of that grid square is actually on top of a pillar.
The game will use the default UDK first-person view, HUD, character, and controls in order to save time. If feasible, the default gun could be removed and some/all player sounds disabled (jumping/landing/falling grunts) since they can be rather obnoxious.
When the level is loaded, a fixed number of "targets" will be automatically placed in the level. Ideally, there will be 8 targets on random grid squares. If doing this is not feasible within time constraints, 4 targets can be used, and the positions can be preset instead of random. Visual design of the targets is postponed to later steps, but all targets need to be easily visible. The room needs to be lit brightly enough that the player can easily see all targets and plan a route to move through the room. Movement through the room will use default UDK FPS controls (WASD, mouse, and spacebar).
Gameplay will consist of the player spawning into the room within a starting region (square, circle, shape, or similar) that is visible on the floor. The player can take as much time as desired to look around at the room and targets before leaving the starting region. Once the player leaves the starting region, a timer will start counting up. If time permits, this timer can be displayed on the screen, but this is not required. The player's goal is to touch (move into) all targets in the level, as quickly as possible, which will cause each in turn to vanish or change in some obvious visual fashion. Once all targets have been touched, the game is over and the timer will stop. The elapsed time will be displayed to the user, and two buttons will be displayed. One button will restart the game, and one will quit to the main menu. Decisions about whether restarting the game generates targets in new random positions are postponed until the POLISH UI step. If development time constraints require it, the buttons can be replaced by a single button that will exit to Windows.
Additional note: When the player is ingame (or even in menus, whatever is easy to do), the ESCAPE key will cause the game to instantly exit to Windows, or, if time permits, will cause the game to pause and a menu to be displayed with "restart game" and "quit to main menu" buttons.
STEP 2: CREATE ROUGH LEVEL: 2 hours
=================================================
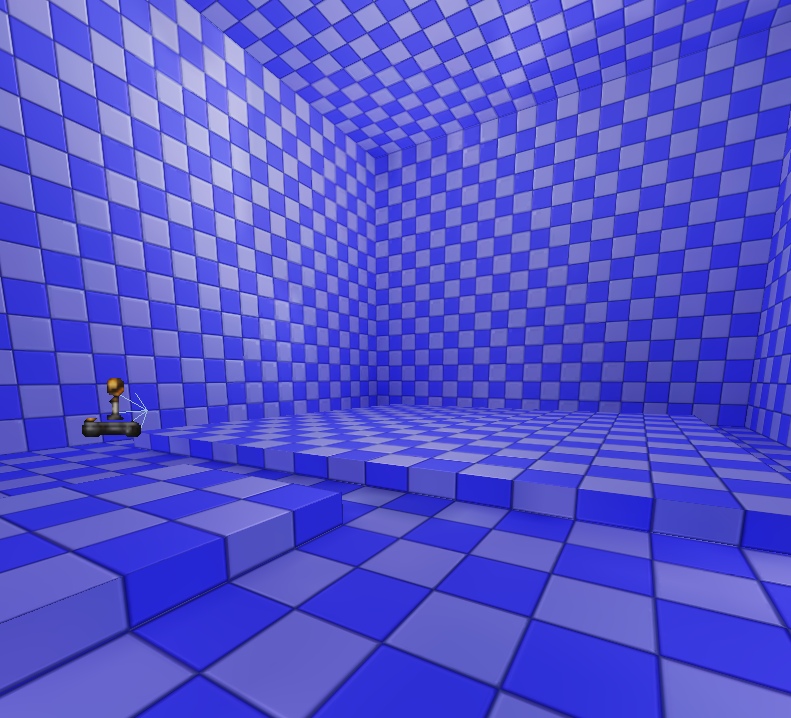
In this step, an unmodified UDK installation will be used to create a map consisting of a room, simple lighting inside the room, and a player spawn point. The room will consist of a large, hollow BSP block. The player's start region will consist of a raised, solid BSP block. The 8x8 grid will consist of a raised, solid BSP block. No texturing or further visual design will be done at this point.
STEP 3: UDK GAME SETUP: 3 hours
=================================================
In this step, the default UDK files will be customized for a new game, "bliz_tg1". This will probably involve a little UnrealScript setup. I have done this sort of thing previously, and I may reuse some previous code or INI file changes in order to save time.
STEP 4: INITIAL UI SETUP: 5 hours
=================================================
In this step, the main menu will be created with its two buttons (ideally using Flash/Scaleform, or something else if needed). Both buttons should work. The new game button should cause the map created in the UDK GAME SETUP step to be loaded, and the main menu to be hidden. The escape button should be implemented to immediately exit to Windows. At this point, no gameplay or additional UI features will be created. I have allocated a huge amount of time for this step because I am afraid of running into something I have not done before, and/or unexpected problems that cause big delays in getting the initial menu and level loading setup working.
STEP 5: INITIAL GAMEPLAY: 4 hours
=================================================
In this step, 4 targets will be placed in preset locations. They will consist of existing UDK static meshes, with properties configured to not block the player's movement. The timer will be implemented. When this step is completed, the player should be able to leave the starting region, move through all meshes, and see the final elapsed time printed to the screen and/or console.
STEP 6: ENHANCE GAMEPLAY: 4 hours
=================================================
In this step, 4 targets will be placed in random locations, using Kismet if possible for scripting. If this goes well, then the number will be increased to 8 targets. If everything goes VERY well, then I may look into randomly placing some targets higher than others on raised pillars. The pillars themselves would probably not be random, however, but just fixed into the grid "shape".
STEP 7: POLISH UI: 5 hours
=================================================
In this step, a winning message and/or graphic and/or animation will be displayed along with final elapsed time once the player finishes the level. The "restart level" and "quit to main menu" buttons will be displayed on the same screen. Their functions will be implemented in this step. Note that this implementation may include some gameplay modification depending on how I want to implement restarting the level. When this step is completed, the game should be playable from start to finish, starting from the main menu.
STEP 8: CREATE AND TEXTURE MODELS: 4 hours
===================================================
In this step, custom models and textures will be created for the following game assets:
* Grid area (chessboard)
* Starting area (raised platform)
* Targets (hovering objects, potentially spinning)
* Floor, wall, and roof BSP textures
STEP 9: POLISH LEVEL: 6 hours
===================================================
The newly created custom assets will be used to replace existing assets in the rough level. Assets will be adjusted as needed, and additional asset/BSP creation/work may be done if desired to make the level look reasonably nice. Any remaining gameplay changes should also be performed in this step. If baked lighting is used, it will be baked using production settings at the end of this step.
STEP 10: PACKAGE/TEST GAME: 5 hours
===================================================
The Unreal Frontend tool will be used to cook and package everything, and an installer will be created. If possible, the installer will be tested on a computer other than the development machine.
Progress so far:
================
Step 1 has been completed on schedule, taking about 2 hours. However, note that I originally predicted 1 hour for the design phase, but took longer than expected to write up the design. Thus, I adjusted my design schedule to 2 hours. =P I will not adjust the budgeted step times for the rest of the project.
I plan to post a status update after completing each of the following steps: 3, 7, 9, 10
Total development time in budget: 40 hours
Approximate total development time used so far: 2 hours
Steps completed: 1


")