ThatObviousUser
ὠαἴÏÏιÏÏÎ¿Ï Ïαá¿Ï εἶ

What is Android?
Developed by the Open Handset Alliance, Android brings Internet-style innovation and openness to mobile phones.
Android™ delivers a complete set of software for mobile devices: an operating system, middleware and key mobile applications. The Android Software Development Kit (SDK) is now available.
Open
Android was built from the ground-up to enable developers to create compelling mobile applications that take full advantage of all a handset has to offer. It was built to be truly open. For example, an application can call upon any of the phone's core functionality such as making calls, sending text messages, or using the camera, allowing developers to create richer and more cohesive experiences for users. Android is built on the open Linux Kernel. Furthermore, it utilizes a custom virtual machine that was designed to optimize memory and hardware resources in a mobile environment. Android is open source; it can be liberally extended to incorporate new cutting edge technologies as they emerge. The platform will continue to evolve as the developer community works together to build innovative mobile applications.
All applications are created equal
Android does not differentiate between the phone's core applications and third-party applications. They can all be built to have equal access to a phone's capabilities providing users with a broad spectrum of applications and services. With devices built on the Android Platform, users are able to fully tailor the phone to their interests. They can swap out the phone's homescreen, the style of the dialer, or any of the applications. They can even instruct their phones to use their favorite photo viewing application to handle the viewing of all photos.
Breaking down application boundaries
Android breaks down the barriers to building new and innovative applications. For example, a developer can combine information from the web with data on an individual's mobile phone -- such as the user's contacts, calendar, or geographic location -- to provide a more relevant user experience. With Android, a developer can build an application that enables users to view the location of their friends and be alerted when they are in the vicinity giving them a chance to connect.
Fast & easy application development
Android provides access to a wide range of useful libraries and tools that can be used to build rich applications. For example, Android enables developers to obtain the location of the device, and allows devices to communicate with one another enabling rich peer-to-peer social applications. In addition, Android includes a full set of tools that have been built from the ground up alongside the platform providing developers with high productivity and deep insight into their applications.
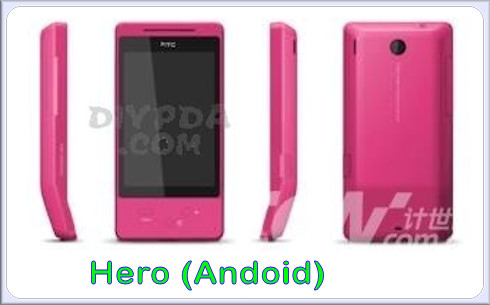
What is This Thread?
This thread is a place to come together and discuss development for one of the most incredible mobile platforms of all time. Since Android development is 100% open (and has been from the start), the entire SDK and documentation have been laid bare, allowing developers everywhere looking to get into mobile application creation their chance at the spotlight.
However, even with this great documentation open and available, some developers inevitably hit snags- that's where this thread comes in. Since NeoGAF is a very large website, I figured there would be at least a couple other Android developers here, and like myself I also figured they would be having some trouble putting their apps together. The Amateur Dev Chronicles thread over on the gaming side has been hugely beneficial, but mostly to XNA programmers. Since Android apps are not limited to just games, I have placed this thread here, on the off topic side, even though I myself will be focusing on utilizing Android to power my games.
The possibilities are truly endless with Android: embed a browser, embed Google Maps, use GPS, make your app's service available to other apps, make a homescreen widget, make a homescreen replacement- all for free! With multiple Android devices hitting this year (I personally believe the total number for Android handsets in the US will be around six or seven by the time the year is done), us Android developers must finally unite and aid one another in furthering one of the most extensible operating system of all time.
Get Started
- Download Eclipse 3.4 (Ganymede).
- Download the Android Development Tools (ADT) plugin
- Start Eclipse, then select Help > Software Updates....
- In the dialog that appears, click the Available Software tab.
- Click Add Site...
- Enter the Location: https://dl-ssl.google.com/android/eclipse/ (Change https to http if it doesn't work.) Click OK.
- Back in the Available Software view, you should see the plugin listed by the URL, with "Developer Tools" nested within it. Select the checkbox next to Developer Tools and click Install...
- On the subsequent Install window, "Android DDMS" and "Android Development Tools" should both be checked. Click Next.
- Read and accept the license agreement, then click Finish.
- Restart Eclipse.
- Download the latest Android SDK and unzip it
- Select Window > Preferences... to open the Preferences panel (Mac: Eclipse > Preferences).
- Select Android from the left panel.
- For the SDK Location in the main panel, click Browse... and locate your downloaded SDK directory.
- Click Apply, then OK.
- Create an AVD
To learn more about how to use AVDs and the options available to you, refer to the Android Virtual Devices document. Before you can launch the emulator, you must create an Android Virtual Device (AVD). An AVD defines the system image and device settings used by the emulator. To create an AVD, use the "android" tool provided in the Android SDK. Open a command prompt or terminal, navigate to the tools/ directory in the SDK package and execute:
The tool now asks if you would like to create a custom hardware profile. For the time being, press Return to skip it ("no" is the default response). That's it. This configures an AVD named "my_avd" that uses the Android 1.5 platform. The AVD is now ready for use in the emulator.Code:android create avd --target 2 --name my_avd
In the above command, the --target option is required and specifies the deployment target to run on the emulator. The --name option is also required and defines the name for the new AVD. - To do the above in Windows, go to Start > Run... (you can make this appear in Vista by right-clicking anywhere on the start menu, clicking Properties, then Customize, then checking "Run Command"). Enter CMD and hit Enter. Then enter the following:
Then hit enter. This puts the current location of the terminal at the tools directory, and you can carry out the above step. Also, note that you cannot Ctrl+V in the terminal, you have to right-click and then click Paste.Code:cd "C:\[b]<ENTER SDK PATH HERE>[/b]\tools" - If you get a "Cannot find AVD" error when trying to compile, you need to add an environment variable to your computer. This is a safe process, but to get a feel for your situation, post here first and I or another thread member will help you out.
Hello, World
Open Eclipse, click the New Android Project Wizard (should be the fourth icon by default), or File > New > Project... > Android > Android Project. Then go through the steps to create an Android application. To get the following code to run correctly, Package name has to be com.android.helloandroid and Create Activity has to be HelloAndroid.

This is the complete code for a Hello World app. The first five lines declare the application and the libraries it uses, and the method onCreate is called when the app is created. The rest any novice Java programmer should be able to figure out. ")
Code:
package com.android.helloandroid;

import android.app.Activity;
import android.os.Bundle;
import android.widget.TextView;

public class HelloAndroid extends Activity {
   /** Called when the activity is first created. */
   @Override
   public void onCreate(Bundle savedInstanceState) {
       super.onCreate(savedInstanceState);
       TextView tv = new TextView(this);
       tv.setText("Hello, Android");
       setContentView(tv);
   }
}Resources
Android Dev Guide
Overview of the Android SDK Tools
Overview of the Android Packages (Classes, Methods, etc.)
Overview of the Android SDK Tools
Overview of the Android Packages (Classes, Methods, etc.)
- Framework Topics
- Publishing
- Best Practices
- Tutorials and Sample Code
- Appendix
- Android Icon Templates Pack (.zip containing .psd's)
- Supported Media Formats
- Intents List: Google Apps
- Glossary
- Frequently Asked Questions
Get Published
- Read the Android Market Developer Distribution Agreement.
- Register as a developer. It requires a one-time $25.00 fee paid via Google Checkout.
- Before you consider your application ready for release:
- Test your application extensively on an actual device
It's important to test your application as extensively as possible, in as many areas as possible. To help you do that, Android provides a variety of testing classes and tools. You can use Instrumentation to run JUnit and other test cases, and you can use testing tools such as the UI/Application Exerciser Monkey.- To ensure that your application will run properly for users, you should make every effort to obtain one or more physical mobile device(s) of the type on which you expect the application to run. You should then test your application on the actual device, under realistic network conditions. Testing your application on a physical device is very important, because it enables you to verify that your user interface elements are sized correctly (especially for touch-screen UI) and that your application's performance and battery efficiency are acceptable.
- If you can not obtain a mobile device of the type you are targeting for your application, you can use emulator options such as -dpi, -device, -scale, -netspeed, -netdelay, -cpu-delay and others to model the emulator's screen, network performance, and other attributes to match the target device to the greatest extent possible. You can then test your application's UI and performance. However, we strongly recommend that you test your application on an actual target device before publishing it.
- If you are targeting the T-Mobile G1 device for your application, make sure that your UI handles screen orientation changes.
- Consider adding an End User License Agreement in your application
To protect your person, organization, and intellectual property, you may want to provide an End User License Agreement (EULA) with your application. - Specify an icon and label in the application's manifest
The icon and label that you specify in an application's manifest are important because they are displayed to users as your application's icon and name. They are displayed on the device's Home screen, as well as in Manage Applications, My Downloads, and elsewhere. Additionally, publishing services may display the icon and label to users.
To specify an icon and label, you define the attributes android:icon and android:label in the <application> element of the manifest.
As regards the design of your icon, you should try to make it match as much as possible the style used by the built-in Android applications. - Turn off logging and debugging and clean up data/files
For release, you should make sure that debug facilities are turned off and that debug and other unnecessary data/files are removed from your application project.- Remove the android:debuggable="true" attribute from the <application> element of the manifest.
- Remove log files, backup files, and other unnecessary files from the application project.
- Check for private or proprietary data and remove it as necessary.
- Deactivate any calls to Log methods in the source code.
- Test your application extensively on an actual device
- Before you do the final compile of your application:
- Version your application
Before you compile your application, you must make sure that you have defined a version number for your application, specifying an appropriate value for both the android:versionCode and android:versionName attributes of the <manifest> element in the application's manifest file. Carefully consider your version numbering plans in the context of your overall application upgrade strategy.
If you have previously released a version of your application, you must make sure to increment the version number of the current application. You must increment both the android:versionCode and android:versionName attributes of the <manifest> element in the application's manifest file, using appropriate values.
For detailed information about how to define version information for your application, see Versioning Your Applications.
- Obtain a suitable cryptographic key
If you have read and followed all of the preparation steps up to this point, your application is compiled and ready for signing. Inside the .apk, the application is properly versioned, and you've cleaned out extra files and private data, as described above.
Before you sign your application, you need to make sure that you have a suitable private key. For complete information about how to obtain (or generate) a private key, see Obtaining a Suitable Private Key.
Once you have obtained (or generated) a suitable private key, you will use it to:- Register for a Maps API Key (see below), if your application uses MapView elements.
- Sign your application for release, later in the preparation process
- Register for a Maps API Key, if your application is using MapView elements
For complete information about getting a Maps API Key, see Obtaining a Maps API Key.
If your application uses one or more Mapview elements, you will need to register your application with the Google Maps service and obtain a Maps API Key, before your MapView(s) will be able to retrieve data from Google Maps. To do so, you supply an MD5 fingerprint of your signer certificate to the Maps service.
During development, you can get a temporary Maps API Key by registering the debug key generated by the SDK tools. However, before publishing your application, you must register for a new Maps API Key that is based on your private key.
If your application uses MapView elements, the important points to understand are:- You must obtain the Maps API Key before you compile your application for release, because you must add the Key to a special attribute in each MapView element — android:apiKey — in your application's layout files. If you are instantiating MapView objects directly from code, you must pass the Maps API Key as a parameter in the constructor.
- The Maps API Key referenced by your application's MapView elements must be registered (in Google Maps) to the certificate used to sign the application. This is particularly important when publishing your application — your MapView elements must reference a Key that is registered to the release certificate that you will use to sign your application.
- If you previously got a temporary Maps API Key by registering the debug certificate generated by the SDK tools, you must remember to obtain a new Maps API Key by registering your release certificate. You must then remember to change the MapView elements to reference the new Key, rather than the Key associated with the debug certificate. If you do not do so, your MapView elements will not have permission to download Maps data.
- If you change the private key that you will use to sign your application, you must remember to obtain a new Maps API Key from the Google Maps service. If you do not get a new Maps API Key and apply it to all MapView elements, any MapView elements referencing the old Key will not have permission to download Maps data.
For more information about signing and your private key, see Signing Your Applications.
- Version your application
- Compile your application:
- When you've prepared your application as described in the previous sections, you can compile your application for release.
- After compiling your application:
- Sign your application
Sign your application using your private key. Signing your application correctly is critically important. Please see Signing Your Applications for complete information. - Test your compiled and signed application
Before you release your compiled application, you should thoroughly test it on the target mobile device (and target network, if possible). In particular, you should make sure that any MapView elements in your UI are receiving maps data properly. If they are not, go back to Register for a Maps API Key and correct the problem. You should also ensure that the application works correctly with any server-side services and data that you are providing or are relying on and that the application handles any authentication requirements correctly.
- Sign your application
- You should now be able to upload your final application version to the Android Market!
- Before you consider your application ready for release:
Links